OneSpan Sign How To: Creating a ASP.NET MVC Web Application
If you are getting into web application development, you will definitely come across the term Model-View-Controller (MVC) many times. The reason for its wide popularity is simple: this framework allows you to separate the concerns. To understand its benefits, it is important to first understand the basic notion of MVC:
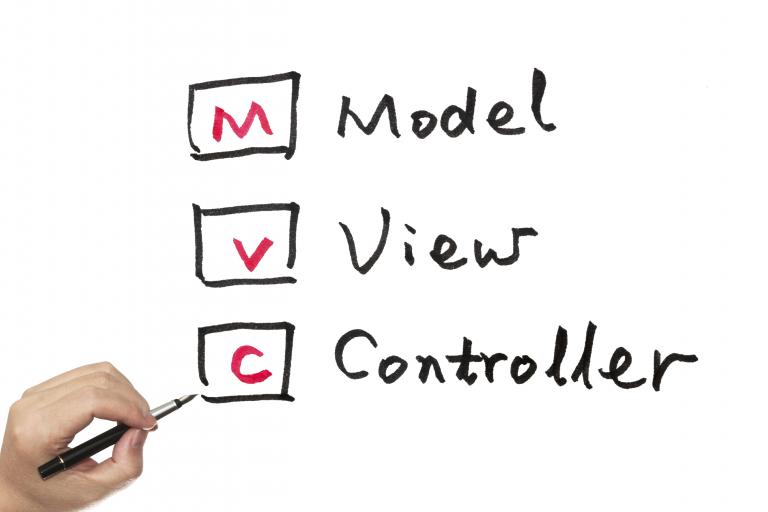
Model: From where you retrieve your data.
View: How you present your data.
Controller: Responsible for processing user input, application flow, etc. Most of the logic will be here.
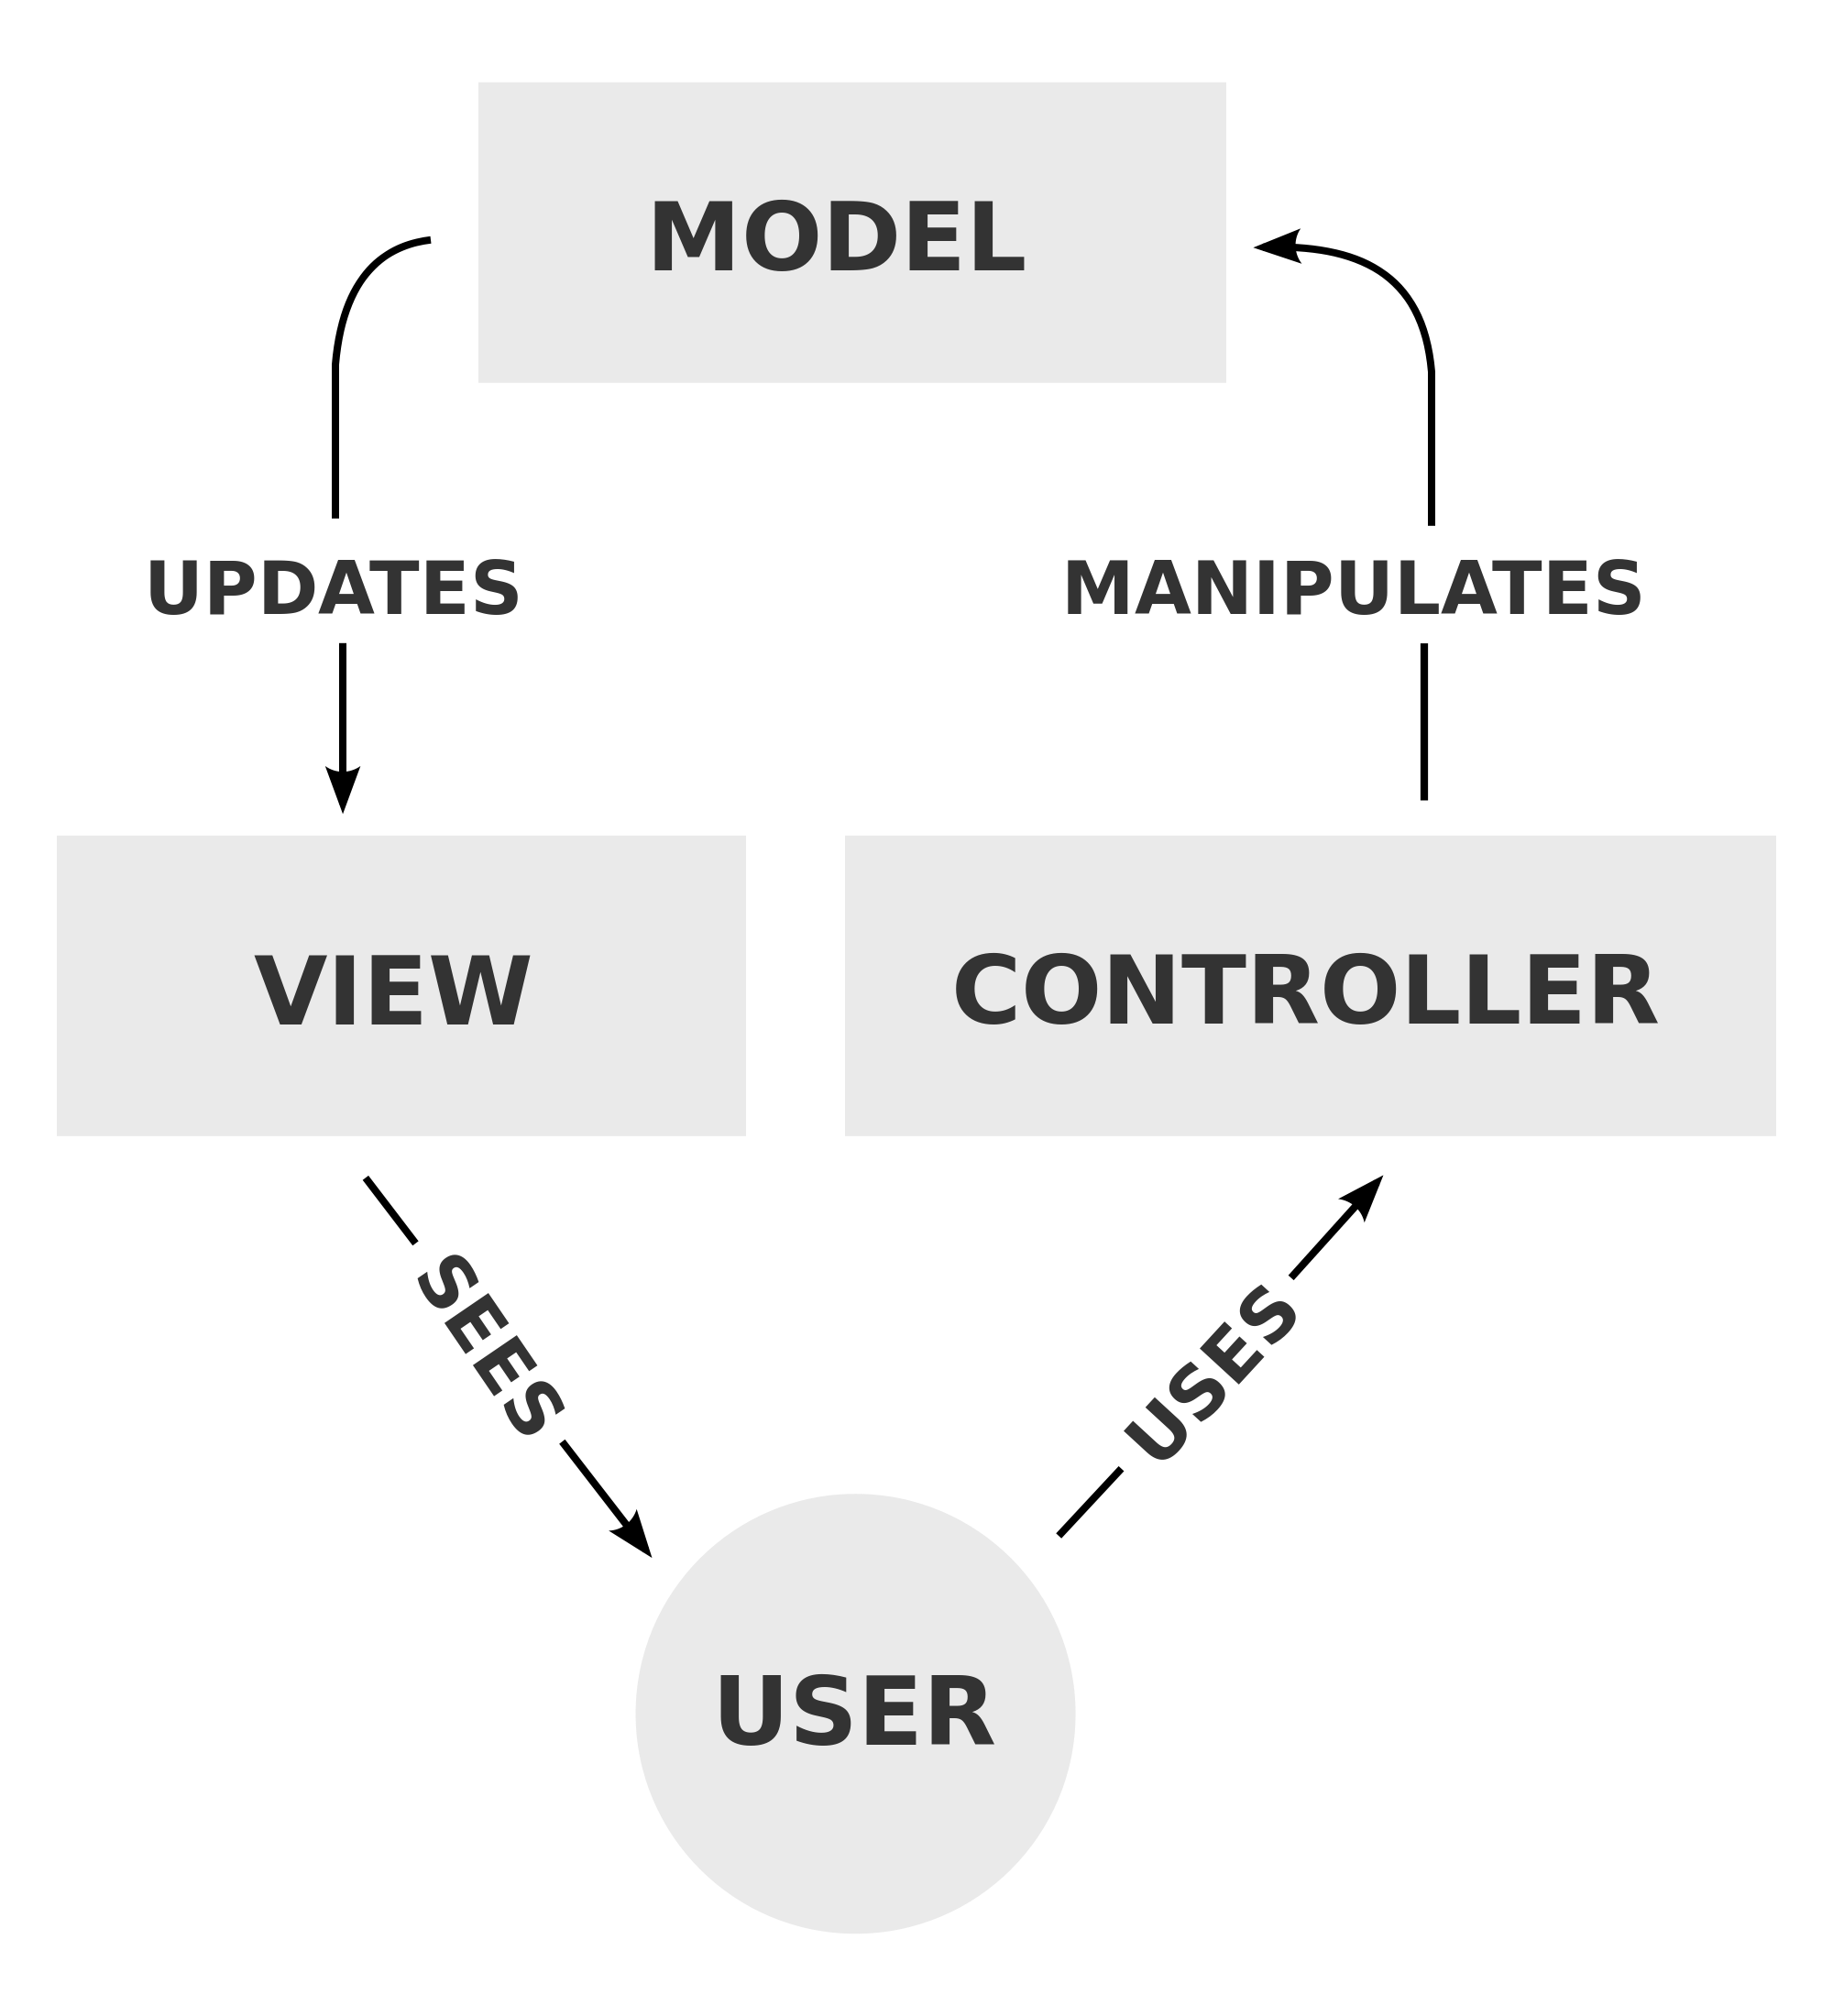
The clear separation of these components makes your codebase highly organized and maintainable. In this blog, I will show you how to create a simple web form that will redirect your user to the OneSpan Sign signing ceremony upon completion of the form using ASP.NET MVC.
Requirements
Before diving into the code, you will need to setup your environment to create a ASP.NET MVC web application. For this guide, you will need the following: OneSpan Sign’s .NET SDK, Microsoft’s Visual Studio, and Internet Information Services (IIS).
Downloading the .NET SDK
The link below will take you to a page where you can download the .NET SDK and also provides a link to some examples of using the .NET SDK on GitHub. Unzip the SDK to the location of your choice.
Downloading Microsoft’s Visual Studio
For this blog, I will be using Microsoft’s Visual Studio Community 2013. If you do not already have it, you can download the community version for free at the link below. You can use any other version but everything covered in this blog will be using Microsoft’s Visual Studio Community 2013 with Update 5. I will also be using C# as the language with the .NET libraries.
Download Microsoft’s Visual Studio Community 2013
Installing Microsoft’s IIS 7.0
Lastly, you will need to install IIS 7.0 or above. You would typically host your web application on your own server. But for the purposes of this blog, I will show you how to do this on your desktop. You can find a step-by-step guide on how to install IIS 7.0 on Windows Vista/7 at the link below.
Installing IIS 7 on Windows Vista/7

OneSpan Developer Community
Join the OneSpan Developer Community! Forums, blogs, documentation, SDK downloads, and more.
Join TodayCreating Your ASP.NET MVC Web Application
Now that you have all the necessary tools, it’s time to start creating your first ASP.NET MVC web application.
Create and Configure Your ASP.NET MVC Web Application
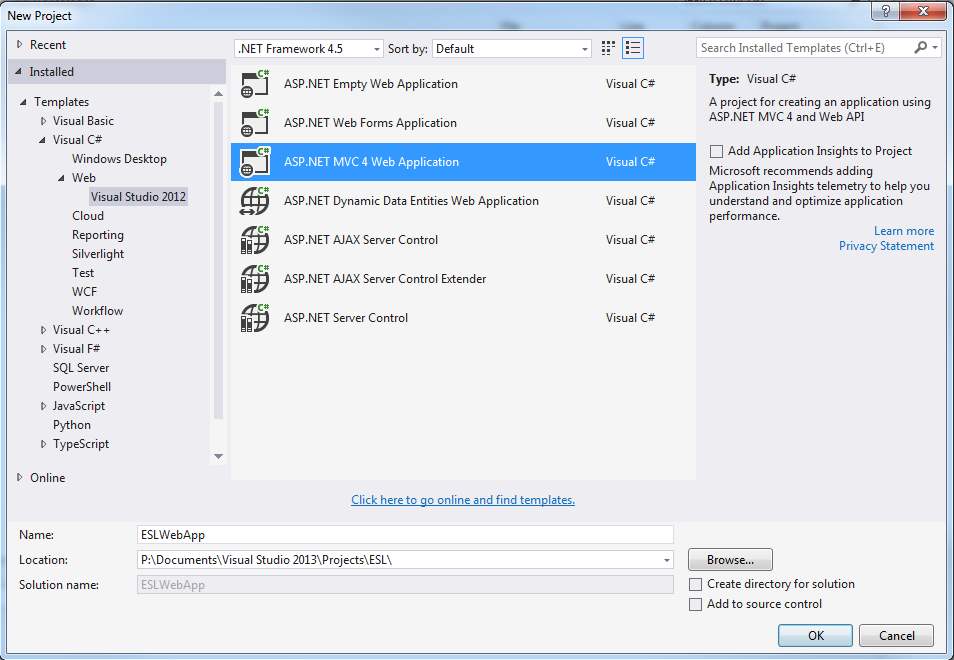
After opening Visual Studio, go to File > New > Project. In the New Project dialog, on the left side, under Templates, select Visual C# > Web > Visual Studio 2012 > ASP.NET MVC 4 Web Application. Give your project a name and specify a location to create your project. I named my project "ESLWebApp". Click on OK.
On the next page, select Empty from templates and Razor as the view engine. Finally, click on OK.
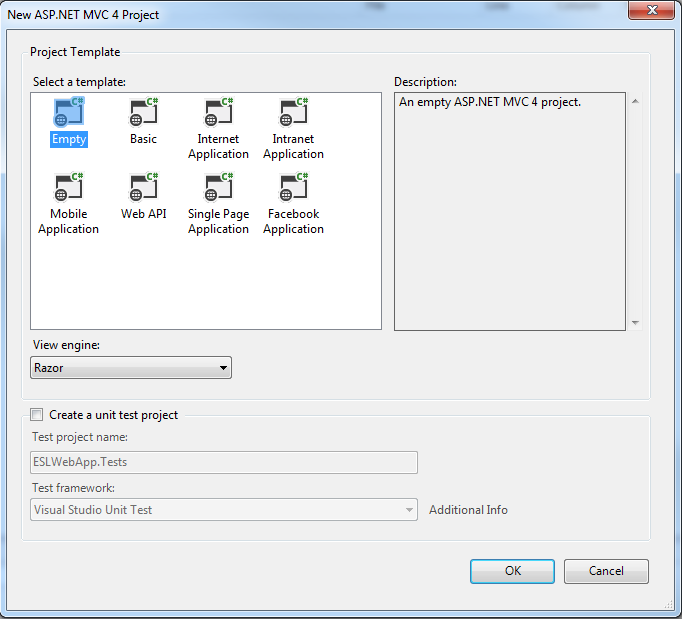
You might be wondering what the view engine is. Simply put, the view engine is responsible for rendering the HTML to the browser. ASP.NET MVC currently supports two view engines: ASPX and Razor. What it boils down to between the two is simple: syntax and preference. Razor’s syntax, as you will see later, is very compact and improves readability of the markup and code.
Building the Model
As previously stated, the model is where you retrieve/store your data. In other words, it maintains the data of the application and typically holds data in public properties. With this in mind, let’s create our first model. In the Solutions Explorer on the right, right-click on the Models folder and select Add > Class. Name your class "FormModel.cs" and click on Add. Now, declare these properties in the FormModel class.
public class FormModel
    {
        public string firstName { get; set; }
        public string lastName { get; set; }
        public string emailAddress { get; set; }
        public string company { get; set; }
        public string address { get; set; }
        public string city { get; set; }
        public string state { get; set; }
        public string zip { get; set; }
        public string country { get; set; }
        public string phone { get; set; }
        public string policyNumber { get; set; }
    }
These properties will be set by the user when filling out the form. Next, let’s create our controller.
Building the Controller
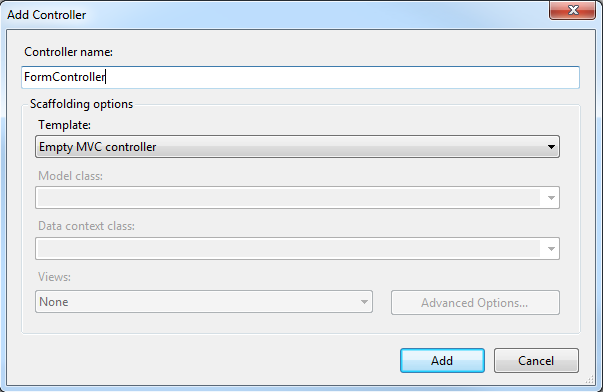
The controller handles any incoming URL request from the user. A controller class contains public methods called Action methods. When a user enters a URL into the browser, the MVC application uses routing rules to parse the URL and to determine the path of the controller. The controller then determines the appropriate action method to handle the request. The controller and its action methods are responsible for handling incoming browser requests and retrieves model data. In ASP.NET MVC, every controller name must end with the word "Controller". In the Solutions Explorer, right-click on the Controllers folder and select Add > Controller. Name your controller "FormController" and click on Add.
In your FormController, you will need to reference the OneSpan Sign SDK. In the Solutions Explorer, right-click on References and select Add Reference. In the Reference Manager window, select Browse on the left hand side, and then select the Browse… button at the bottom, navigate to where you unzipped the .NET SDK, select the OneSpan Sign .dll file, and choose Add.
Go ahead and copy the following in your FormController class. You will need to replace they API_KEY placeholder with your OneSpan Sign api key.
public class FormController : Controller
    {
        private string API_KEY = "YOUR_API_KEY";
        private string BASE_URL = "https://sandbox.e-signlive.com/api";

        [HttpGet]
        public ActionResult Index()
        {
            return View();
        }

        [HttpPost]
        public ActionResult Index(FormModel form)
        {
            // Create a packageId
            PackageId packageId = ESLPackageCreation.createPackage(form, API_KEY, BASE_URL);

            //Get the session token
            SessionToken token = ESLPackageCreation.createSessionToken(packageId, API_KEY, BASE_URL);

	    //Send token from controller to view
            ViewData["token"] = token.Token;

            // Redirect the signer to thank you view.
            return View("ThankYou");
        }

    }
The first action method is where the "Index.cshtml" view associated with FormController is returned to you upon browsing to the location, for example, http://localhost:54206/Form/Index in your internet browser. You can also default the "Form" controller and the "Index" action method when you run your application. Go ahead and edit your "RouteConfig.cs" found in your App_Start folder in the Solutions Explorer like such:
public class RouteConfig
    {
        public static void RegisterRoutes(RouteCollection routes)
        {
            routes.IgnoreRoute("{resource}.axd/{*pathInfo}");

            routes.MapRoute(
                name: "Default",
                url: "{controller}/{action}/{id}",
                defaults: new { controller = "Form", action = "Index", id = UrlParameter.Optional }
            );
        }
    }
The second action method in the FormController is where your document package will be created upon clicking the submit button in your form and be redirected to the "ThankYou.cshtml" view. It is generally bad practice to put all the logic in the controller class. Therefore, I will create a new folder called "Services" where I put all of my logic for creating packages and session tokens. In your Solutions Explorer, right-click on your project name and select Add > New Folder and name your folder "Services". Next, right-click on your Services folder and select Add > Class. Name your class "ESLPackageCreation.cs". Go ahead and copy the following:
public class ESLPackageCreation
    {
        readonly static string CUSTOM_ID = "Signer";

        public static PackageId createPackage(FormModel model, string API_KEY, string BASE_URL)
        {
            String company = model.company;
            String emailAddress = model.emailAddress;
            String firstName = model.firstName;
            String lastName = model.lastName;
            String address = model.address;
            String city = model.city;
            String state = model.state;
            String zip = model.zip;
            String country = model.country;
            String phone = model.phone;
            String policyNumber = model.policyNumber;

            EslClient client = new EslClient(API_KEY, BASE_URL);

            FileStream fs = File.OpenRead("DOC_FILE_PATH");

            // Build the DocumentPackage object
            DocumentPackage documentPackage = PackageBuilder.NewPackageNamed("C# Form Package " + DateTime.Now)

                // Customize package settings
                .WithSettings(DocumentPackageSettingsBuilder.NewDocumentPackageSettings()
                                .WithDecline()
                                .WithOptOut()
                                .WithDocumentToolbarDownloadButton()

                                // Customize the signing ceremony settings
                                .WithCeremonyLayoutSettings(CeremonyLayoutSettingsBuilder.NewCeremonyLayoutSettings()
                                        .WithoutGlobalNavigation()
                                        .WithoutBreadCrumbs()
                                        .WithoutSessionBar()
                                        .WithTitle()))

                // Define the insured first and last name
                .WithSigner(SignerBuilder.NewSignerWithEmail(emailAddress)
                                         .WithCustomId(CUSTOM_ID)
                                         .WithFirstName(firstName)
                                         .WithLastName(lastName)
                                         .WithCompany(company))

                // Define sender
                .WithSigner(SignerBuilder.NewSignerWithEmail("[email protected]")
                                         .WithCustomId("Sender")
                                         .WithFirstName("Haris")
                                         .WithLastName("Haidary")
                                         .WithTitle("Technical Evangelist")
                                         .WithCompany("eSignLive"))

                // Define the document
                .WithDocument(DocumentBuilder.NewDocumentNamed("Form")
                                    .FromStream(fs, DocumentType.PDF)
                                    .EnableExtraction()
                                    .WithInjectedField(FieldBuilder.TextField()
                                        .WithName("first_name")
                                        .WithValue(firstName))
                                    .WithInjectedField(FieldBuilder.TextField()
                                        .WithName("last_name")
                                        .WithValue(lastName))
                                    .WithInjectedField(FieldBuilder.TextField()
                                        .WithName("address")
                                        .WithValue(address))
                                    .WithInjectedField(FieldBuilder.TextField()
                                        .WithName("city")
                                        .WithValue(city))
                                    .WithInjectedField(FieldBuilder.TextField()
                                        .WithName("state")
                                        .WithValue(state))
                                    .WithInjectedField(FieldBuilder.TextField()
                                        .WithName("zip")
                                        .WithValue(zip))
                                    .WithInjectedField(FieldBuilder.TextField()
                                        .WithName("country")
                                        .WithValue(country))
                                    .WithInjectedField(FieldBuilder.TextField()
                                        .WithName("phone_number")
                                        .WithValue(phone))
                                    .WithInjectedField(FieldBuilder.TextField()
                                        .WithName("company")
                                        .WithValue(company))
                                    .WithInjectedField(FieldBuilder.TextField()
                                        .WithName("email")
                                        .WithValue(emailAddress))
                                    .WithInjectedField(FieldBuilder.TextField()
                                        .WithName("policy_number")
                                        .WithValue(policyNumber))

            ).Build();

            // Issue the request to the e-SignLive server to create the DocumentPackage
            PackageId packageId = client.CreatePackage(documentPackage);
            client.SendPackage(packageId);

            return packageId;
        }

        public static SessionToken createSessionToken(PackageId packageId, string API_KEY, string BASE_URL)
        {
            EslClient client = new EslClient(API_KEY, BASE_URL);
	//Create signer session token
            SessionToken sessionToken = client.SessionService.CreateSignerSessionToken(packageId, CUSTOM_ID);
            Trace.WriteLine("Session token: " + sessionToken.Token);

            return sessionToken;
        }
    }
The "createPackage" method will create and send your package using the information stored in your model. The "createSessionToken" method will create a signer session token. This signer session token will be used to build the URL for the signing ceremony that will be embedded in an Iframe. Also, make sure to reference the OneSpan Sign SDK and your models in your "ESLCreatePackage.cs" file. We can now create our views.
Building the View
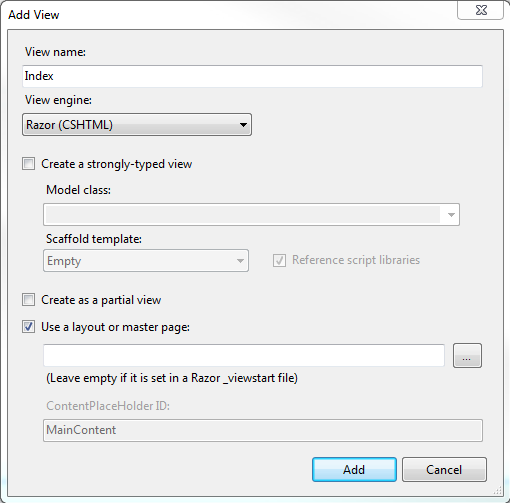
The view is a user interface. It displays data from the model to the user also enables the user to modify them. The Views folder contains separate folders for each controller with the same controller name to accommodate multiple views. In the Solutions Explorer, right-click on the Views folder and select Add > New Folder. Name your folder "Form". Now, right-click on your Form folder and select Add > View. Name your view "Index" and hit Add.
Go ahead and copy the code below in your Index view.
[code language="html"]@* Reference to model *@ @model ESLWebApp.Models.FormModel <h2>Form</h2> <b> Please fill out the following form:</b> @*CSS style for fieldset*@ <style> fieldset { padding: 1em; font: 80%/1 sans-serif; width: 300px; } </style> @*Create HTML Form*@ @using (Html.BeginForm()) { <fieldset> <legend>Signer Information</legend> <span>First Name</span> <div>@Html.TextBoxFor(model => model.firstName)</div> <span>Last Name</span> <div>@Html.TextBoxFor(model => model.lastName)</div> <span>Email</span> <div>@Html.TextBoxFor(model => model.emailAddress)</div> <span>Company</span> <div>@Html.TextBoxFor(model => model.company)</div> <span>Address</span> <div>@Html.TextBoxFor(model => model.address)</div> <span>City</span> <div>@Html.TextBoxFor(model => model.city)</div> <span>State</span> <div>@Html.TextBoxFor(model => model.state)</div> <span>Zip</span> <div>@Html.TextBoxFor(model => model.zip)</div> <span>Country</span> <div>@Html.TextBoxFor(model => model.country)</div> <span>Phone Number</span> <div>@Html.TextBoxFor(model => model.phone)</div> <span>Policy Number</span> <div>@Html.TextBoxFor(model => model.policyNumber)</div> <input type="submit" /> </fieldset> }
As you can see in the code above, for each HTML text box, the model property will be set by the user input. Next, create a new view called "ThankYou" under Views > Form folder and add in the following:
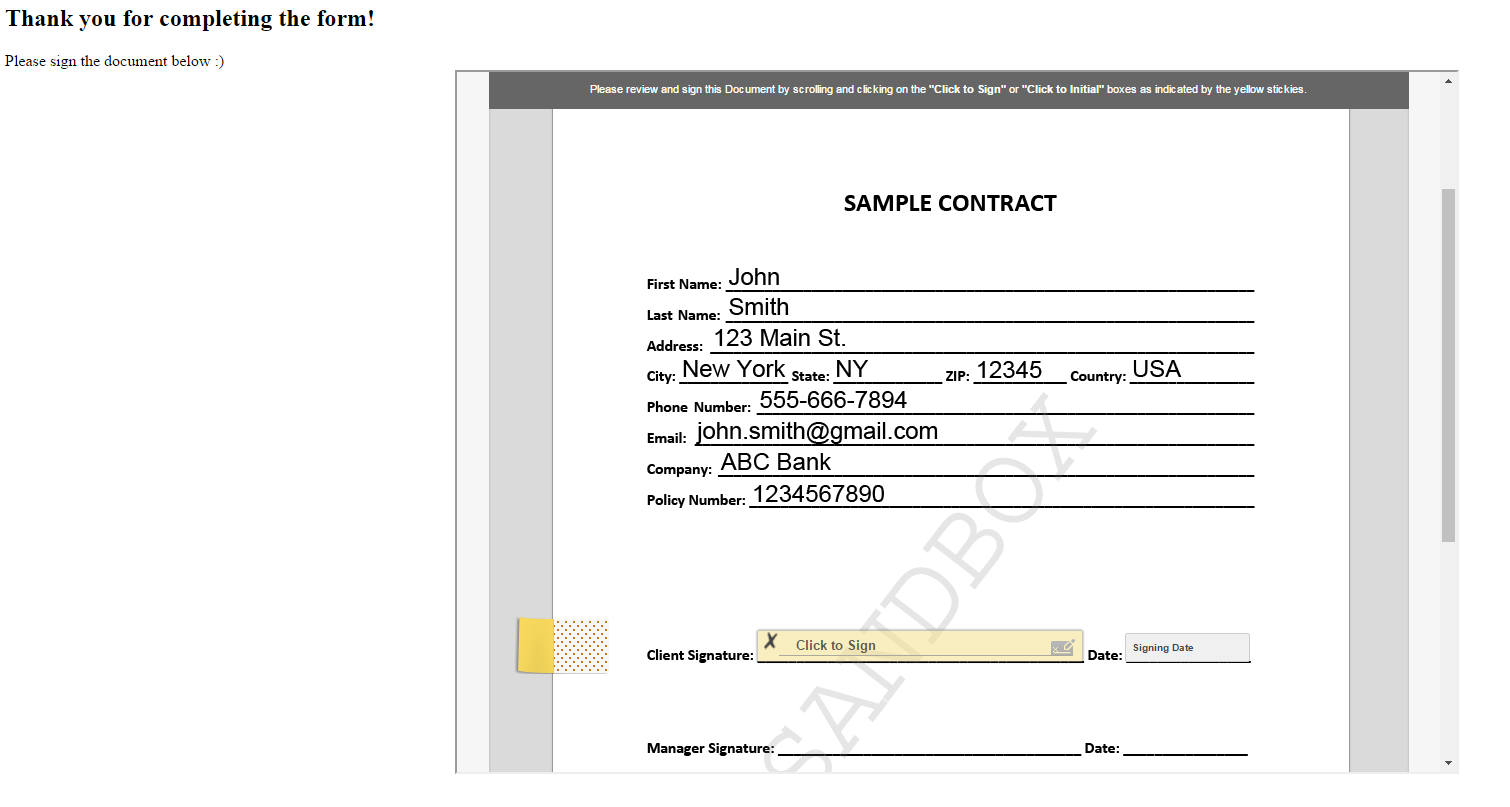
[code language="html"] <h2>Thank you for completing the form!</h2> <span>Please sign the document below :)</span> <div align="center"> <iframe src="@String.Concat("http://sandbox.e-signlive.com/access?sessionToken=", @ViewData["token"])" width="1000" height="700" scrolling="yes"></iframe> </div>
In this view, we will use the session token to build the signing ceremony URL to embed in an Iframe.
Running Your Application
You can now run your application. The form below should be presented to you. Go ahead and fill out the form. Then click on the Submit button.
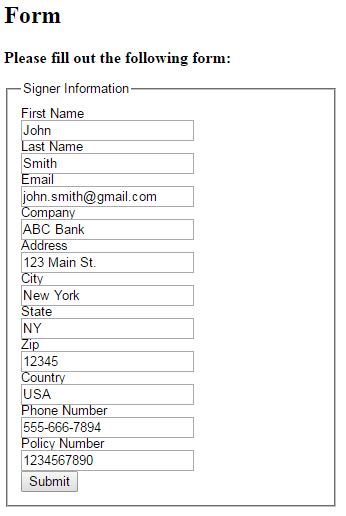
Finally, you should be re-directed to the following page below where the signing ceremony is embedded in an Iframe and the document ready to be signed.
You can find the complete project on our Developer Community Code Share section, here. If you have questions regarding this blog or anything else concerning integrating OneSpan Sign into your application, visit the developer community forums: https://developer.esignlive.com. That's it from me. Thank you for reading! If you found this post helpful, please share it on Facebook, Twitter, or LinkedIn. You can find all of my previous blogs by going to my author page.