OneSpan Sign How To: Creating a Callback Event Notification Listener

In the Developer Community forums, there has been numerous questions on OneSpan Sign's callback event notification listener service. In short, OneSpan Sign allows you to be automatically notified of events pertaining to a package. Upon a specific event, the system will send a JSON payload to a URL destination of your choice. In other words, it is an HTTP callback: an HTTP POST that occurs when an event happens (i.e. an event-notification via HTTP POST). It is a simple and elegant way to receive valuable information as it happens (i.e. real-time), rather than continually polling for data and receiving nothing valuable most of the time.
Requirements
Register for Event Notifications
Before the OneSpan Sign system can notify you of an event, you must first register to be notified in case of an event. You can follow this feature guide on how to register for event notifications.
Visual Studio Community 2015
For this blog, you will need Microsoft’s Visual Studio Community 2015. If you do not already have it, you can download the community version for free, here.
OneSpan Sign's .NET SDK
You can download the .NET SDK from the following link. It also provides a link to some examples of using the .NET SDK on GitHub. Unzip the SDK to the location of your choice.
Ngrok
In order to receive callback event notifications, you will need a publicly accessible URL to hit and work. Your localhost server on its own will not work. Ngrok is a very simple and easy to use tool that creates a secure tunnel on your local machine along with a public URL you can use for browsing your local site. This saves you the trouble of deploying your web application.
The Code
Go ahead and create a new ASP.NET MVC web application project. If this is your first time working with the ASP.NET framework, you can follow this previous blog on how you can get started. You can also download the code from the Developer Community Code Share.
Once your project has been created, add a new controller and name it "HomeController". Below is the code of the action controller to process the event notification.
public class HomeController : Controller
    {
        // GET: Home
        public ActionResult Index()
        {
            return View();
        }

        public ActionResult Listener()
        {

            // Get the received request's headers
            var requestheaders = HttpContext.Request.Headers;

            // Get the received request's body
            var requestBody = string.Empty;
            using (var reader = new System.IO.StreamReader(HttpContext.Request.InputStream))
            {
                requestBody = reader.ReadToEnd();
            }

            JObject jsonBody = JObject.Parse(requestBody);

            //Do anything you want with the json payload from OneSpan Sign
            Debug.WriteLine(jsonBody);

            string packageId = jsonBody["packageId"].ToString();

            Services.DownloadDocuments.download(packageId);

            return new HttpStatusCodeResult(200);
        }
    }
In this example, I will register for the "PACKAGE_COMPLETE" event notification. Once all documents in a package has been signed and the package completed, OneSpan Sign will make a POST request to my registered URL with the following example JSON payload:
{
  "@class": "com.silanis.esl.packages.event.ESLProcessEvent",
  "name": "PACKAGE_COMPLETE",
  "sessionUser": "0787be84-f095-44c7-ba00-787093df86fc",
  "packageId": "KHiRfOXgKK0gpVWwwpFOSNy6o34=",
  "message": null,
  "documentId": null
}
Then, we will use the package id in order to download the signed documents. Create a new folder called "Services" and add a new class named "DownloadDocument".
public static void download(string packageId)
        {
            EslClient eslClient = new EslClient("api_key", "https://sandbox.esignlive.com/api");
            PackageId pkgId = new PackageId(packageId);
            byte[] content = eslClient.DownloadZippedDocuments(pkgId);
            File.WriteAllBytes(@"C:/Users/hhaidary/Desktop/documents_" + packageId + ".zip", content);
        }
The code above utilizes the eslClient to download the signed documents. Make sure to reference the OneSpan Sign .NET SDK in this class. Optionally, you can add the corresponding Views to each controller action. However, this step is not required for the purposes of this example.
Running Your Code
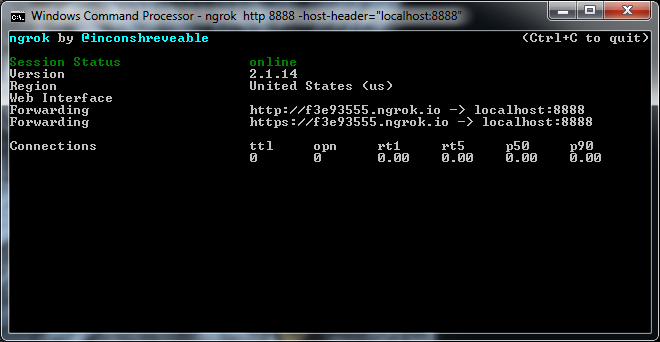
Go ahead and run your project by pressing on Run in Visual Studio. Then, open a command prompt and change the directory to the location where you saved your ngrok executable. Enter the following command:
ngrok http [port] -host-header="localhost:[port]"
Below is a screenshot of what you can expect after running the command:
Then, login to your OneSpan Sign account and browse to the Admin page. Enter in the "Callback URL" field the URL to your callback listener (i.e. http://f3e93555.ngrok.io/home/listener) and register for the "transaction complete" event. Finally, create, send, and complete a test package. You should be able to view the signed documents as a zipped file in the location where you chose to save it in the "DownloadDocuments" class.
If you have questions regarding this blog or anything else concerning integrating OneSpan Sign into your application, visit the developer community forums: https://developer.OneSpan.com. That's it from me. Thank you for reading! If you found this post helpful, please share it on Facebook, Twitter, or LinkedIn.

OneSpan Developer Community
Join the OneSpan Developer Community! Forums, blogs, documentation, SDK downloads, and more.
Join Today