How to electronically notarize documents with In-Person Electronic Notarization (IPEN)

OneSpan Notary offers a digital alternative to traditional notarizations by allowing notaries to electronically notarize documents with In-person Electronic Notarization (IPEN). With IPEN, notaries can conveniently notarize documents with signers face-to-face by leveraging electronic signatures and digital capabilities, while delivering a secure, compliant, and efficient process.
A notary can complete an in-person electronic notarization with signers on a computer, laptop, or tablet to facilitate the notarization process by following these steps:
- The notary electronically uploads and prepares the document for notarization
- The notary and signer meet at a physical location
- The notary validates the signer’s identity by verifying their government-issued ID
- The notary presents the electronic document to the signer via a computer, laptop, or tablet
- The signer electronically signs the document
- The notary electronically witnesses, e-signs, and applies their electronic notary seal to the document
- At the end of the in-person electronic notarization session, the notary can enter additional information in the eJournal and has access to an audit trail capturing the detailed events of the notarization
In this blog, we’ll show you how easy it is to use IPEN with OneSpan Notary.
Updating the notary commission page for IPEN
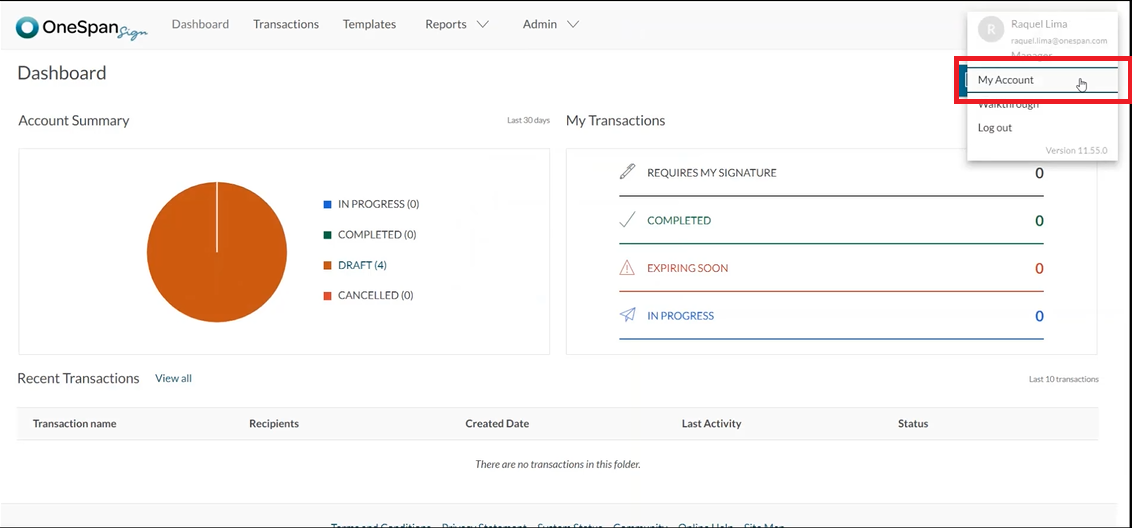
After logging in to OneSpan Sign, the Notary accesses their ‘My Account’ section and clicks ‘Notary Commission’.
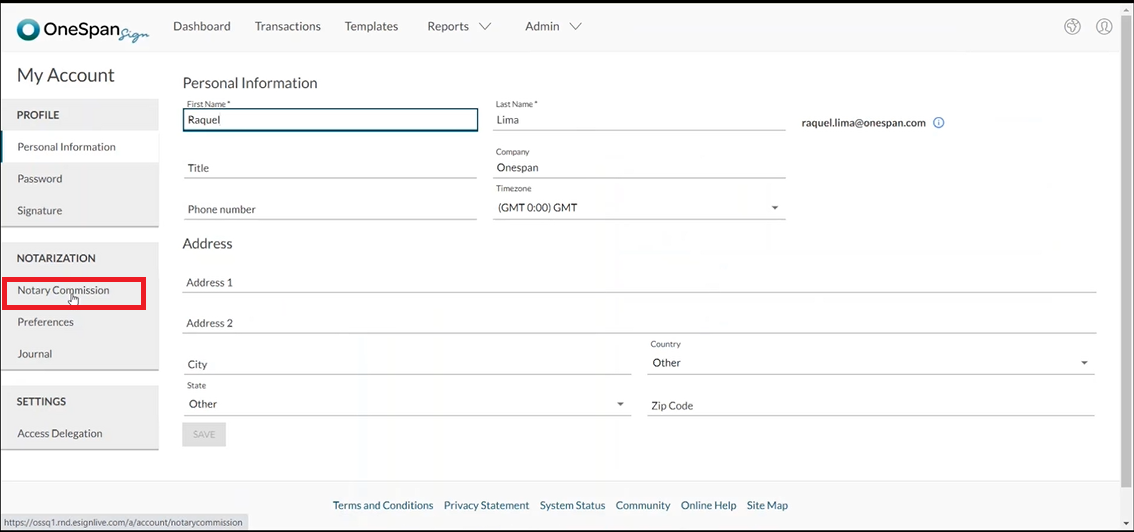
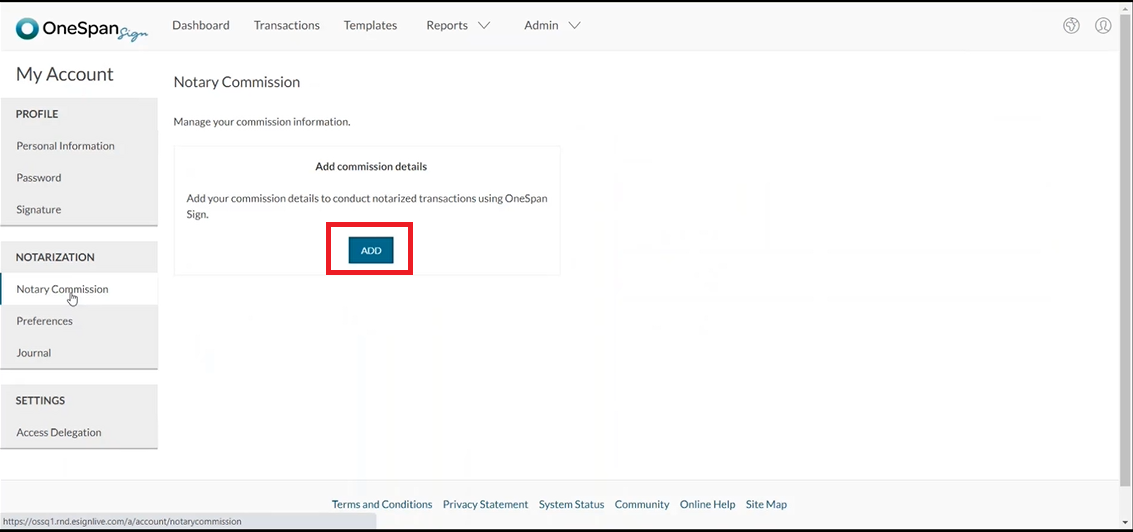
The Notary clicks ‘Add’ to include their commission details.
The Notary can select different options in the ‘Authority’ section:
- If the Notary can only perform IPEN transactions, they can select ‘Electronic notary’
- If the Notary can perform both IPEN and RON transactions, they can select ‘Remote online notary’
- If their commission applies to both methods, they can add a checkbox to ‘My commission applies to both RON and IPEN transactions’
In this example, the Notary can only perform IPEN transactions, so they will select ‘Electronic notary’.
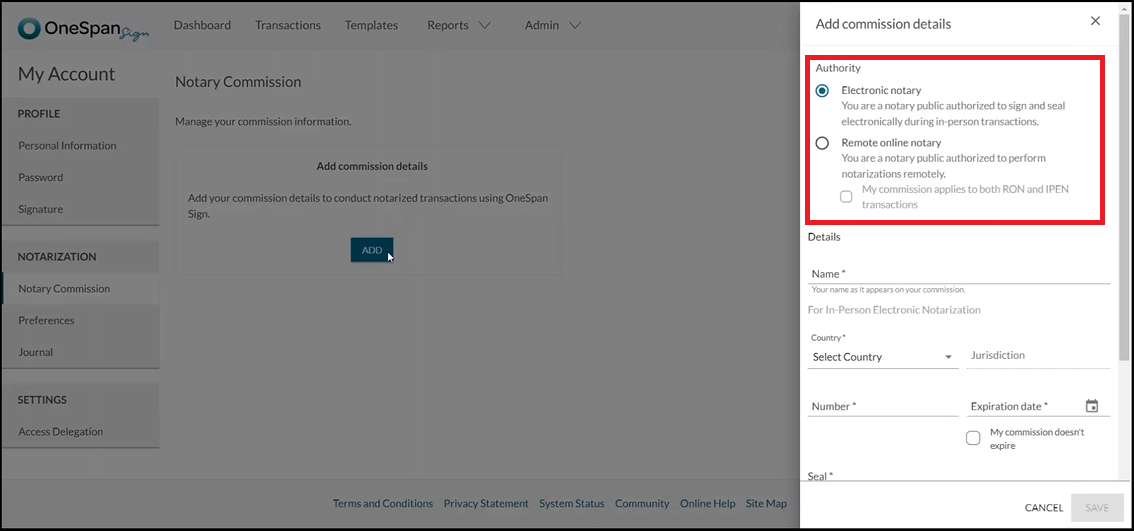
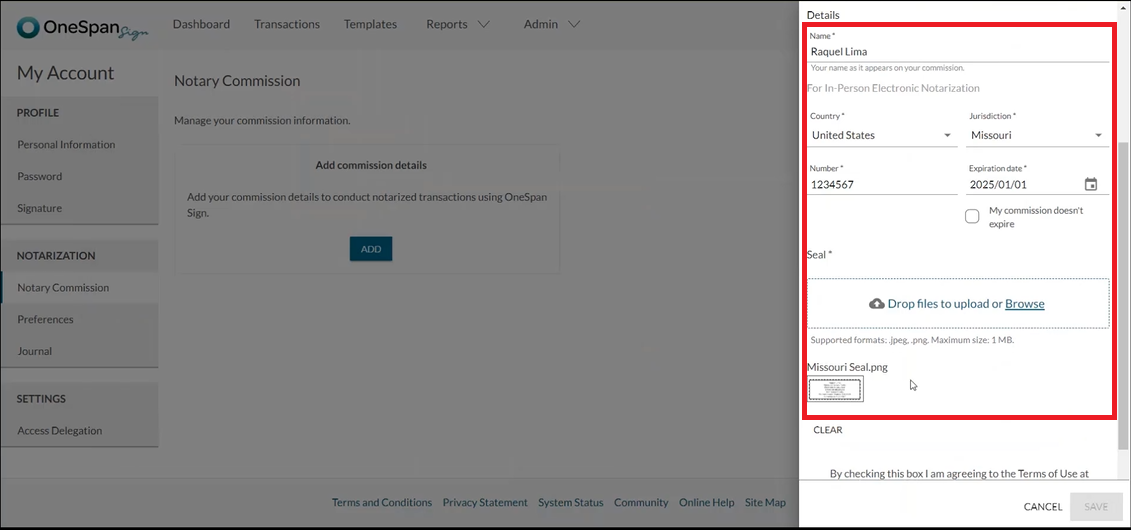
The Notary adds their name, country, jurisdiction, commission number, and commission expiration date, and then uploads their notary seal. The Notary agrees to the ‘Terms of Use’, confirms they are a commissioned notary, and clicks ‘Save’.

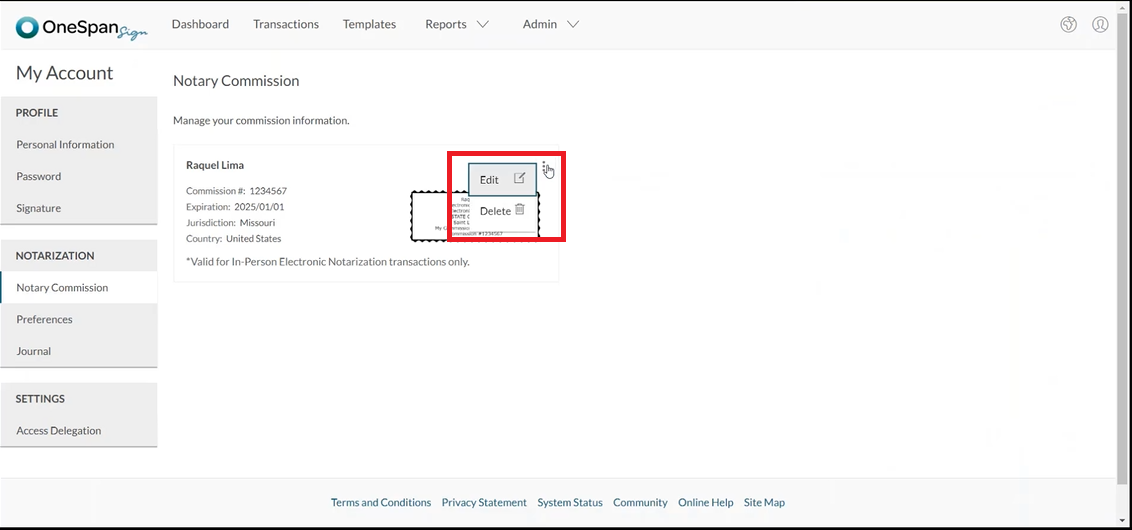
The Notary’s commission information is saved in OneSpan Sign and they can revisit this page at any time to edit or delete their commission details.
Configuring a transaction for IPEN
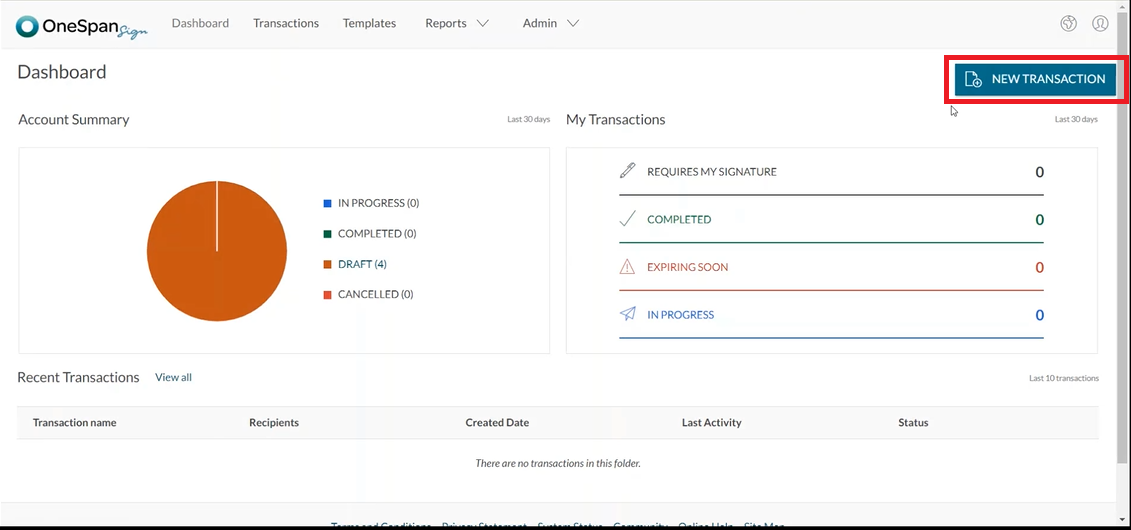
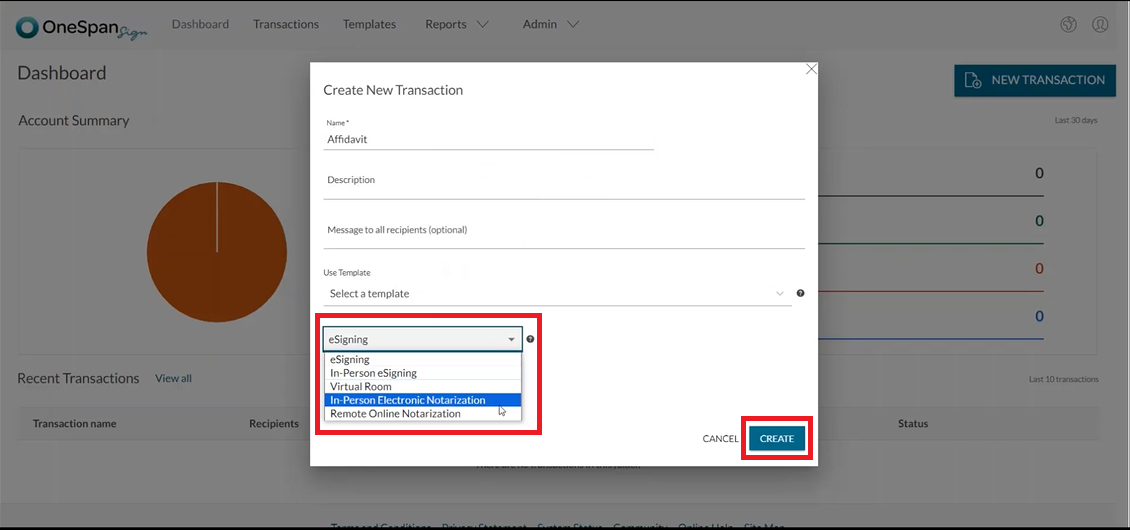
Now it’s time for the Notary to prepare the documents for In-person Electronic Notarization. The Notary selects ‘New Transaction’ and enters a name for the transaction.
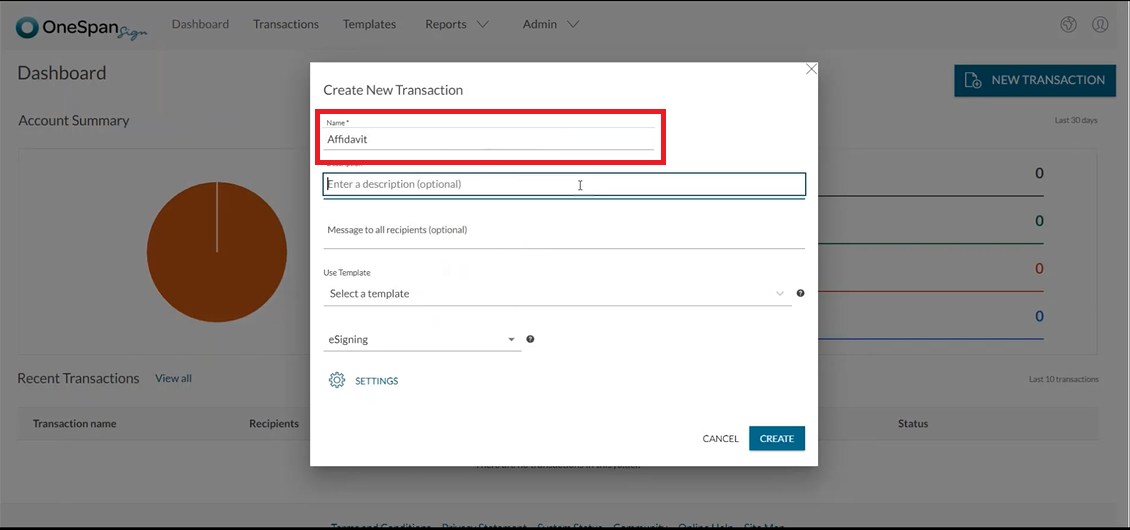
In the drop-down, the Notary selects ‘In-Person Electronic Notarization’ as a transaction type and then clicks ‘Create’ to proceed.
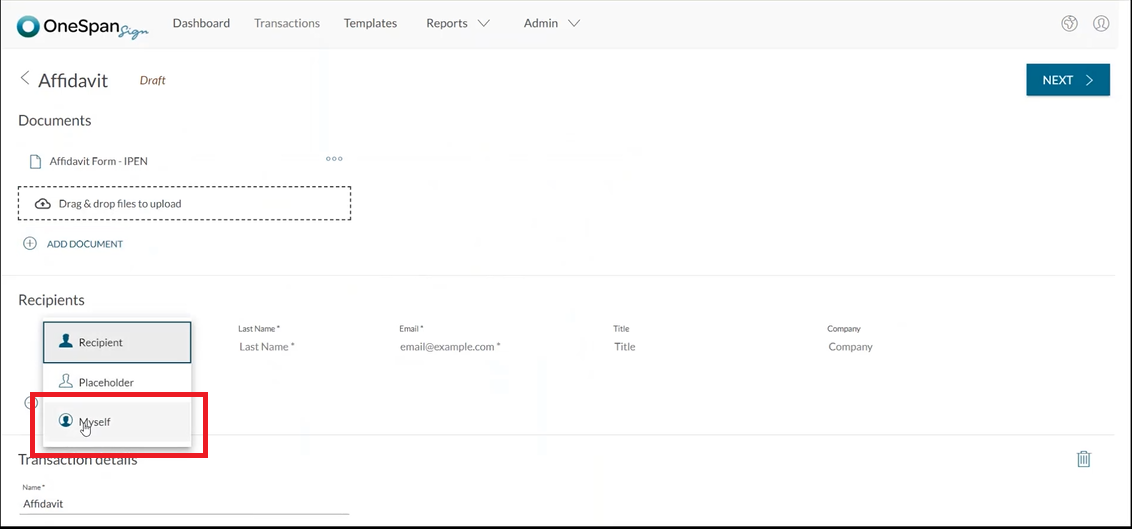
To add a document to the transaction, the Notary clicks ‘Add Document’ and uploads a document from their files.

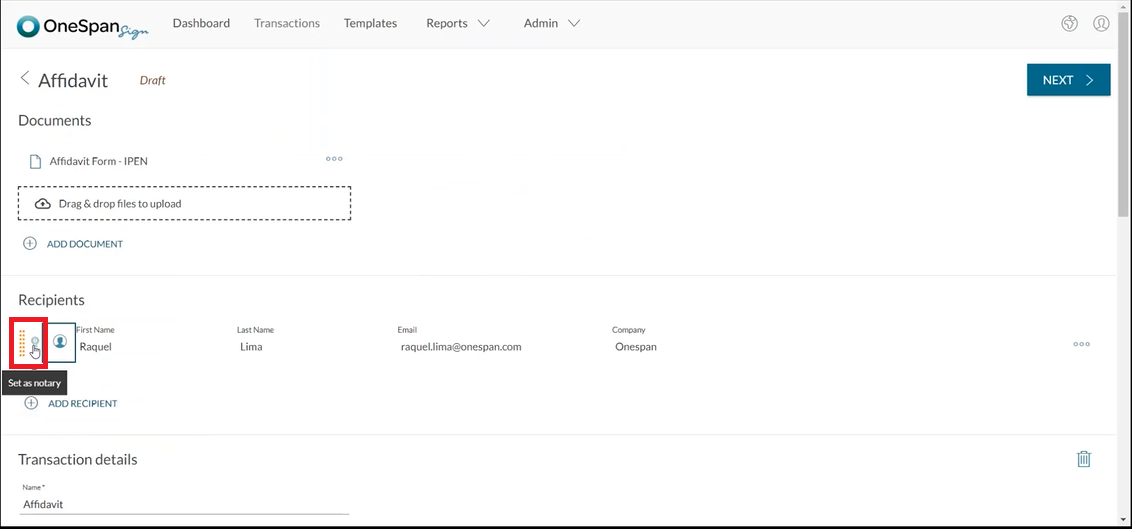
The Notary now adds themselves to the transaction and clicks the notary badge next to their name.
The Notary adds a signer to the transaction by adding the signer’s first name, last name, and email address.
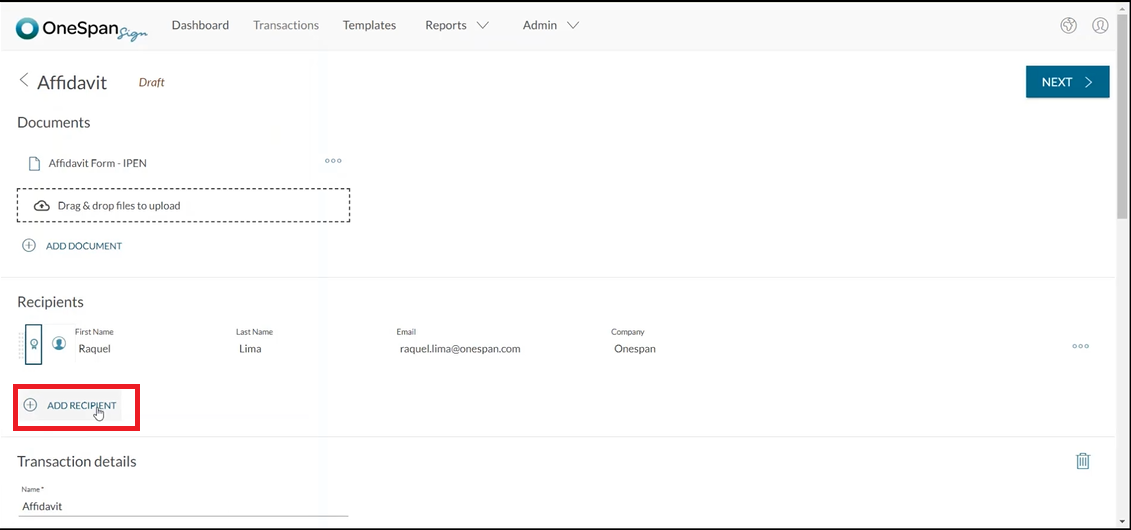
They then click ‘Next’ to prepare the document for signing and electronic notarization.
To prepare the affidavit, the Notary can drag and drop the signature blocks into the desired areas of the document.
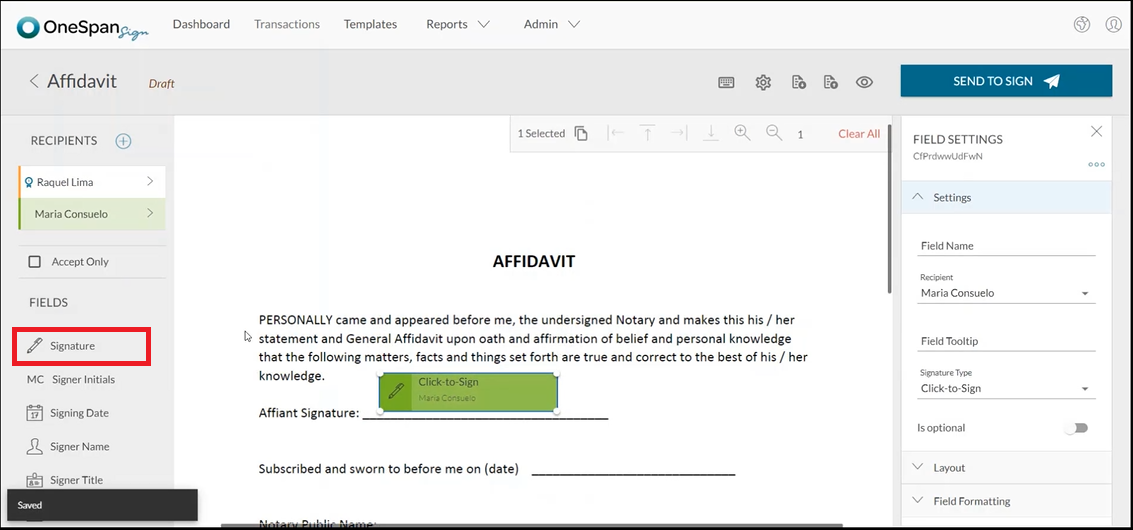
The Notary can also scroll down to access additional fields specifically configured for IPEN such as:
- Notary Name
- Notary Commission Number
- Notary Jurisdiction
- Notary Country
- Notary Seal
- Notary Commission Expiration Date
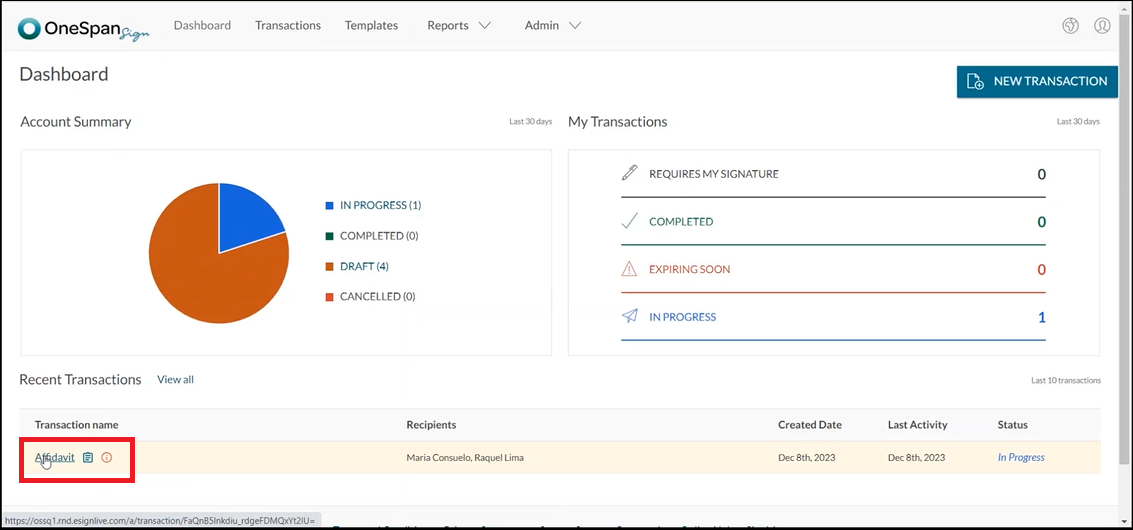
Once all the necessary fields have been added, the affidavit is ready to send. The Notary clicks ‘Send to Sign’.
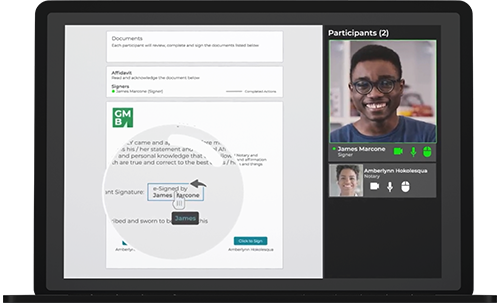
Signing in an IPEN session
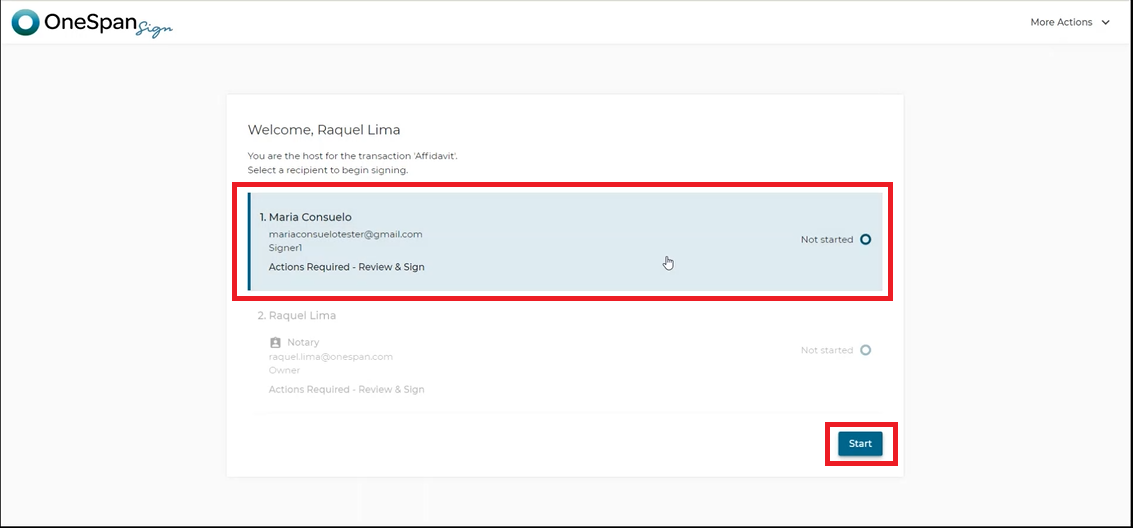
When the Notary meets the signer in-person to notarize the affidavit, they access the transaction on their tablet or laptop and then click ‘Sign’.
The Welcome screen appears showing the actions required for both the signer and Notary in the IPEN session.
To start the electronic notarization, the Notary selects the signer’s name and clicks ‘Start’.
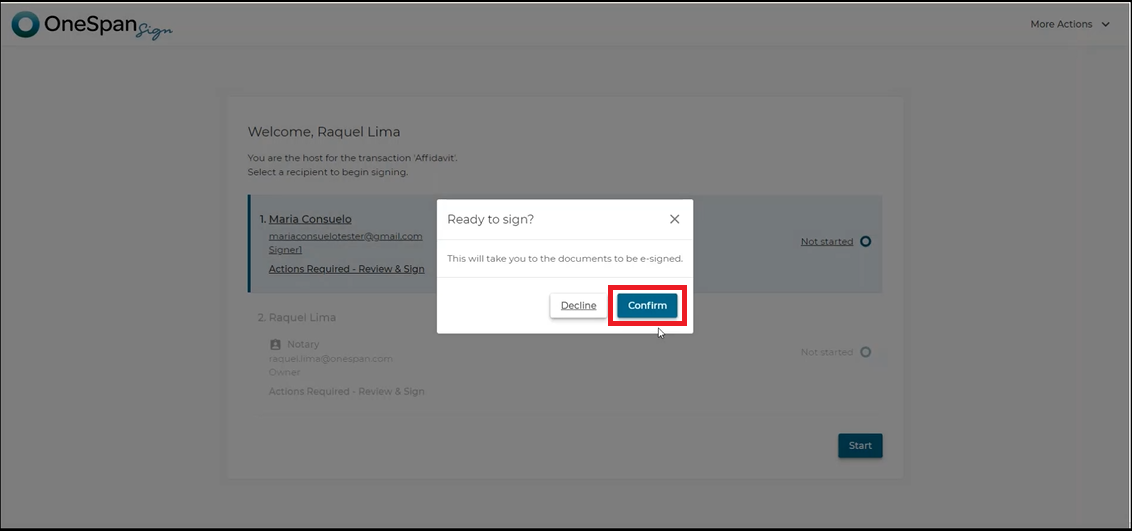
The Notary clicks ‘Proceed’ to confirm they are handing off the documents to be e-signed by the signer.

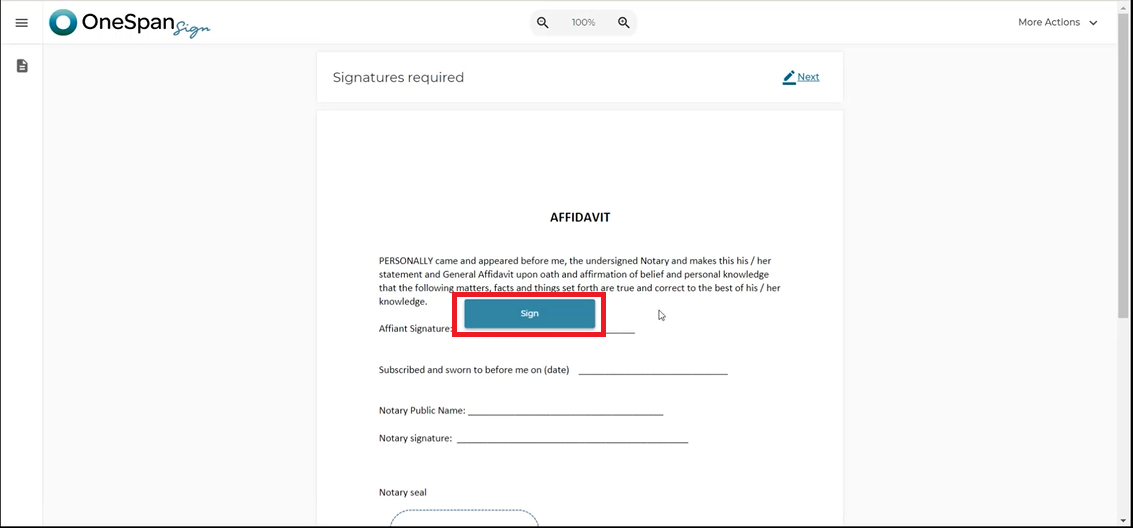
The Notary hands the tablet or laptop to the signer. The signer confirms that they are ready to e-sign the documents.
The signer reviews the document that needs to be e-signed and clicks sign.
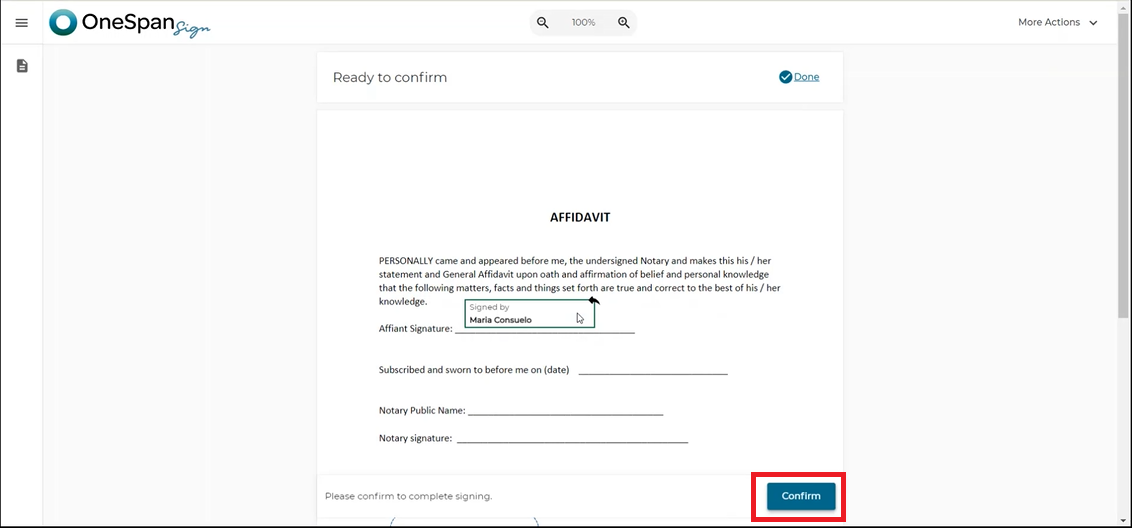
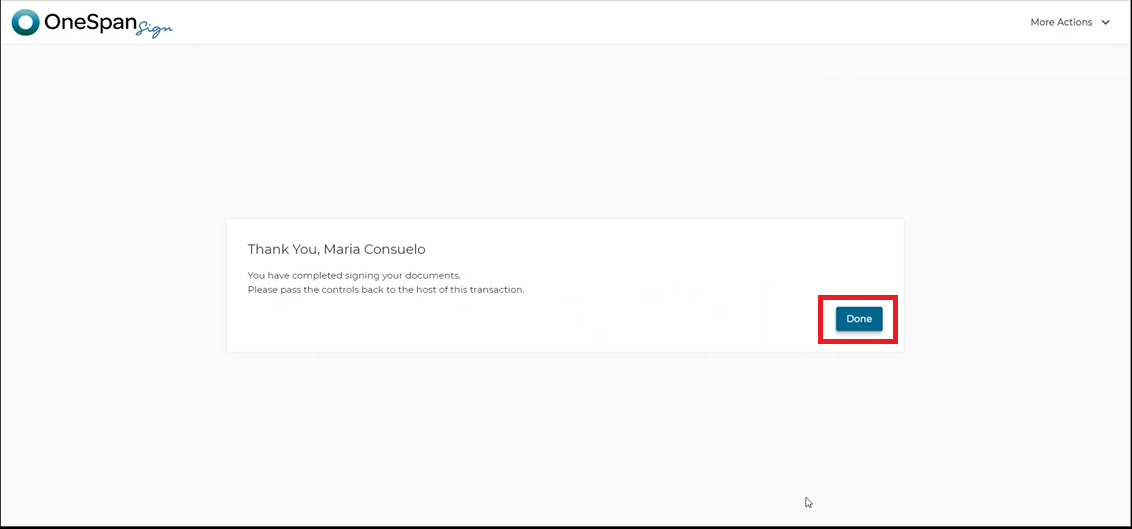
Once the signer has completed the signing process, they click ‘Confirm’ and then ‘Done’ to pass control back to the Notary to apply their signature and notary seal.
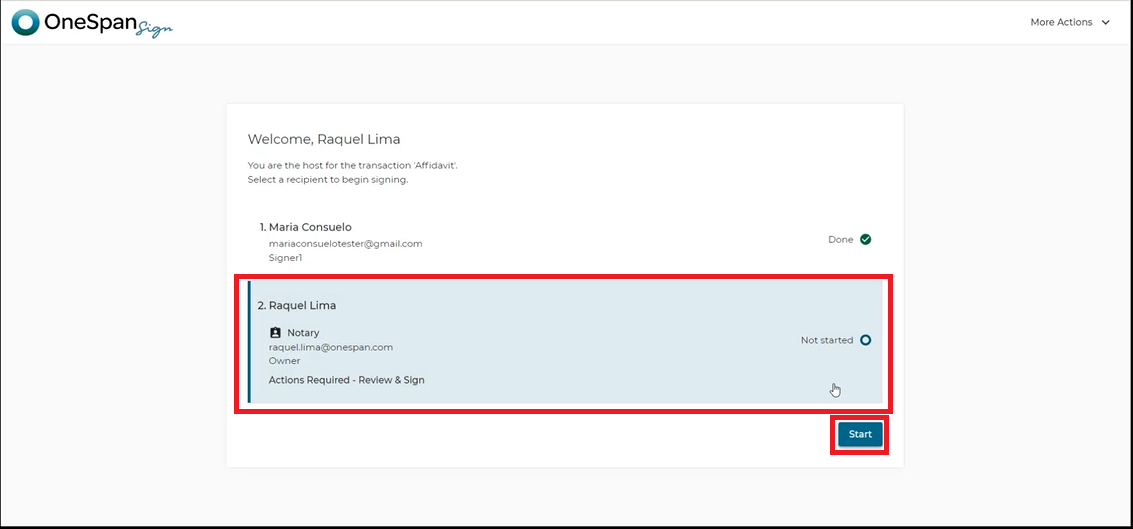
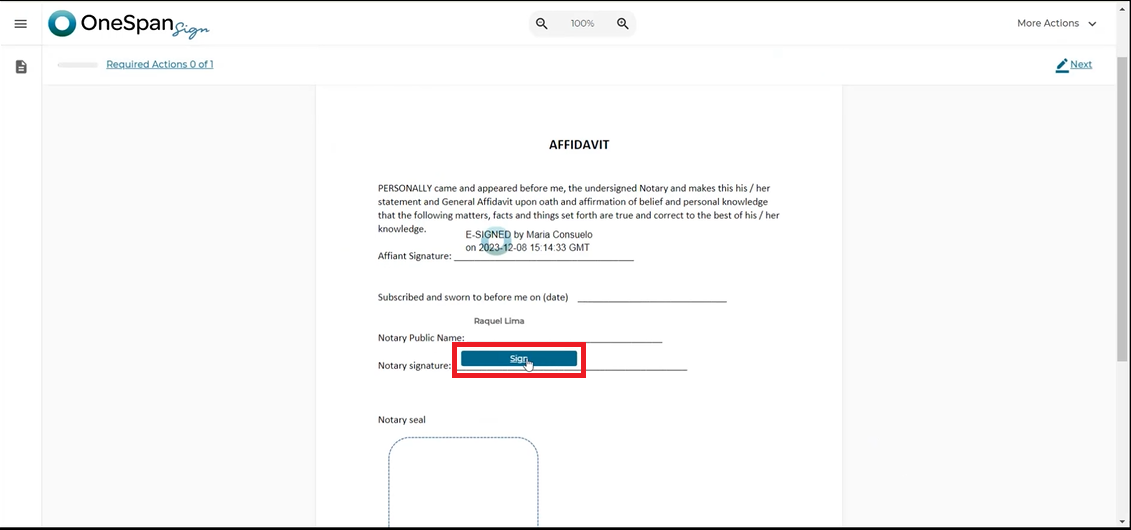
The Notary selects themselves and clicks ‘Start’ to proceed with signing and notarizing the document by applying their seal.
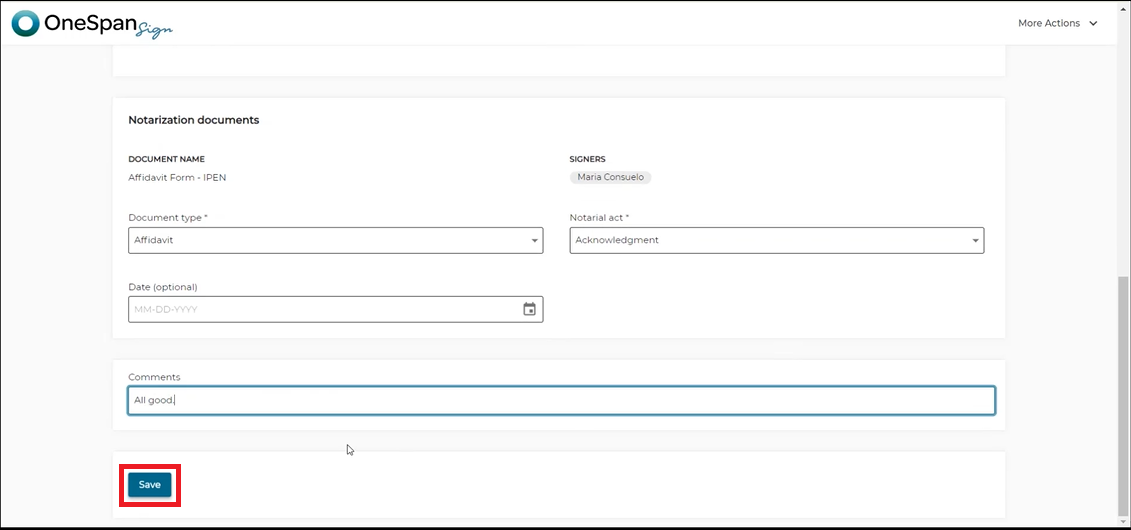
The Notary can then fill in additional information about the In-person Electronic Notarization session in the eJournal. This includes information such as:
- Signer street address, city, country, zip code and state
- Identification method
- Notary’s relationship to the signer
- Document type
- Notarial act
- Date of notarization
- And comments
The Notary clicks ‘Save’.
And that’s it! The In-person Electronic Notarization session has been successfully completed with OneSpan Notary.
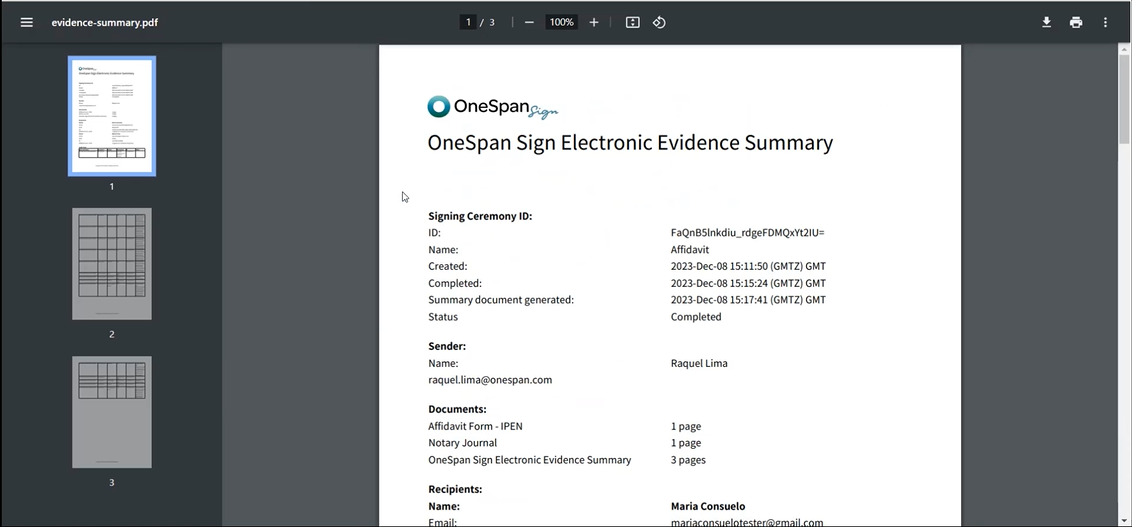
Accessing electronic evidence
At the end of the session, the notarized affidavit, comprehensive audit trail, and eJournal are available to review and download. The Notary exits signing mode and clicks ‘Download’ to access these assets. The notarized document and audit trail will be contained in a zip file.

The notarized document shows the signer’s e-signature, the date the document was notarized, the notary’s name, signature, and the eNotary electronic seal.
The evidence summary contains the audit trail. This captures detailed actions taken throughout the e-signing and notarization process, including:
- Signing privileges passed between notary and signer
- IP address and geolocation details of participants
- E-Signing events and timestamps
- Notaries applying their eNotary electronic seal
- And other actions
The eJournal can only be accessed by the notary. At the end of each In-person Electronic Notarization session the eJournal will be available to the notary in the ‘Account Settings’ section. To access the eJournal the notary clicks ‘My Account’, then selects ‘Journal’ in the left-hand column. They can then download the eJournal for their selected IPEN session.
All the required information captured during the IPEN session is included in the eJournal. This includes transaction name, notarial act, document type, signer information, identification type, and the notary’s comments.
The notary can download and save the electronic evidence to their records at any time.
In addition to In-person Electronic Notarization (IPEN), OneSpan Notary also offers Remote Online Notarization (RON) to complete notarizations remotely in a secure and trusted environment. Visit the Support Center for more video tutorials about OneSpan Notary.
Product overview
OneSpan Notary
Transform how your notaries and customers get agreements completed – easily and securely, in a trusted environment
Learn more