OneSpan Sign Developer: In-person Signing

With OneSpan Sign, transaction owners can send documents for signatures and let recipients e-sign remotely over the web or in a face-to-face scenario. Supposing a life-insurance agent visits a couple in their home, the agent can prepare an insurance transaction using a mobile device and have both the agent and the couple e-sign relevant documents during their one meeting. You can easily implement this kind of use case by leveraging the in-person signing feature without extra development or effort.
In this blog, we will guide you through the steps how to create an in-person signing transaction, build an in-person signing link, conduct the signing session, and potentially embed the signing link in an iFrame to provide a better white-labelled experience for your integrated application. Without further delay, let’s get started!
Step 1: Create an In-Person Signing Transaction
Setting up in-person signing is similar to the regular process of sending a transaction.
For ad-hoc users:
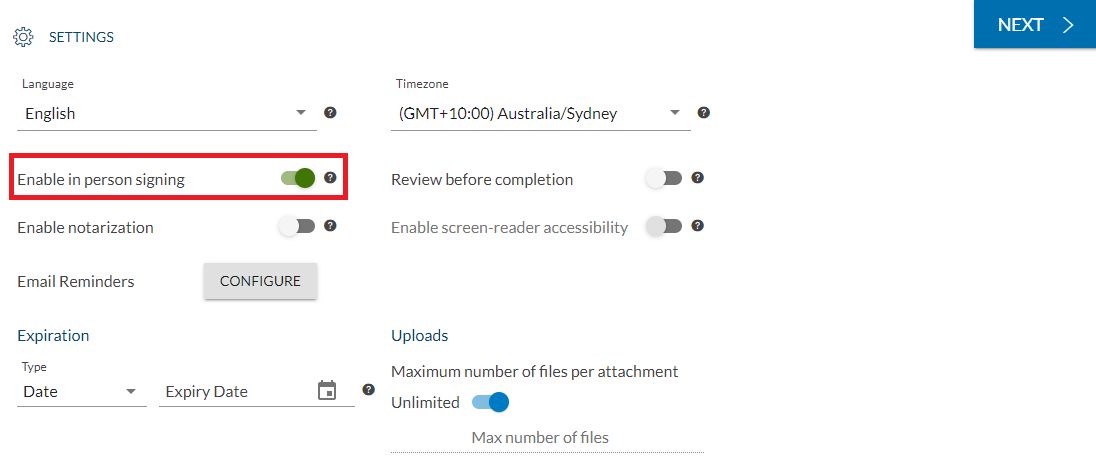
When preparing a transaction, scroll down to the “Settings” section and enable the “in-person signing” option.
For integrated users:
Whether the transaction is to be signed in-person is determined by the package setting:
“settings” > “ceremony” > “inPerson” : true/false
An example transaction JSON could look like below:
{
  "name": "In-Person Signing Transaction",
  "language": "en",
  "description": "In-Person Signing Transaction",
  "status": "DRAFT",
  "settings": {
    "ceremony": {
      "inPerson": true
    }
  }
}
Alternatively, it can be determined with the SDK code below:
Java SDK:
DocumentPackage pkg = PackageBuilder.newPackageNamed("In-Person Signing Transaction")
		.withSettings(DocumentPackageSettingsBuilder.newDocumentPackageSettings()
				.withInPerson())
		.build();
.NET SDK:
DocumentPackage pkg = PackageBuilder.NewPackageNamed("In-Person Signing Transaction")
		.WithSettings(DocumentPackageSettingsBuilder.NewDocumentPackageSettings()
				.WithInPerson())
		.Build();
Step 2: Build In-Person Signing Link
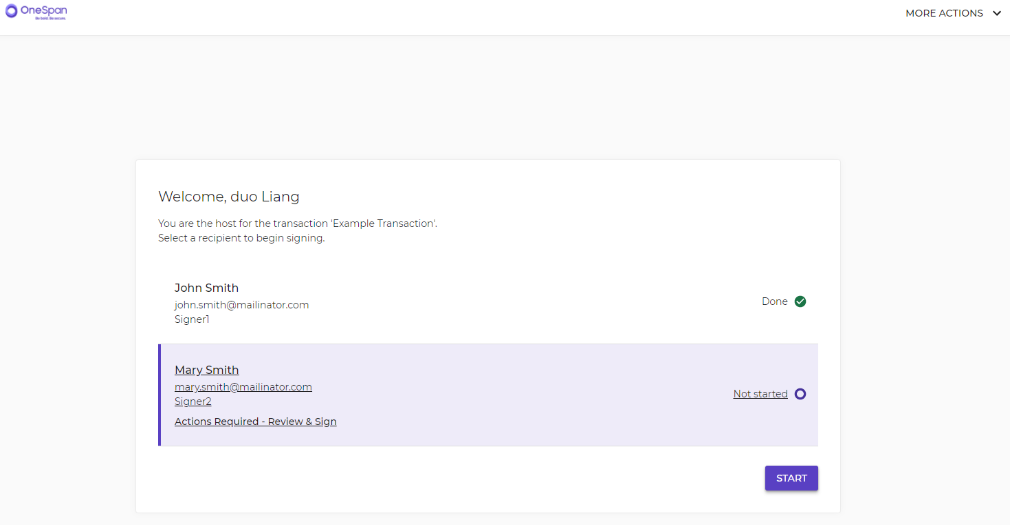
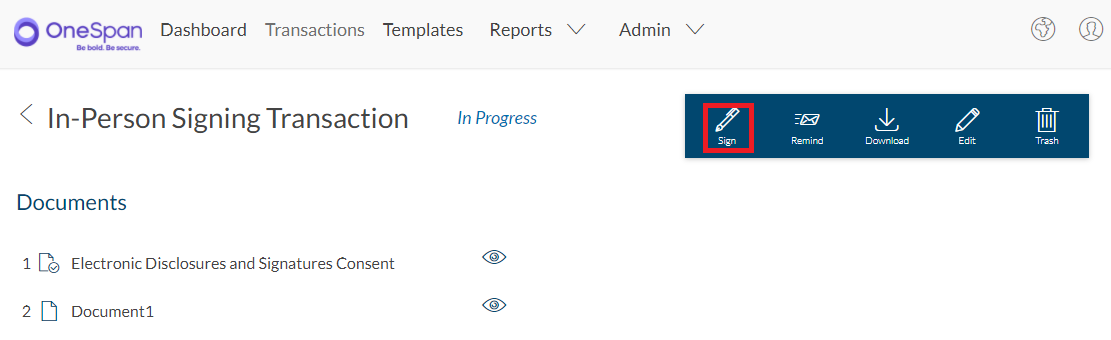
Ad-hoc users can kick off an in-person signing ceremony via their OneSpan Sign sender portal.
On top of that, integrated users can access the in-person signing ceremony directly through a signing link with either method below:
Method 1:
With the first method, we’ll authenticate the signing link with a sender authentication token:
Java SDK:
String senderAuthToken = eslClient.getAuthenticationTokensService().createSenderAuthenticationToken(packageId);
.NET SDK:
string senderAuthToken = eslClient.AuthenticationTokenService.CreateSenderAuthenticationToken(new PackageId(packageId));
API Method:
HTTP Request
POST /api/authenticationTokens/sender
HTTP Headers
Accept: application/json
Content-Type: application/json
Authorization: Basic api_key
Example Request Payload
{"packageId: "5vjLRY5MWrDJ6MzRAEyCKOy5IH0="}
With the sender authentication token by hand, build the link with below template:
{instance_url}/auth?authenticationToken={sender_auth_token}&target={instance_url}/transaction/{package_id}/sign
The final signing link could look like the example below:
https://sandbox.esignlive.com/auth?authenticationToken=MTcxMzE1MWYtZjM3Ni00ZTEyLWFmNTctZTUyY2Q5ZTMxN2Qx&target=https://sandbox.esignlive.com/transaction/BEJGut_BQrji0JIyLJJE-4-VCmI=/sign
Note:
- The instance URL doesn’t include “/api” part, for example: “https://sandbox.esignlive.com”.
- The redirected URL doesn’t contain “/a/” in the path. This might require code change if you are migrating from classic Signing Ceremony to New Signer Experience.
Method 2:
Instead of the sender authentication token, it also works when retrieving a sender’s signer authentication token.
Java SDK:
String multiUseToken = eslClient.getAuthenticationTokensService().createSignerAuthenticationToken(packageId, signerId);
String singleUseToken = eslClient.getAuthenticationTokensService().createSignerAuthenticationTokenForSingleUse(packageId, signerId, signerSessionFields);
.NET SDK:
string multiUseToken = eslClient.AuthenticationTokenService.CreateSignerAuthenticationToken(new PackageId(packageId), signerId);
string singleUseToken = eslClient.AuthenticationTokensService.CreateSignerAuthenticationTokenForSingleUse(packageId, signerId, signerSessionFields);
API Method:
HTTP Request
POST /api/authenticationTokens/signer/multiUse
Or
POST /api/authenticationTokens/signer/singleUse
HTTP Headers
Accept: application/json
Content-Type: application/json
Authorization: Basic api_key
Example Request Payload
{
  "packageId": "s-wy6PFASBlAKfnLJjcbzoaMyTg=",
  "signerId": "sender_email"
}
Using the signer authentication token, you can obtain a signing session by building the following URL:
https://sandbox.esignlive.com/access?sessionToken={signerAuthToken}
With either link, developers can either open it in a new window tab or embed the link into an iFrame and seamlessly integrated into your own application.
We Appreciate Your Feedback
There it is. We’ve showcased you a two-step approach creating an in-person signing transaction and obtaining the signing link. If you have any questions regarding this blog or anything else concerning integrating OneSpan Sign into your application, visit the Developer Community Forums. Your feedback matters to us!
