OneSpan Sign Developers: OAuth Event Notification for Salesforce – Part 1

In OneSpan Sign, callback event notifications enable you to be automatically notified of events that pertain to a transaction. When a specific event occurs, for example when a signer has completed signing, OneSpan Sign system sends a POST call to your listener endpoint with Basic authentication carrying the callback key which you registered, so that your application knows it’s not a spoof call and can react accordingly.
This is a standardized way to send credentials with Basic authentication. However, it can pose a security risk if the admin team does not rotate the callback key often, or it simply won’t work if your callback listener is hosted on a platform like Salesforce that doesn’t support Basic authentication method.
In order to mitigate this pain point, OneSpan Sign has introduced a new callback service which implements the Salesforce OAuth 2.0 refresh token flow. It’s now possible to set up a callback listener in Salesforce! This powerful callback mechanism significantly boost the potential for your Salesforce integration to monitor ongoing transaction status and download and store signed documents directly into Salesforce to name just a few uses.
In this blog, we will walk through the steps to register a connected app in Salesforce with OAuth settings enabled and then retrieve a refresh token for this connected app. Without further delay, let’s get started!
Register a Connected App in Salesforce
Salesforce community site has well-documented guides on how to register a connected app and to enable OAuth Settings for API integrations. In this section, we will highlight noteworthy points in the configuration process.
Step 1: Make sure your Salesforce Edition and User Permissions meet the requirements.
Step 2: Switch to Lightning Experience and navigate to “Setup”
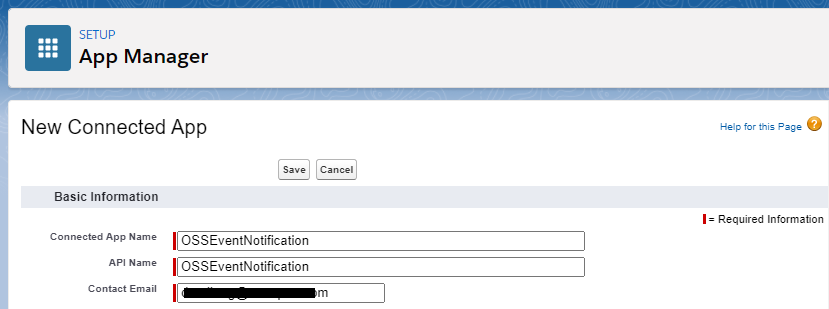
Step 3: Search by “App Manager” in the search bar and choose to create a “New Connected App”
Step 4: Supply basic information
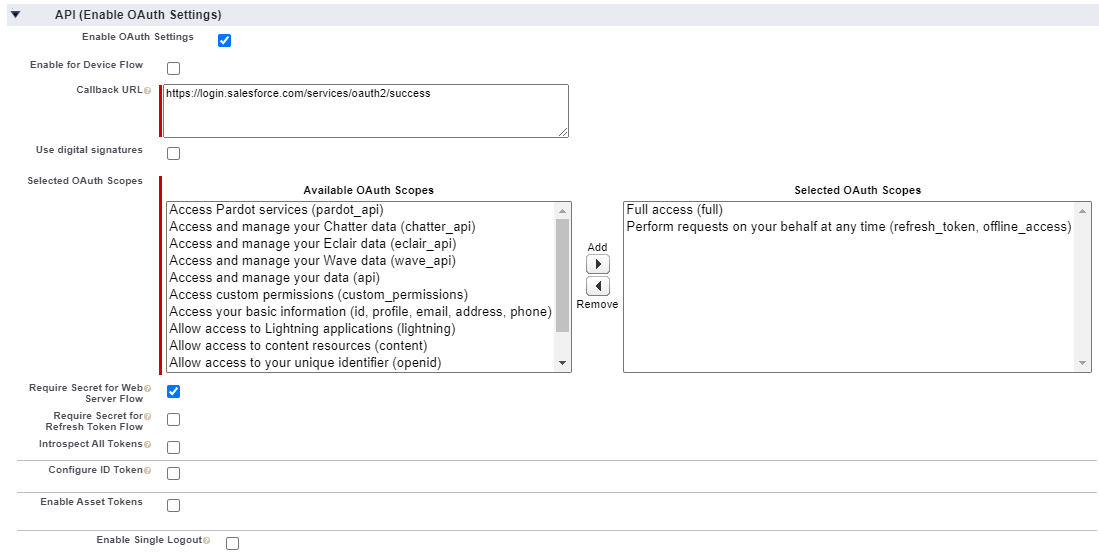
Step 5: Turn on the option “Enable OAuth Settings”
Step 6: Provide a callback URL. This is the link that Salesforce will call back to your application during OAuth.
This URL is normally a link within your salesforce domain. For example the lightning home page appears as such:
https://mydomain-dev-ed.lightning.force.com/lightning/page/home
Alternatively, simply include a generic success URL:
https://login.salesforce.com/services/oauth2/success
Step 7: In “Selected OAuth Scopes”, grant certain permissions to the connected app. In our example below, we simply allowed “Full access”. On top of that, you also need to explicitly request the refresh_token scope by adding the option “Perform requests on your behalf at any time (refresh_token, offline_access)”.
Step 8: Uncheck “Require Secret for Refresh Token Flow”, because you won’t supply your client secret to OneSpan Sign.
Save the configuration and wait a few minutes while Salesforce deploys the changes.
Retrieve a Refresh Token
OAuth authentication uses a short-lived access token to ensure a user or an API call has sufficient access to designated resources. When access tokens expire or became invalid, a refresh token allows the application to obtain a new access token without prompting the user. Generating and supplying OneSpan Sign with a refresh token is key for this flow.
Although there are other methods to retrieve the refresh token, we will demonstrate a working approach using the Salesforce OAuth 2.0 Web Server Flow.
Step 1: Build a URL using below template, and open the link in your browser:
https://login.salesforce.com/services/oauth2/authorize?client_id={client_id}&redirect_uri={callback_url}&response_type=code
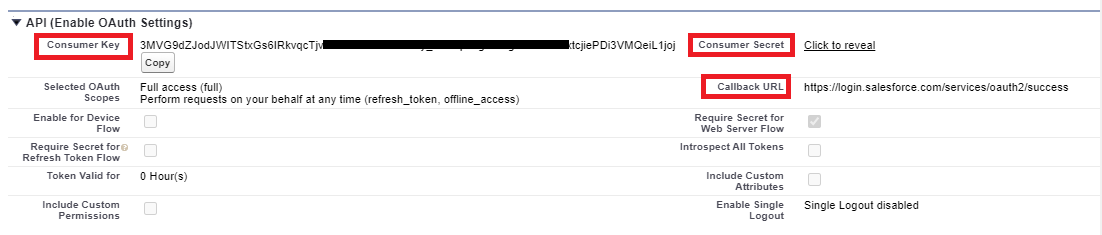
You will be able to find all the parameters in the connected app edit page if you:
- In lightning experience, Navigate to setup and search “App Manager”
- Find the connected app we just registered
- Expand the dropdown and choose “Edit” and then save without changing any settings
Step 2: This link will bring you to a web login flow. It requires you to grant access to the connected app.
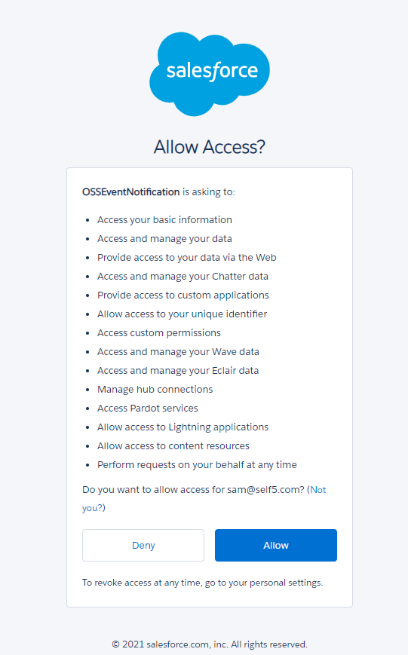
Once you have successfully granted access, it redirects to a link where you will find the authorization code appended to the URL.

Step 3: With the authorization code, build a second request using below template and open in the browser:
https://login.salesforce.com/services/oauth2/token?grant_type=authorization_code&code={authorization_code}&client_id={client_id}&client_secret={client_secret}&redirect_uri={callback_url}
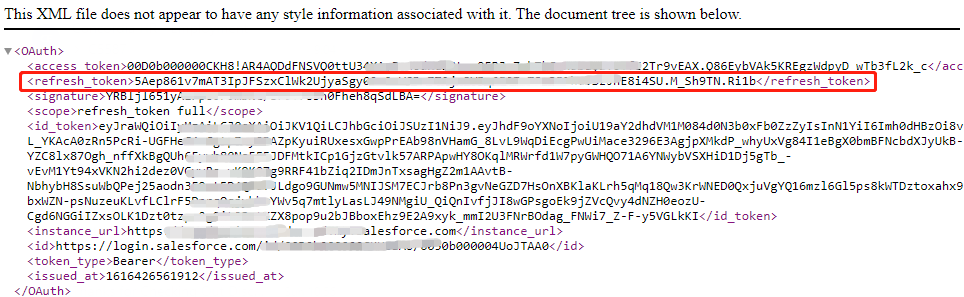
The link returns you a SOAP response, where you’ll find the refresh token together with an initial access token.
Looking Ahead to the Upcoming Installation
There it is. We’ve successfully created a connected app in Salesforce and retrieved a working refresh token. Under the default security policy, the refresh token will be valid until revoked. In next blog, we will start by changing these security policies to rotate the token periodically, then supply the refresh token to OneSpan Sign via API and finally set up a callback listener in Salesforce. Just stay tuned!
If you have any questions regarding this blog or anything else concerning the integration of OneSpan Sign into your application, visit the Developer Community Forums. Your feedback matters to us!

OneSpan Developer Community
Join the OneSpan Developer Community! Forums, blogs, documentation, SDK downloads, and more.
Join Today