OneSpan Sign Developers: Overview for New Signer Experience — Part 2

OneSpan Sign New Signer Experience offers an intuitive interface which accelerates the e-Signing process. It offers a professional web design that is responsive to all type of devices and screen sizes as well as full customization options, allowing you to personalize your own logo, colors, and UI messages.
Picking up where we left in the last blog, we will continue to introduce the transaction settings necessary to white label your e-signature process. Without further delay, let’s get started!
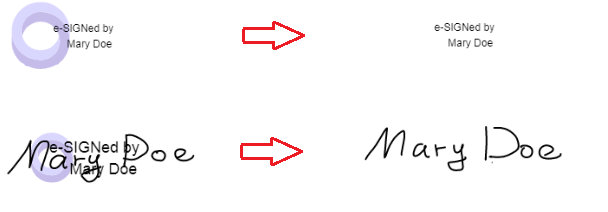
Signature Stamp
OneSpan Sign provides a wide range of options for signers to apply their signatures. Signers can use the default printed signature, a hand-drawn signature, or an uploaded image as their signature, and then use the signature across all their signing sessions. On top of these options, transaction senders can also determine whether the signature will be stamped with the OneSpan Sign logo and the “e-SIGNEed by” text in the finished document. Check below table to see how to define these settings:
Restful API | SDK Method | Description |
|---|---|---|
“settings” > “ceremony” > “hideWatermark” | withWatermark (default) / withoutWatermark | Defines whether the signed documents are stamped with the OneSpan Sign logo. |
“settings” > “ceremony” > “hideCaptureText” | withCaptureText (default) / withoutCaptureText | Defines whether the signed documents are stamped with the date, time, and signer’s name at each location they were signed. |
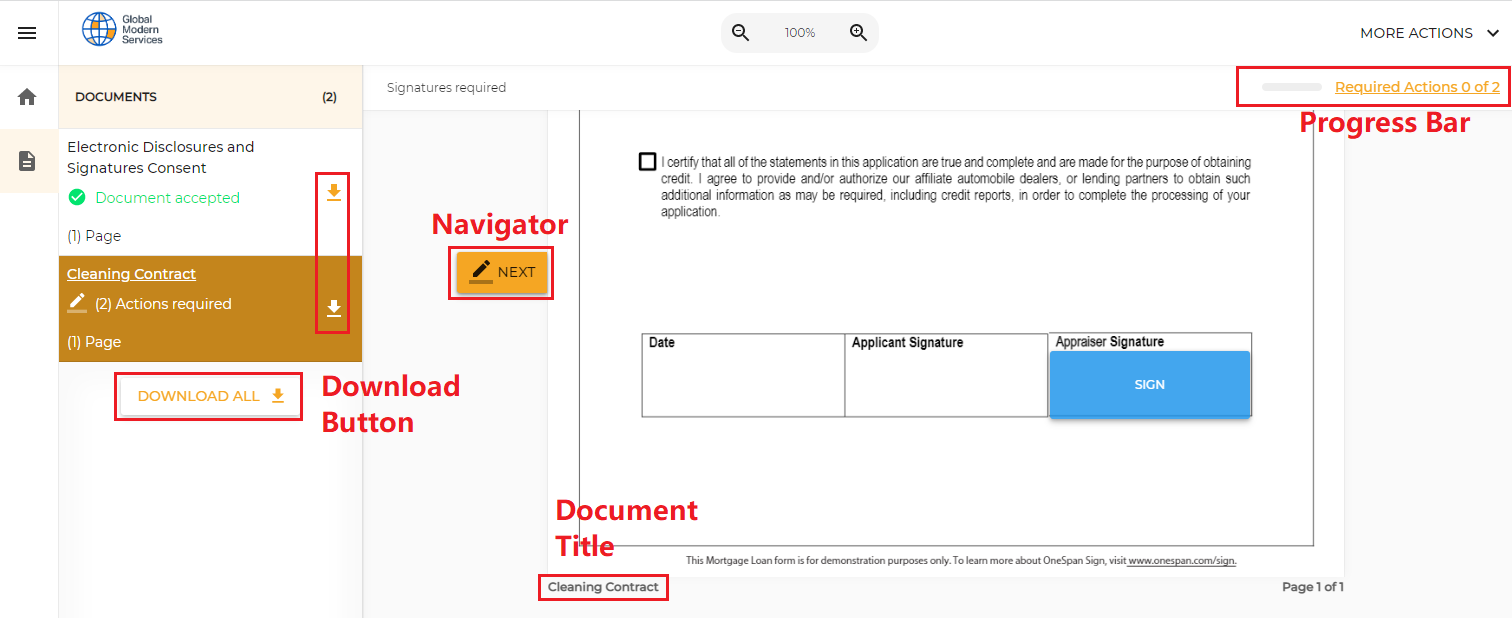
Layout Settings
The New Signer Experience also offers self-service branding options that give you the power to customize the signing experience for your signers. In addition to branding the signing experience with your logo, you can also customize the signing ceremony layouts by determining whether to show or hide the UI components below:
Restful API | SDK Method | Description |
|---|---|---|
“settings” > “ceremony” > “layout” > “navigator” | withNavigator (default) / withoutNavigator | Shows the Navigator. The Navigator directs the signer to the next available signature. |
“settings” > “ceremony” > “layout” > “header” > “titleBar” > “title” | withTitle (default) / withoutTitle | Shows the title |
“settings” > “ceremony” > “layout” > “header” > “titleBar” > “progressBar” | withProgressBar (default) / withoutProgressBar | Shows the progress bar. |
“settings” > “ceremony” > “layout” > “header” > “globalActions” > “download” | withGlobalDownloadButton (default) / withoutGlobalDownloadButton | Shows the Download button in the left menu as well as the thank you summary page. |
Other Features
As part of an integration, developers have flexible options to launch and present the New Signer Experience. The settings below could help improve the signer experience according to your preferences:
Restful API | SDK Method | Description |
|---|---|---|
“settings” > “ceremony” > “showNseLogoInIframe” | withShowNseLogoInIframe / withoutShowNseLogoInIframe (default) | When the NSE was presented in an iFrame, defines whether to display the logo |
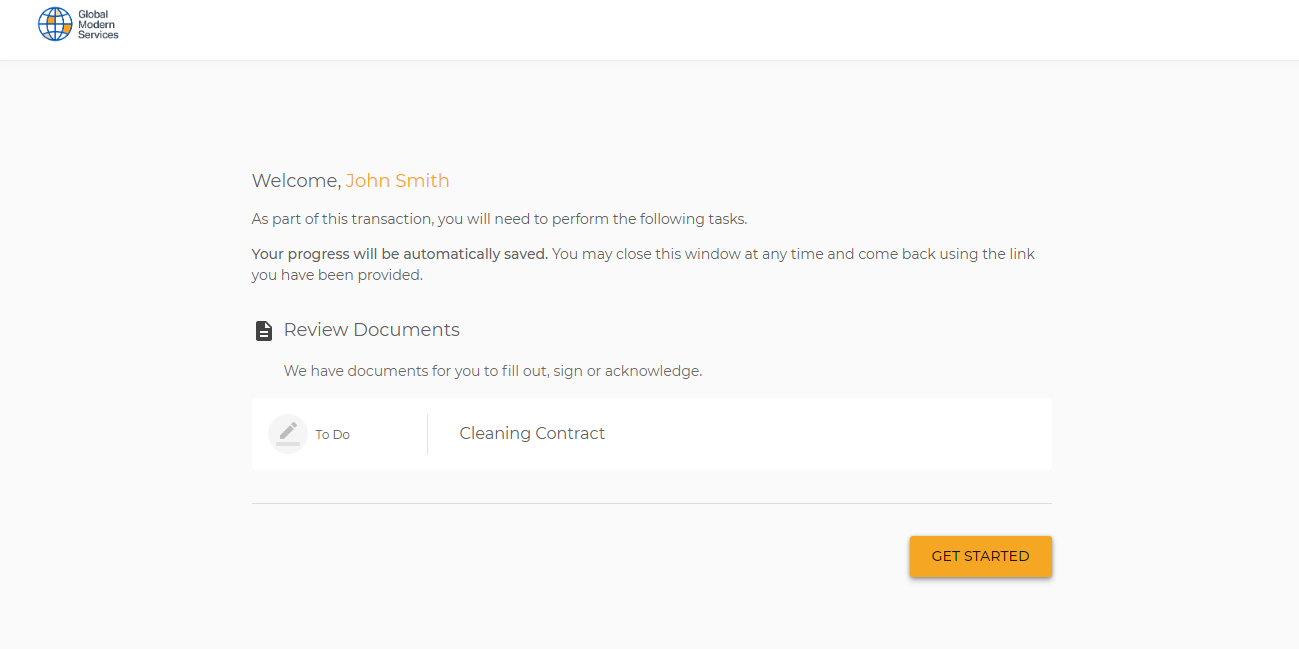
“settings” > “ceremony” > “showNseOverview” | withShowNseOverview / withoutShowNseOverview (default) | Before a signer can start to sign, determines whether to display an overview page |
“settings” > “ceremony” > “leftMenuExpand” | withLeftMenuExpand / withoutLeftMenuExpand (default) | Defines whether the left menu will be expanded by default |
We Appreciate Your Feedback
This concludes today’s blog. By now, we have walked through most of the transaction settings that can customize and tailor the signing experience to your need. If you have any questions regarding this blog or anything else concerning the integration of OneSpan Sign into your application, visit the Developer Community Forums. Your feedback matters to us!
