OneSpan Sign Release 11.33: Self-Serve Logo Customization

OneSpan Sign version 11.33 was recently deployed to the preview and sandbox environment. In this new version, we enabled a signer to remove a signature that has not yet been confirmed, enhanced the validation of the conditional fields and recorded the “Condition Logic” actions to the audit trail, extended our API and SDKs to customize the logo that is displayed in the new signing ceremony, and added several bug fixes. You can find the deployment dates for all our environments on our Trust Center page.
Among all these exciting updates, we will explain how to upload a signing ceremony logo for the New Signer Experience. Let’s get started!
New Signer Experience – Self Serve Logo Customization
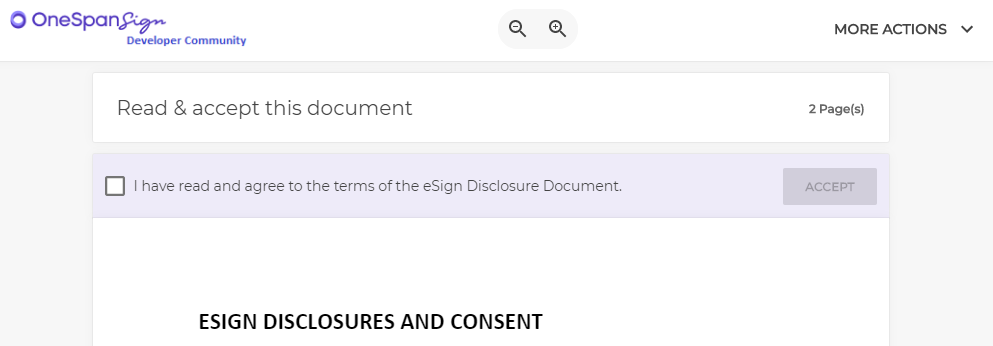
Being able to upload a customized logo that represents your organization is one of the most important options in terms of the signing ceremony. Since version 11.33, we are proud to empower you to upload the logo through the API and SDK. The screenshot below gives you a brief idea of how the logo is presented in then New Signer Experience.
Note:
1. If you are using the Classic Signing Ceremony, the changes mentioned in this blog will not affect your existing integration or end-user experience.
2. Set up logo from Sender UI will soon be available in a future release.
3. Instead of a package setting, the logo customization in the New Signer Experience is managed at the Account Level and is specified per language.
4. The logo in the New Signer Experience will be limited to 273x43 pixels. Larger images will be shrunk and auto-fitted to the area.
Customize through the API
There are two Restful APIs exposed to create, update, delete, and/or retrieve the configured logo customizations. To add new logo settings, the API is:
HTTP Request
POST /api/account/admin/signingLogos
HTTP Headers
Content-Type: application/json
Authorization: Basic api_key
Request Payload
[
  {
    "language": "en",
    "image": "data:image/jpeg;base64,/9j/4AAQSkkvkl8kv//9k="
  },
  {
    "language": "fr",
    "image": "data:image/jpeg;base64,/9j/4AAQSkkvkl8kv//9k="
  }
]
Note:
1. Supported language keys are: “en”, ”fr”, ”it”, ”ru”, ”es”, ”pt”, ”de”, ”nl”, ”da”, ”el”, ”zh-CN”, ”zh-TW”, ”ja”, ”ko“.
2. The “image” attribute will accept a base64 string that presents the image.
Similarly, when you want to update the existing settings or to add new settings for another language, you’d use the same API endpoint and include all the existing settings as the payload. Otherwise, the missing language nodes will be lost. This requires you to always make a retrieval call first and edit based on the response whenever you wish to update:
HTTP Request
GET /api/account/admin/signingLogos
HTTP Headers
Accept: application/json
Authorization: Basic api_key
Response Payload
[
    {
        "dirtyFields": [
            "image",
            "language"
        ],
        "language": "en",
        "image": "data:image/png;base64,/9j/4AAQSkkvkl8kv//9k="
    },
    {
        "dirtyFields": [
            "image",
            "language"
        ],
        "language": "fr",
        "image": "data:image/png;base64,/9j/4AAQSkkvkl8kv//9k="
    }
]
To revert to system default and remove all existing settings, simply pass in an empty array when updating:
HTTP Request
POST /api/account/admin/signingLogos
HTTP Headers
Content-Type: application/json
Authorization: Basic api_key
Request Payload
[]
Customize through the SDKs
The equivalent SDK code to create and to retrieve the logo settings looks like below:
Java SDK
         List<SigningLogo> signingLogos = new ArrayList< > ();
        SigningLogo signingLogoEn = SigningLogoBuilder.newSigningLogo()
                .withLanguage(Locale.ENGLISH)
                .withImage("data:image/png;base64,xxxuQmCC")
                .build();
        signingLogos.add(signingLogoEn);
        // Create signing logos
        eslClient.getSigningStyleService().saveSigningLogos(signingLogos);
        List<SigningLogo> createdSigningLogos = eslClient.getSigningStyleService().getSigningLogos();
.NET SDK
            List<SigningLogo> signingLogos = new List<SigningLogo> ();
            SigningLogo signingLogoEn = SigningLogoBuilder.NewSigningLogo ()
                    .WithLanguage ("en")
                    .WithImage ("data:image/png;base64,iVBORw0KGgoAAUEAALGPC")
                    .Build ();
            signingLogos.Add(signingLogoEn);
            eslClient.GetSigningStyleService ().SaveSigningLogos (signingLogos);
            List<SigningLogo> createdSigningLogos = eslClient.GetSigningStyleService ().GetSigningLogos ();
There it is. After reading through today’s blog, you have better idea how to upload a customized logo to your account and the necessary technical details involved.
If you have any questions regarding this blog or anything else concerning integrating OneSpan Sign into your application, visit the Developer Community Forums. Your feedback matters to us!

OneSpan Developer Community
Join the OneSpan Developer Community! Forums, blogs, documentation, SDK downloads, and more.
Join Today