OneSpan Sign for New Users: Check Package Status and Download Files (.NET SDK)

Last time, I showed you how to set up a C# project within Microsoft Visual Studio, to allow you to create and send a package using the OneSpan Sign .NET SDK. This week, I will cover some things you can do after sending the package, like:
- Checking the package/signing status
- Downloading the e-signed documents
- Downloading the evidence summary
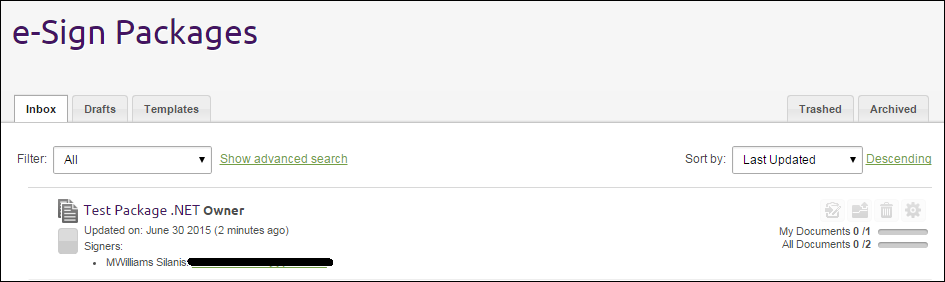
I will pick up right where I left off, in last week’s blog. If you followed along, you had just looked in your OneSpan Sign inbox to see that your document package was created and sent properly after executing the C# class built in the tutorial.
Configuration
Initial Setup
Create a new project and .cs file for this tutorial. I named my file, "CheckStatusAndDownload.cs". If you need help with this setup, visit my previous blog for further instructions.

The Beginner's Guide to Electronic Signatures
This essential briefing introduces important legal concepts and key considerations when creating digital business processes with e-signatures.
Download NowLocating the Package ID of your Existing Project
Since the package you are working with was created previously, we need to find the package ID for use in this project. If you select the project from the UI inbox, as seen above, the URL will have the package ID, like this:
https://sandbox.esignlive.com/packages/yourPackageID
In the C# class you created in the last blog, you will see you had access to this package ID when you created the package and used it to send the package. If you were creating a more complex application, you would likely store this package ID for use within other parts of your application, versus looking it up in your OneSpan Sign URLs.
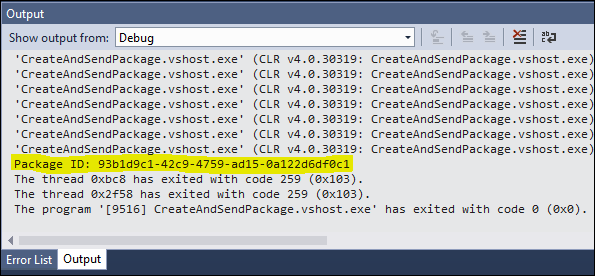
If you want to see this package ID coming from the C# class made in last blog’s tutorial, you could add the line, Debug.WriteLine("PackageId: " + packageId); after the line, PackageId packageId = eslClient.createPackage( superDuperPackage);. If you run that class again, you will now see the package ID printed to the output window in Visual Studio.
The Code
You are now ready to write the code in your C# class. Copy the following code into your "CheckStatusAndDownload.cs" file (or whatever you named it) that you created above.
using System;
using System.Diagnostics;
using Silanis.ESL.SDK;
using Silanis.ESL.SDK.Builder;
using System.IO;

namespace CheckStatusAndDownloadDocuments
{
    class CheckStatusAndDownloadDocuments
    {
        private static String apiUrl = "https://sandbox.esignlive.com/api";
        // USE https://apps.e-signlive.com/api FOR PRODUCTION
        private static String apiKey = "YOUR_API_KEY";

        public static void Main(string[] args)
        {
            EslClient eslClient = new EslClient(apiKey, apiUrl);

            PackageId packageId = new PackageId("YOUR_PACKAGE_ID");
            DocumentPackage sentPackage = eslClient.GetPackage(packageId);

            DocumentPackageStatus packageStatus = sentPackage.Status;
            Debug.WriteLine("Package Status: " + packageStatus);

            SigningStatus signingStatus = eslClient
                            .GetSigningStatus(packageId,null,null);
            Debug.WriteLine("Signing Status: " + signingStatus);

            if (signingStatus.ToString() == "SIGNING_PENDING")
            {
                Debug.WriteLine("Cannot Download: Signing not complete");
            }
            else
            {
                byte[] zipContent = eslClient.DownloadZippedDocuments(packageId);
                File.WriteAllBytes(Directory.GetCurrentDirectory()
                                    + "/package-documents.zip", zipContent);
                Debug.WriteLine("Document Zip File Downloaded");

                byte[] evidenceContent = eslClient
                                    .DownloadEvidenceSummary(packageId);
                File.WriteAllBytes(Directory.GetCurrentDirectory()
                                    + "/evidence-summary.pdf", evidenceContent);
                Debug.WriteLine("Evidence Summary Downloaded");
            }
        }
    }
}
Now, let’s take a closer look at the code. Just like last time, the first few lines define your connection information for OneSpan Sign.
Access the Package
private static String apiUrl = "https://sandbox.esignlive.com/api";
// USE https://apps.e-signlive.com/api FOR PRODUCTION
private static String apiKey = "YOUR_API_KEY";
Be sure to put your API_KEY in place of the placeholder.
Again, because this is a very simple example, the rest is done within the main method. The first line inside the main method is where you connect to OneSpan Sign using your connection info, from above.
EslClient eslClient = new EslClient(apiKey, apiUrl);
Next, a PackageId object is created using the Package ID you got from your URL (or package creation C# class), above. Then, you will use that PackageId object to grab your previously sent package from the OneSpan Sign client.
PackageId packageId = new PackageId("YOUR_PACKAGE_ID");
DocumentPackage sentPackage = eslClient.GetPackage(packageId);
Check the Status
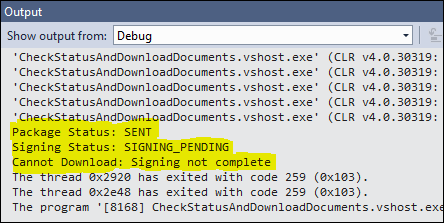
Now that you have access to the document package, you can check uour package to see what the package status is. The possible values are ARCHIVED, COMPLETED, DECLINED, DRAFT, EXPIRED, OPTED_OUT, and SENT. Go ahead and print the status so we can see it in the console when we execute our class.
DocumentPackageStatus packageStatus = sentPackage.Status;
Debug.WriteLine("Package Status: " + packageStatus);
Next, check the signing status of the package. The possible values for this one are ARCHIVED, CANCELED, COMPLETE, DECLINED, EXPIRED, INACTIVE, OPTED_OUT, COMPLETED, and SIGNING_PENDING. Write this to the Debug output window, as well.
SigningStatus signingStatus = eslClient.GetSigningStatus(packageId,null,null);
Debug.WriteLine("Signing Status: " + signingStatus);
Download the Files
For the last part, you will check to see if the package is complete. If it is, the zip file of all documents will be downloaded, as well as the evidence summary. After each step, write to the Debug output so that you know the event happened when you test the class in the next step.
if (signingStatus.ToString() == "SIGNING_PENDING")
{
   Debug.WriteLine("Cannot Download: Signing not complete");
}
else
{
   byte[] zipContent = eslClient.DownloadZippedDocuments(packageId);
   File.WriteAllBytes(Directory.GetCurrentDirectory()
                       + "/package-documents.zip", zipContent);
   Debug.WriteLine("Document Zip File Downloaded");

   byte[] evidenceContent = eslClient.DownloadEvidenceSummary(packageId);
   File.WriteAllBytes(Directory.GetCurrentDirectory()
                       + "/evidence-summary.pdf", evidenceContent);
   Debug.WriteLine("Evidence Summary Downloaded");
}
Running the Code
With your simple class completed, it is time to execute the C# class. Run the class from the toolbar by clicking the Start button.
If you have not yet signed your package, your Output should look like the following:
After signing your package, you will get the following in your Output window:
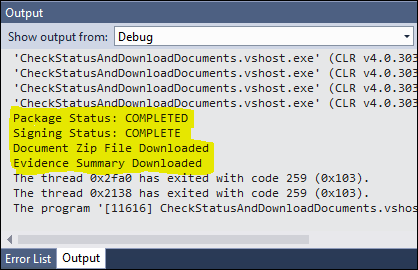
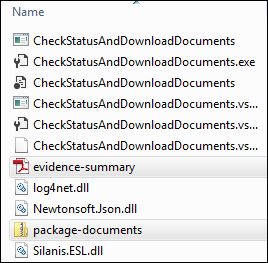
If you now browse to the location where you saved your files (if you used the code above and are in Debug mode, they’ll be in the Debug folder inside your project, in your file system), you will see that your files were successfully downloaded.
There you have it. You have successfully checked the status of and downloaded the files from your package.
Thanks for reading! If you have any questions or features you would like to see covered from a new user’s perspective, feel free to post in the comments section. Links to all of the posts from this blog series can be found, below.
– Michael Williams
Twitter | Facebook | LinkedIn
eSignLive for New Users Blog Series
- Create and Send a Package Using the UI
- You Sent a Package, What Now? (UI)
- Create and Send a Package with the Java SDK
- Check Package Status and Download Files with the Java SDK
- Create and Send a Package with the .NET SDK
- Check Package Status and Download Files with the .NET SDK
- Create and Send a Package using REST with C#
- Check Package Status and Download Files using REST with C#
- Create and Send a Package using REST with Java
- Check Package Status and Download Files using REST with Java
