How-to guide: Inserting a signature in Microsoft Word

In this article, we’ll cover the ins and outs of inserting signatures in Word documents. To learn how to insert signatures in Google Docs, see this entry in our series of eSignature tutorials or sign up for a free trial of OneSpan Sign.
We’ll start by describing the process for manually inserting a signature image, and then get into methods that provide more electronic signature security assurances, which is what businesses need for customer-facing transactions.
Why would you need to insert a signature in Word?
There are a host of use cases for inserting a signature in a Microsoft Office Word document. The security requirements for each can be very different.
For example, if you are simply looking to add a personal touch to digital documents such as company newsletters and professional letters, or quickly signing and sending back documents received via email, you likely will not need to focus on high-assurance security features.
However, if you are using MS Word docs for sensitive or high-value contracts, you will want the kind of security provided by leveraging an eSignature solution such as OneSpan Sign to sign your Word docs.
In both cases, inserting a signature in Word eliminates the need for printing and scanning a piece of paper for a physical signature. In the case of complex workflows, this streamlines approval processes and eliminates errors like missing signatures.

eBook
AI Companion Guide for Evaluating eSignatures
Learn how to use AI effectively in your eSignature evaluation—and strengthen it with the TRUST Framework to make decisions you can defend.
Download nowCreating your digital signature in Microsoft Word
First, let's look at image-based signatures, how you can create them, and how to insert them into your Word documents.
Scanning, creating, or drawing an image of your signature
To create an image of your signature, you can scan your signature, take a photo, or use Word’s drawing tool.
First, we’ll provide an overview of Word’s drawing tool. How you use this tool depends on your version of Microsoft Office. The following instructions are applicable if you are using Microsoft 365. For other versions of Microsoft Office, consult Microsoft’s support documentation.
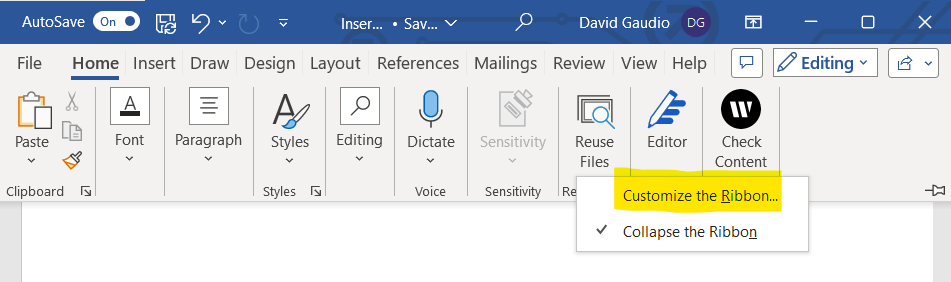
To access the drawing tool, locate the Draw tab on the Ribbon. If it is not there, you can add it. Right-click the Ribbon and select Customize the Ribbon... Locate the Draw command, select it, and click Add >>. Follow the in-app instructions to complete the process.
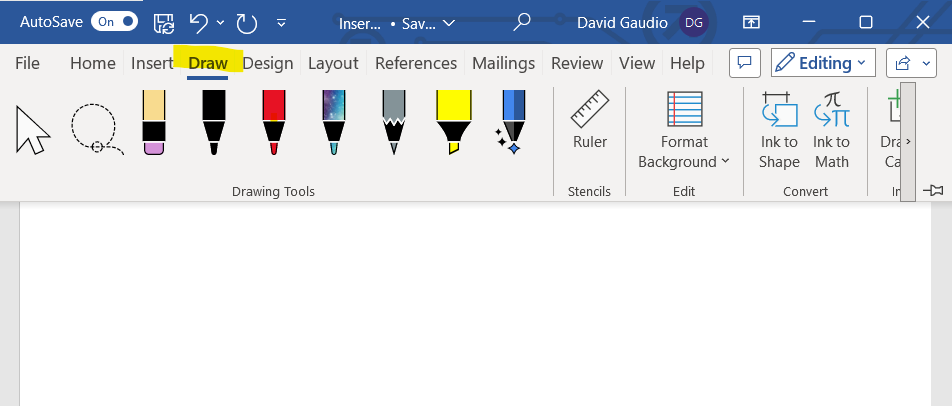
Once the Draw tab is available on your menu bar, select it, and choose your writing implement from the Drawing Tools group. Then, if Draw mode is not enabled, click to enable the Draw Input Mode. Depending on your device accessories, you can now use your mouse, touchpad, stylus, or finger to draw your signature. Click the mouse cursor icon to exit Draw mode. Position your signature on the page by selecting it and using Word’s wrapping options from the contextual menu.
If you are going to scan or take a photo of your signature, readability is key. Make sure the signature is distinct and clear, and the photo or scan is taken using high-resolution settings.
Saving the image file as a different format
After creating a photo or scan of your handwritten signature, the next step is to make sure it is a usable file format for signatures, e.g., .bmp or .jpg. You can also save as a .png or .gif file, as both of these picture formats support transparent backgrounds, which can be useful if your Word document background has a fill pattern or color. Note that it is not possible to import .eps files into Office 365 documents.
Send the photo or scan to the device on which you are running Microsoft Word.
Inserting the image into Microsoft Word
After creating or scanning an image of your signature, inserting the image into Microsoft Word is straightforward:
- For Windows devices, select Insert > Pictures > This Device

- For Mac devices, first click the location in your document where you want to insert a picture. Then on the Insert tab, click Pictures and locate your image in iPhoto, Photo Booth, or your computer's file structure.
In both cases, to resize the signature image, select the image and use the resize handles. You also have various options for cropping the image, and wrapping text in relation to the image.
Creating a signature line in Word
In Word, you can create the proverbial dotted line for signers to sign on.
- Locate the Signature Line command in the Insert menu of the Ribbon. This will enable you to insert a signature line with an X indicating where signers should sign.

- Click the location in the document where you’d like to insert the signature line. Then, click Insert > Signature Line ...
- In the Signature Setup pop-up, complete the optional fields at your discretion (you can add name, job title, email address, phone number, additional instructions …), and click OK.
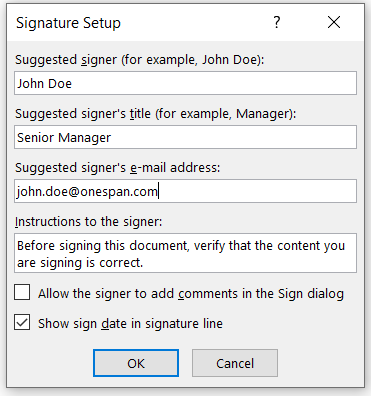
The signature line now appears in your Word doc, along with the text you have added in the previous step.
Managing your signature in Microsoft Word
There are numerous options for managing your signature in Word documents, including the ability to add multiple signatures and automatically insert your signature. We’ll provide an overview of each.
Adding multiple signatures in Word
To add multiple signatures in a Microsoft Word document, simply repeat the instructions above for creating a signature line in Word, as many times as needed.
Note that this does not allow you to enforce a specific signing sequence or workflow. More on that below (see: Mass-signing contracts can be painful).
Automatically inserting your signature in documents
To easily sign Word documents, you can automatically insert signature lines, your signature, or both, using the following method:
Insert a signature line using the Microsoft Office Signature Line command in the Insert menu of the Ribbon. Add any signature block/text group you want to associate with the signature line.

If you want to be able to automatically insert your actual signature later on, insert your signature now, using a signature image or Word’s drawing tool.

- Highlight the signature line (as well as any typed text and your signature, if applicable).
- In the main menu, click File > Options > Proofing > AutoCorrect Options.
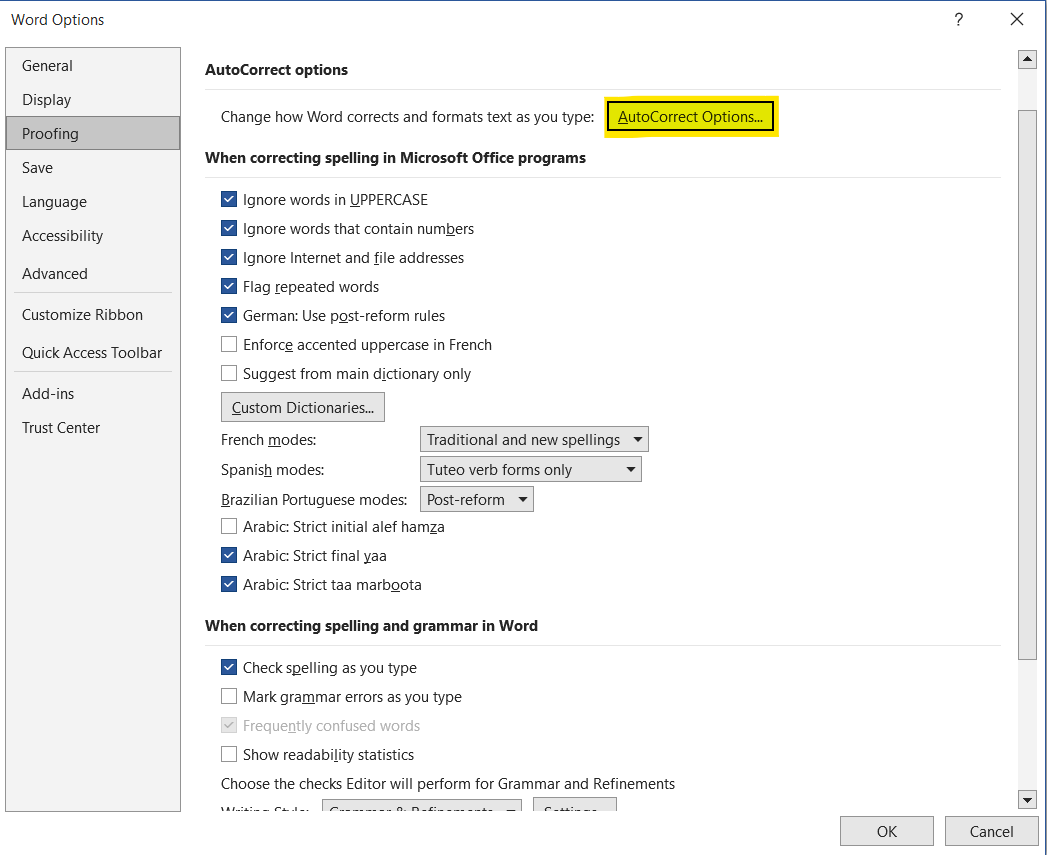
In the Replace field, type the characters you would like to use to trigger the automatic insertion of your signature (for example, “sig1”). Save selection by clicking Add.
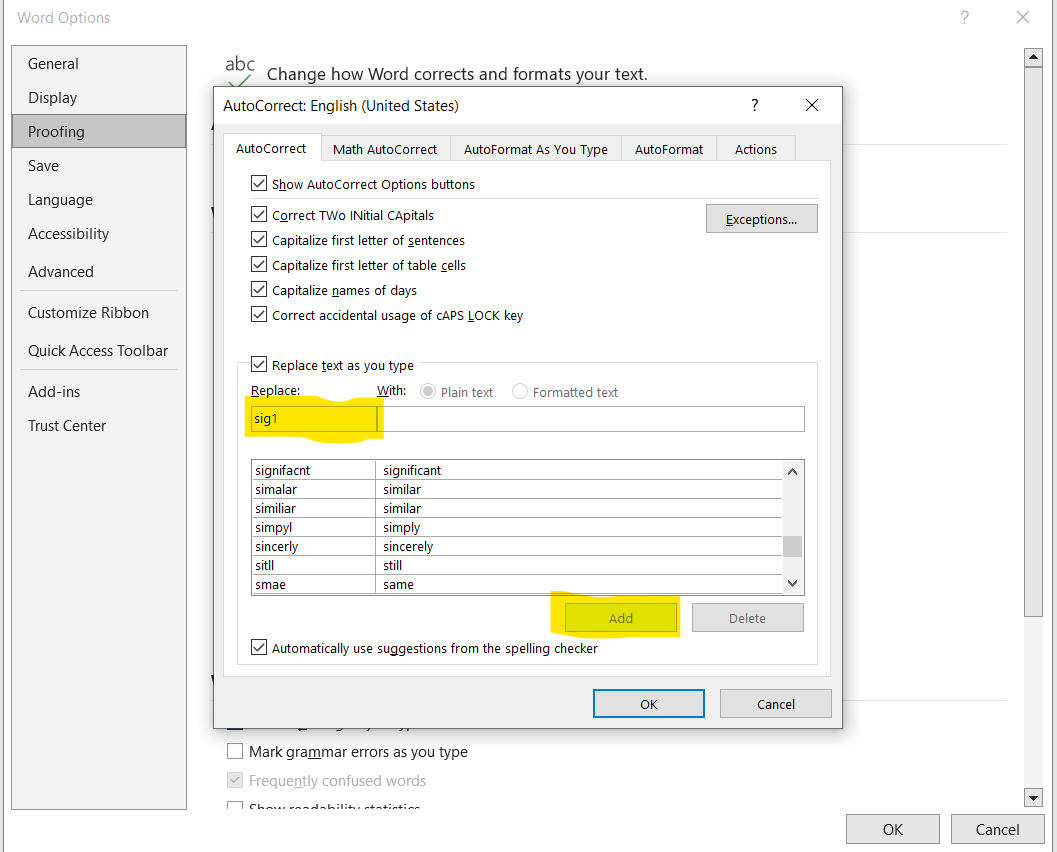
- Press OK to accept this change, and then press OK to exit the Word Options window.
- Now, when you type your trigger characters and press Enter, your signature will automatically appear.
There is an alternate method involving the use of autotext in conjunction with the Quick Part gallery, but your success rate will be variable according to which version of Word you are using, as well as how your network handles Word templates. For this reason, we recommend using the method above.
Limitations of signing a contract in Microsoft Word
As a tool for signing contracts and other sensitive information, Microsoft Word has limitations. We’ll provide an overview of some of the core eSigning functionality that’s missing.
Mass-signing contracts can be painful
There are times when a signer will need to sign multiple sections of a single document, or, alternatively, sign many documents at once. Without bulk or mass-signing capabilities, this can be time-consuming. Word does not provide these capabilities.
If you are using Word to sign contracts, and are looking for mass-signing features, you will need to use a dedicated eSignature solution such as OneSpan Sign, which can incorporate the use of Word documents, while supplying powerful capabilities for signing all required signatures at once instead of navigating through documents successively.
Keeping track of all signed documents: Not a Word feature
For complex agreements, it can be important to track documents as the agreement is being navigated. It is certainly essential to be able to store signed documents in a secure repository once the agreement has been concluded.
Microsoft Word provides neither of these features, nor is it intended to, as there are other tools within the Office suite that are designed for document tracking and storage.
Enterprise-level eSgn software such as OneSpan Sign will provide this functionality.
No advanced electronic signature functionality
The fact is, for advanced eSigning functionality, you will need to deploy a dedicated electronic signature solution. This will provide you with advanced features that Microsoft Word lacks, including:
- support for mobile-ready, intelligent guided forms
- customized eSigning workflows, via pre-set signing orders (in sequence or in parallel), conditional fields, and more
- automated email reminders and expirations for signers to complete the signing process on time, so signing requests don’t suffer from in-box burial
- robust, flexible identity verification and authentication options
- co-browsing
- centralized administration and reporting
If you need to stick to Microsoft Word, you can use OneSpan Sign’s Print Driver, to prepare any Word document for eSigning, and ‘print’ to OneSpan Sign directly, with no coding required.
Are signatures in Word documents legally binding?
Are signatures in Word documents legally binding? The short answer is yes, they are 100% legally binding, provided they meet certain requirements for authenticity, integrity, and non-repudiation.
The more complete answer depends on the nature of the agreement and the effective jurisdiction. In US federal law, electronic signatures are regulated by the Electronic Signatures in Global and National Commerce Act (ESIGN Act) and the Uniform Electronic Transactions Act (UETA).
eSignature solutions should address requirements such as support for multiple signature methods, verifying the identity of unknown individuals, authenticating customers with established identities, detailed audit trails, and compliance with applicable eSignature regulations around the world.
For instance, the EU’s eIDAS regulation provides one of the most comprehensive eSignature frameworks in the world to ensure a high degree of identity assurance during the eSign process.
The OneSpan Sign eSignature platform is designed to meet these requirements, making it easy for organizations to capture legally binding signatures that are valid in countries with enacted eSignature laws.
Using OneSpan to create and manage signatures
There are numerous advantages to using an enterprise-grade eSignature solution such as OneSpan Sign to secure and streamline the digital agreements that are the lifeblood of your business. We’ll examine the benefits and practices to follow for best results.
Benefits of using OneSpan for signatures
OneSpan Sign is designed to reduce errors and make signing processes more efficient. Here are the top benefits of using OneSpan Sign:
- White-labeling: Unlike most eSignature solutions, OneSpan Sign allows you to put your brand front and center to optimize the signing experience for your clients, and reduce phishing risks.
- Quick start: OneSpan Sign’s open API and fully supported SDKs enable easy integration of eSigning and workflow capabilities into your app or website. OneSpan also has numerous pre-built eSignature integrations with common business applications.
- Improved compliance: Seamlessly validate the authenticity of signed documents through one-click verification, accompanied by detailed audit trails.
- Robust identity assurance: Access a diverse array of identity verification and authentication methods to ensure that signers are who they claim to be before granting access to the documents.
- Advanced security: Safeguard your users and electronic files from potential fraud by employing digital signature encryption.
Best practices for setting up and managing digital signatures with OneSpan
eSignature technology goes beyond capture of consent. With secure eSignature solutions, you can streamline agreement workflows, ensure audit trails for enforceability, and collect real-time signature submissions, among other benefits.
To fully leverage these advantages, we recommend following a best-practice workflow when setting up and managing eSignatures with OneSpan Sign:
- Grant signers access to the documents.
- Authenticate signers to ensure their identity.
- Present the document for review and signing.
- Capture relevant data from participants during the signing process.
- Offer the ability to include additional documents in the transaction.
- Obtain consent through the act of signing.
- Deliver the signed documents to all involved parties.
By adhering to this well-structured approach, you can harness the true potential of e-signatures with OneSpan Sign.

Free trial
Try OneSpan Sign for free for 30 days
See how easy it is to securely create, send, and sign digital agreements.
Try now