Bulk Send
Automate the signing process for transactions that involve many recipients
Step-by-step Instructions
Step-by-step Instructions
1) Create a template of a document you frequently send out for signature such as a non-disclosure form
2) From the Dashboard, click the ‘New Transaction’ button
3) Enter a name for your transaction. Next, select the template of the document you want to send out for signature.
4) Now it’s time to upload your .CSV file with the names of recipients who need to sign your document. Click ‘Send’.
5) Your transaction is sent to your recipients. Each recipient will receive an email indicating that they need to sign your document. Once signed, you’ll receive a unique copy of the document from each of your recipients.
FAQ Questions
Is Bulk Send included with my OneSpan Sign account?
Bulk Send is available as an add-on feature for OneSpan Sign. Contact your customer success representative to learn more about Bulk Send.
What’s the difference between Bulk Send and Fast Track?
Bulk Send and Fast Track fulfill the same goal of automating the e-signature process by shortening the time and manual work to send documents to a large volume of recipients for signature. Both features leverage template-based transactions in OneSpan Sign.
The main difference between these two features is how the documents are delivered to your recipients. Fast Track lets you generate and send transactions for signature on-demand via a single URL. You can distribute the URL to a large number of recipients or embed the URL into your website or portal to automate the e-signing process – with zero programming or integration required. Bulk Send on the other hand lets you upload a list of the intended recipients and send the documents in your transaction for signature directly from the OneSpan Sign interface. What’s more, you also have the option to validate your signers’ identity using authentication methods such as Q&A or SMS.
Will I get individually signed documents for each of my recipients?
Yes. Each recipient in the .CSV file will receive his or her own document to sign. Once the transaction is complete, a separate e-signed document will be generated for each recipient.
Can I assign different authentication methods for each of my recipients?
Yes. In your .CSV file, the value assigned to “AUTH_TYPE” must be either NONE, CHALLENGE (Q&A) or SMS (SMS passcode) to indicate your desired authentication method. Refer the online documentation for more information on how to set up authentication methods for bulk send transactions.
Access Delegation
Grant others in your organization access to your OneSpan Sign account while you’re away
Step-by-step Instructions
Step-by-step Instructions
1) From the Dashboard, go to your account details section and select ‘Admin’. Then choose ‘Senders’ from the left navigation bar. Here you will find a list of your colleagues who use OneSpan Sign in your organization.
2) Access your account details in the top menu. Select ‘My Account’ and then choose ‘Access Delegation from the left navigation bar. This screen shows the list of colleagues to choose from to delegate the authority to manage your OneSpan Sign account. To add a colleague, simply click the ‘Add Delegate’ field and select the person you want to grant access to your OneSpan Sign account. In this example, we’ll grant Robert Ray access to your OneSpan Sign account. Click ‘Save’.
3) Robert Ray now has access to your OneSpan Sign account. Within her account, he clicks the ‘Manage delegation’ icon found at the top right-hand side. In the ‘Manage Delegation’ dialog box, she selects your name and then clicks ‘Start Managing’.
4) As your delegate, Robert Ray can send and sign transactions on your behalf. She also has access to your transactions and templates.
FAQ Questions
Is Access Delegation included with my OneSpan Sign account?
Yes it is! All you need to do is contact our support team to enable this feature in your account.
Can I delegate authority to my OneSpan Sign account to more than one person?
Yes, you can delegate authority to all of the Senders your Administrator included in your organization’s OneSpan Sign account. Contact your OneSpan Sign Administrator for more information.
Is there a maximum amount of users I can delegate access to?
This depends on how many Senders are included with your OneSpan Sign subscription. As an example, if your subscription includes 10 senders per account, you will be able to delegate access to all 10 senders.
I can’t find the user I want to delegate access to. What do I do?
To add a delegate, the user has to be a sender in your organization’s account. Contact your OneSpan Sign admin to verify if the appointed delegate is a sender.
If my appointed delegate signs a document, will their name appear as the owner of the transaction?
You own all transactions sent and signed by your delegate. This means your name will show up as the sender and/or signer of the transaction.
If my appointed delegate signs a document, who’s signature will appear on the e-signed document?
Your signature will appear on the e-signed document since your appointed delegate is e-signing from your account. The Evidence Summary Report however will show that you appointed a delegate to e-sign on your behalf.
Can I delegate access programmatically through the OneSpan Sign API/SDKs?
Absolutely. Sample code is available in the OneSpan Sign Integrator’s Guide.
Document Visibility
Control who can view and sign documents in a transaction
Step-by-step Instructions
Step-by-step Instructions
Let’s take a closer look at how to use the Document Visibility feature in this scenario.
In this example, we’ll show you how Paul, HR Director, sends documents for signing to a hiring manager (Charles) and new employee (Robert). Paul includes an HR Contract that must be viewed and signed by both hiring manager and new employee. In addition, the transaction also contains a Salary Deposit Request form to be viewed and signed only by the new employee.
1) First, make sure all of your documents and recipients are added to the transaction. In this example, Charles is the hiring manager and Robert is the new employee. Once your documents and recipients are in place, click ‘Next’ to prepare your document for signature.
2) Add your signature blocks to the documents. Once all signature blocks have been added, let’s use the document visibility feature to designate which recipients can view and sign the documents in this transaction. Click the ‘eye’ icon.
3) The Document Visibility table opens showing which documents are visible or hidden for each recipient. Simply tick off which documents need to be viewed and signed by your recipients. In this example, Charles, the hiring manager can only view and sign the HR Contract. Robert, the new employee can view and sign the HR Contract and the Salary Deposit Request. Click ‘Save’.
4) Your transaction is ready to send. Click ‘Send to Sign’ to route your document for signing.
5) Once you’ve sent the transaction, your recipients will receive an email asking them to view and e-sign the required documents in the transaction.
FAQ Questions
Is Document Visibility included with my OneSpan Sign account?
Yes! The Document Visibility feature is available with all OneSpan Sign plans at no extra charge. Contact our support team if the feature is not enabled in your account.
Can I use this feature in my OneSpan Sign Templates?
Yes! The process for using Document Visibility in a template is similar to the normal process for using this feature in a regular transaction.Start by creating a new template. Enter a name, add your documents and signer placeholders to your transaction. Next, add your signature blocks to the documents. Once all signature blocks have been added, click the ‘eye’ icon to designate which signer placeholder can view and sign the document in the transaction. Click ‘Done’.To use the template, simply access it from the Templates section. Replace the signer placeholders with the recipients you want to send the transaction to, then click ‘Send to Sign’.
Can my recipients download all of the documents in the transaction?
No, your recipients can only download the documents they were able to view and sign in the transaction. For example, if Recipient A has access to all documents in the transaction, he/she can download all of the documents. On the other hand, if Recipient B only has access to 2 out of 3 documents in the transaction, he/she can only download 2 of the documents from the transaction.
Can I leverage this feature programmatically via the OneSpan Sign API/SDKs?
Absolutely. Sample code is available in the OneSpan Sign Integrator’s Guide.
Fast Track
Automate e-signature workflows by distributing documents for signature using a single URL
Step-by-step Instructions
Signing URL – obtain signatures from recipients that are not known
1) To get started, select a template from your template library. In this example, we’ll use a Volunteer Sign-Up Form that we previously created.
2) In the ‘Actions’ section, click the ellipses and select ‘Fast Track URLs’.
3) The Fast Track dialog box will appear.
4) You have two options to choose from – The Signing URL and Sending URL. Let’s cover both of these scenarios in detail.
The Signing URL is ideal to use when your transaction includes only one signer. What’s more, the Signing URL can be embedded into your website to obtain signatures from multiple recipients easily – with zero programming or integration work.
Simply copy and paste the Signing URL link of the Volunteer Sign-Up Form and include it in an email to your desired recipients.
5) Your Recipients then click the URL and are directed to a forms-based web page prompting them to to enter their information.
6) Once they submit the required info, they are directed to the signing experience. They can review the documents, complete the necessary form fields and then electronically sign.
Sending URL – obtain signatures from recipients that are known
7) In the second scenario, let’s use the Sending URL in Fast Track. The Sending URL is ideal to use when your transaction includes multiple signers. In the following example, we’ll show you how a Real Estate agent can use Fast Track with two clients required to co-sign an Agency Disclosure Form

8) The Real Estate agent simply completes the forms-based web page with the required signer information. He then submits the information. The transaction is immediately sent to the signers, inviting them to e-sign the Agency Disclosure Form.
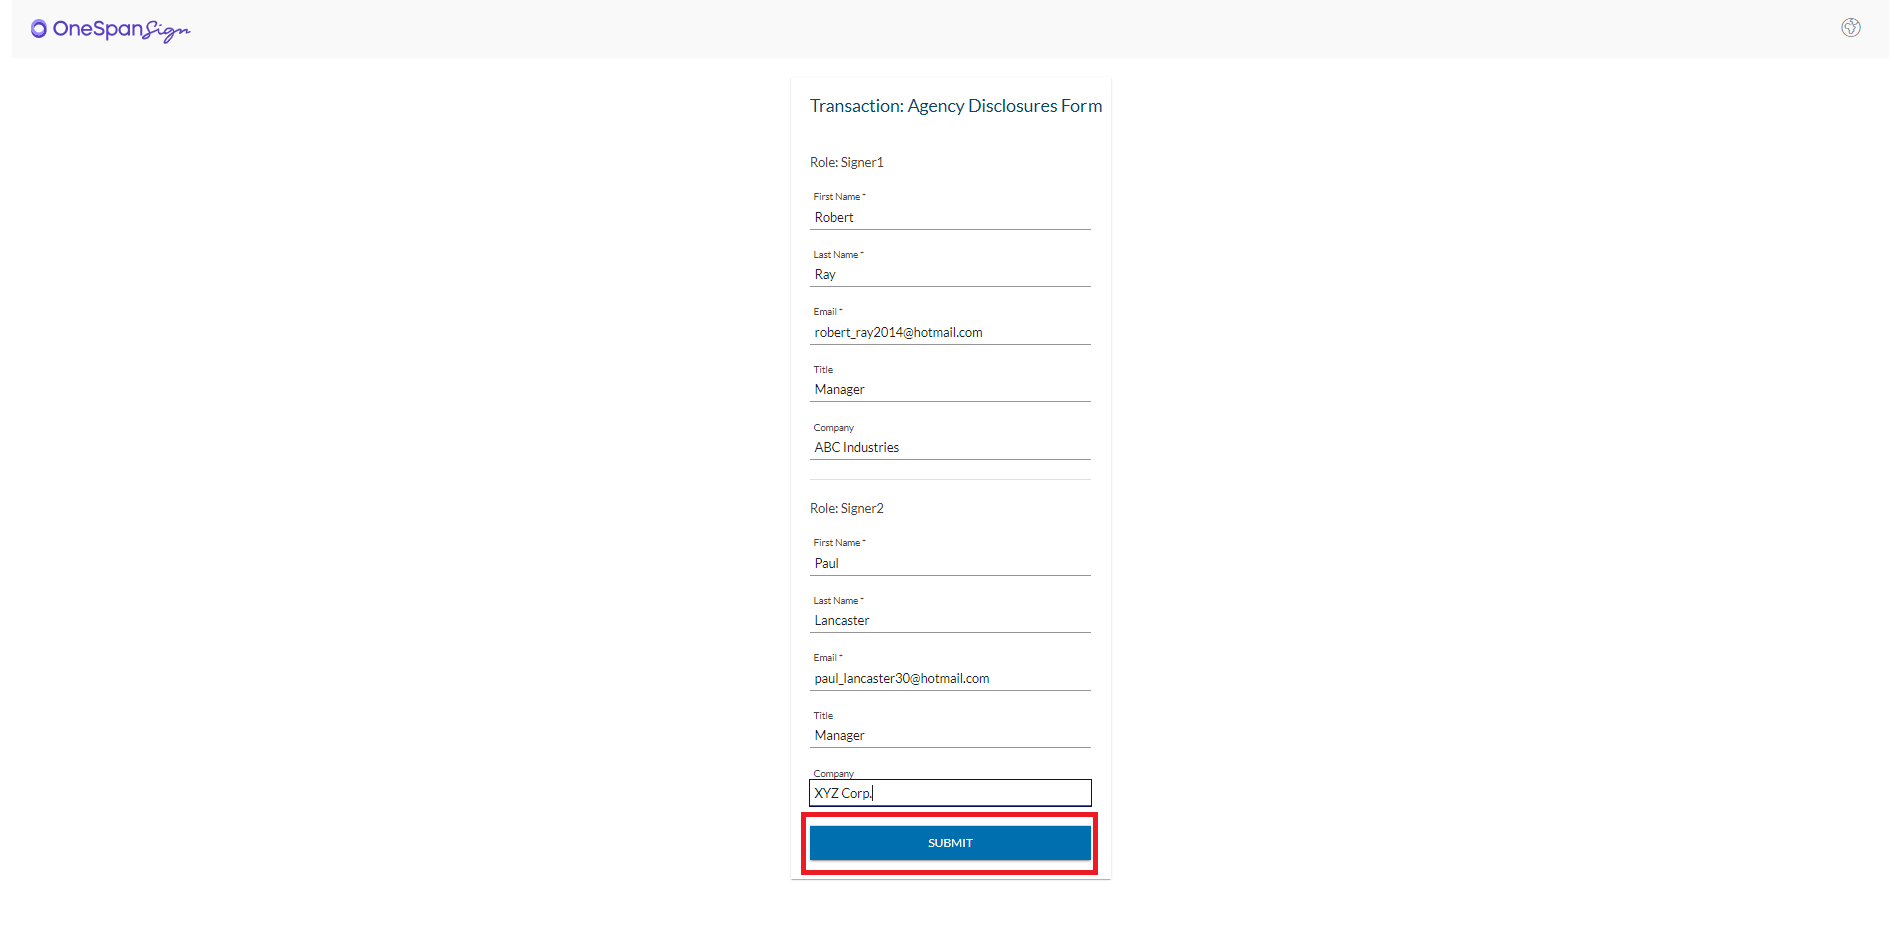
9) The recipients will receive an email invitation to access the documents to sign. They can review the documents and then e-sign.
Sending URL – obtain signatures from recipients that are known
7) In the second scenario, let’s use the Sending URL in Fast Track. The Sending URL is ideal to use when your transaction includes multiple signers. In the following example, we’ll show you how a Real Estate agent can use Fast Track with two clients required to co-sign an Agency Disclosure Form
8) The Real Estate agent simply completes the forms-based web page with the required signer information. He then submits the information. The transaction is immediately sent to the signers, inviting them to e-sign the Agency Disclosure Form.
9) The recipients will receive an email invitation to access the documents to sign. They can review the documents and then e-sign.
FAQ Questions
Is Fast Track included with my OneSpan Sign account?
Fast Track is available as an add-on feature for OneSpan Sign. Contact your customer success representative to learn more about Fast Track.
What’s the difference between Fast Track and Bulk Send?
Bulk Send and Fast Track fulfill the same goal of automating the e-signature process by shortening the time and manual work to send documents to a large volume of recipients for signature. Both features leverage template-based transactions in OneSpan Sign.
The main difference between these two features is how the documents are delivered to your recipients.
Fast Track lets you generate and send transactions for signature on-demand via a single URL. You can distribute the URL to a large number of recipients or embed the URL into your website or portal to automate the e-signing process – with zero programming or integration required.
Bulk Send on the other hand lets you upload a list of the intended recipients and send the documents in your transaction for signature directly from the OneSpan Sign interface. What’s more, you also have the option to validate your signers’ identity using authentication methods such as Q&A or SMS.
What is the maximum amount of recipients I can send a transaction to using FastTrack?
You can use Fast Track for an unlimited amount of recipients.
Will I get individually signed documents for each of my recipients?
Yes. Each recipient will receive his or her own document to sign. Once the transaction is complete, a separate e-signed document will be generated for each recipient.
What’s the difference between the Signing URL and Sending URL?
The Signing URL is ideal to use when your transaction includes only one signer. What’s more, the Signing URL can be embedded into your website to obtain signatures from multiple recipients easily – with zero programming or integration work.
The Sending URL is ideal to use when your transaction includes multiple signers. For example, a Real Estate agent can use Fast Track with two clients required to co-sign an Agency Disclosure Form.
Text Tags
Automatically extract signatures and fields by placing text tags in documents
Step-by-step Instructions
Step-by-step Instructions
1) To begin, ensure the Text Tags feature is enabled in your account by contacting our support team.
2) Click ‘New Transaction’ and enter a name for your transaction. Click the ‘Create’ button to proceed.
3) Now it’s time to add a document to your transaction. Make sure your document includes the necessary text tags in the appropriate locations in the document. A text tag is a string of text, or a text convention, that acts as a placeholder, indicating where your signatures and fields will be placed in the document. You can find the list of text tag patterns in OneSpan Sign’s documentation.
4) Next, let’s add a recipient to the transaction.
5) Click ‘Next’. After the document is uploaded, OneSpan Sign analyzes it, and replaces every text tag pattern with the appropriate signatures and fields in the pre-defined locations.
6) Your transaction is now ready to be sent out. Click ‘Send to Sign’ to distribute your document for signing.
7) What’s more, similar to text tags, we also enable you to extract signatures and fields from form fields placed in a PDF document. Simply contact our Support team to enable the extraction feature and follow the same steps using Form Fields to have signatures and fields automatically placed in your document.
FAQ Questions
Are the Text Tags and Form Fields extraction features included with my OneSpan Sign account?
Yes! These features are available with all OneSpan Sign plans at no extra charge. Contact our support team to enable the feature in your account.
How do I create Text Tags to add to my documents?
OneSpan Sign uses a set of pre-defined patterns (or “parameters”) when creating Text Tags. Visit our Text Tags Parameters table to help you build the required Text Tags for your documents.
Our documentation also includes naming conventions to use to extract signatures and fields from form fields placed in a PDF document
Can I leverage these features programmatically via the OneSpan Sign API/SDKs?
Absolutely. Sample code is available on the OneSpan Community Portal.
SMS Authentication for In-Person Signing Scenarios
Add an extra layer of security to validate your signer’s identity with SMS authentication for in-person signing scenarios
Step-by-step Instructions
Step-by-step Instructions
Add your documents and recipients to the transaction. Since this is an in-person signing scenario, add yourself as one of the recipients.
You can request that the recipient authenticates himself in order to access the documents to sign. In this example, we’ll authenticate David Cobb’s identity using SMS authentication.
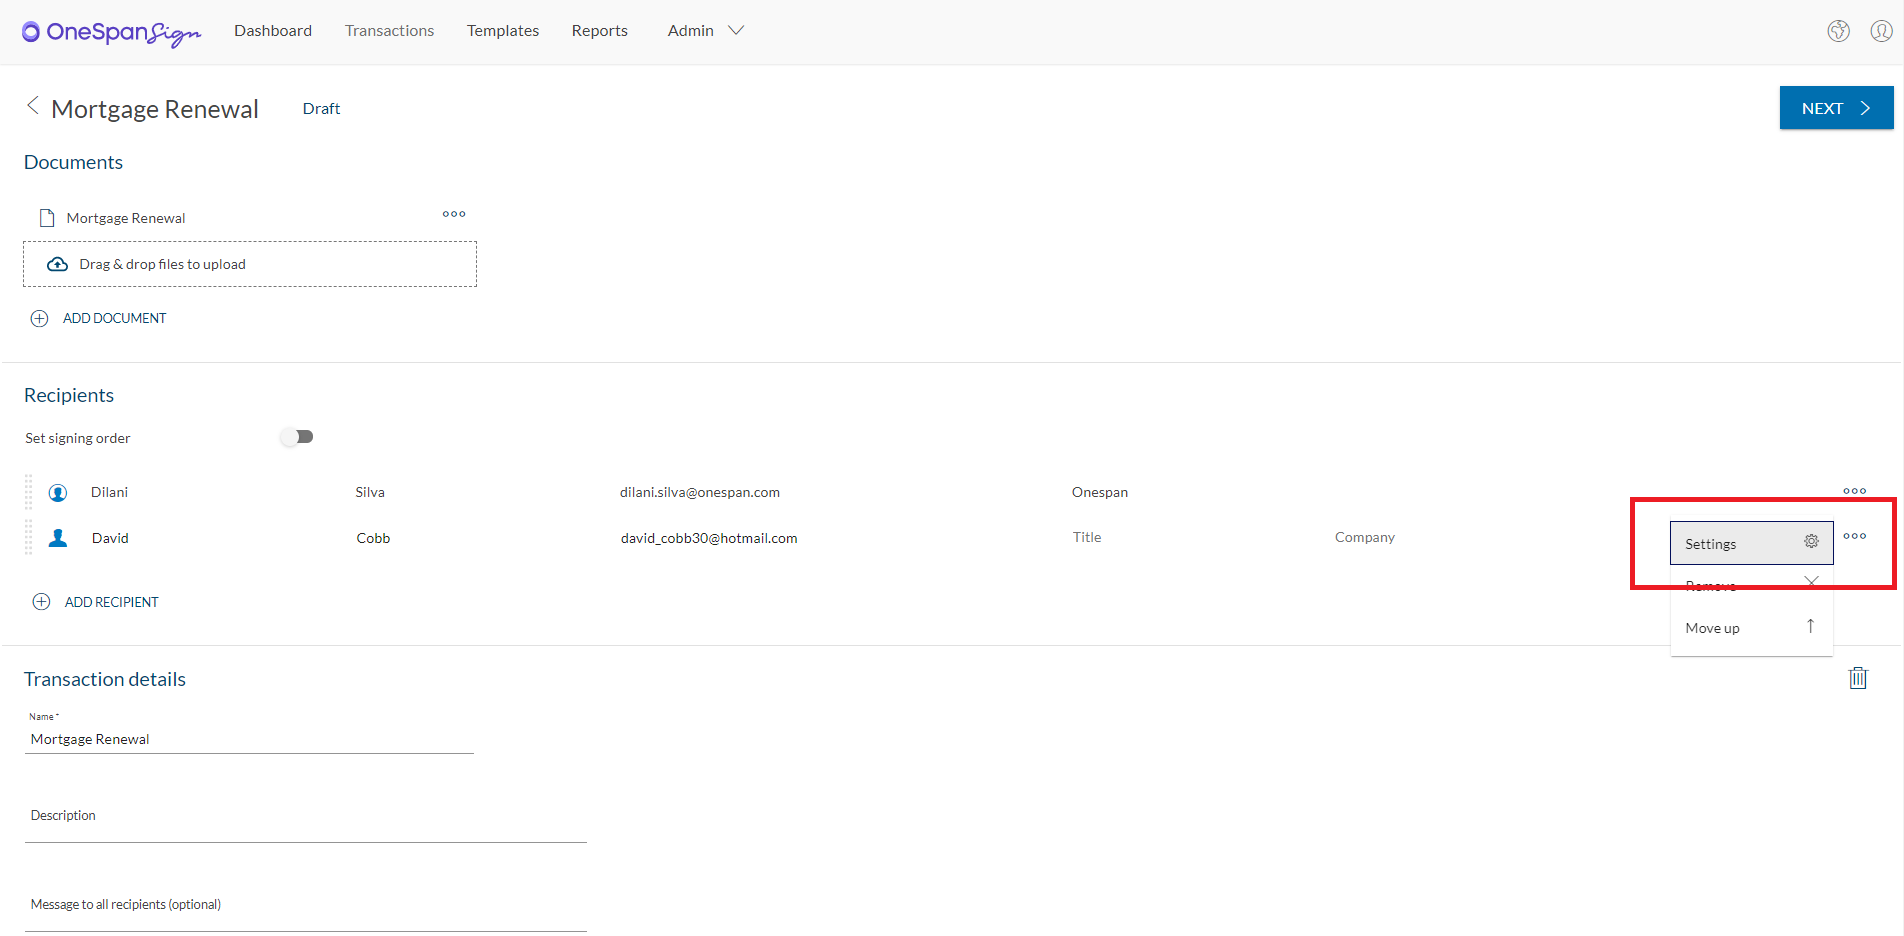
In the Recipients section, click the ellipses and select ‘Settings’.
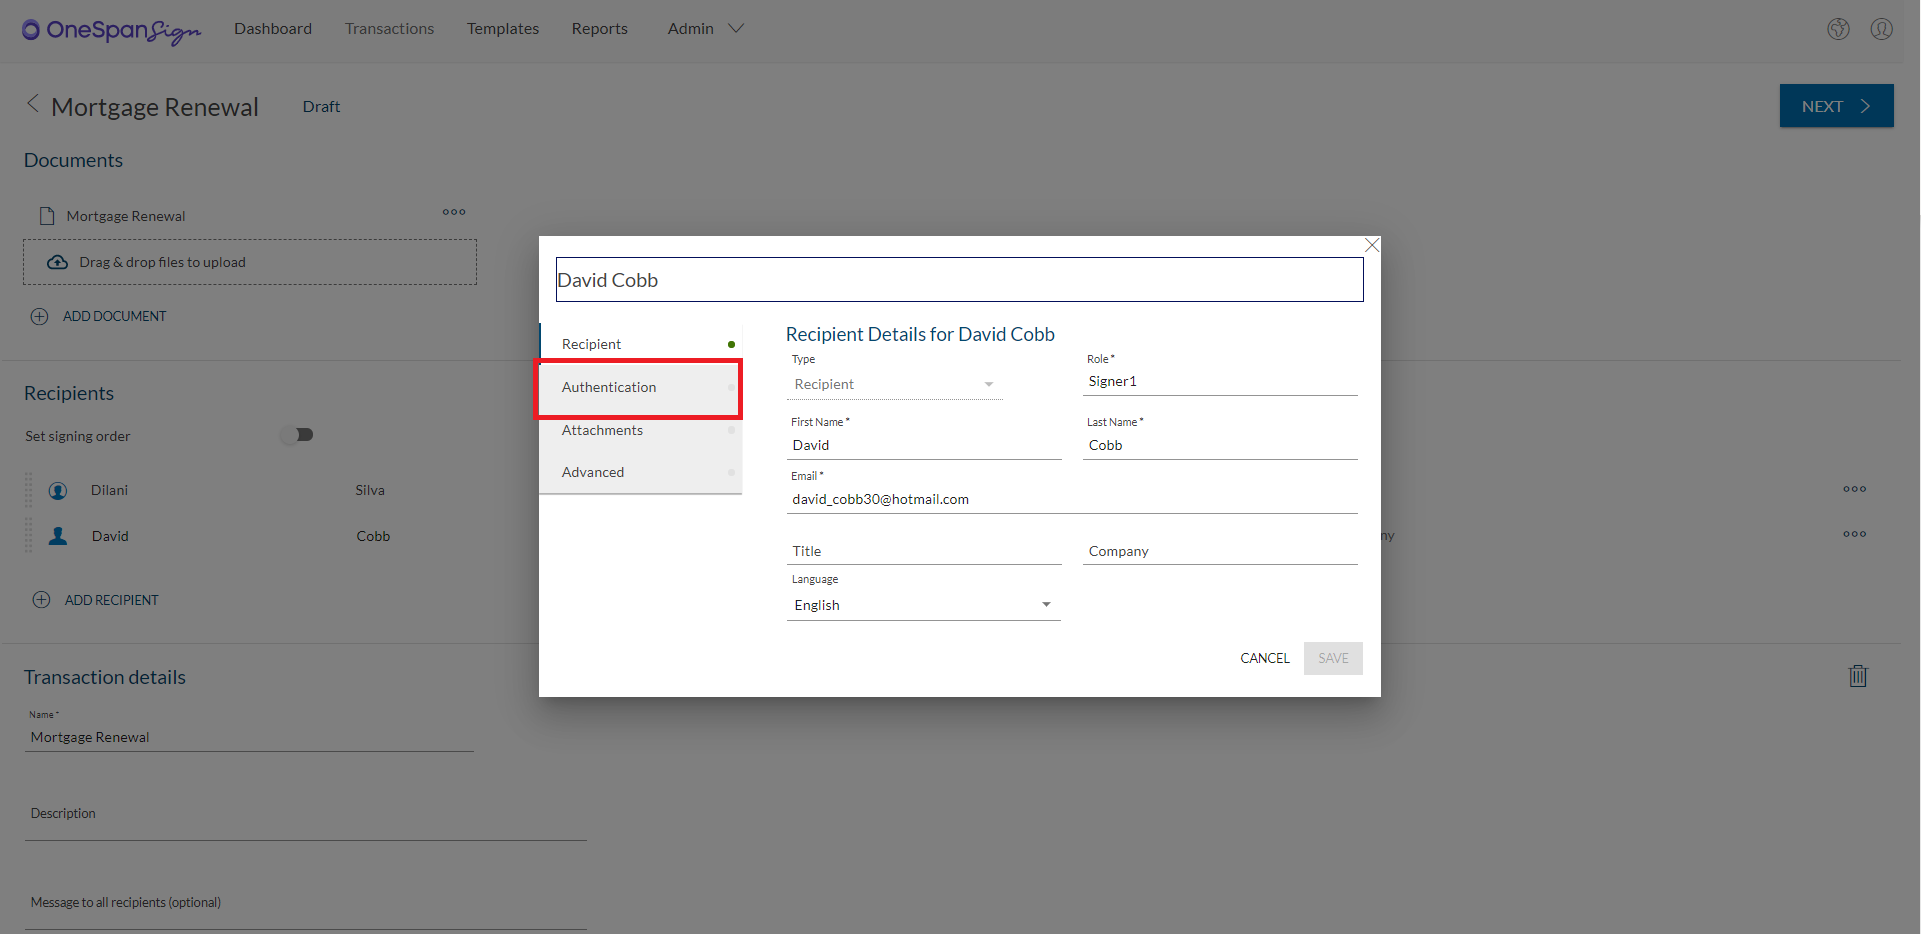
A dialog box will appear. Click ‘Authentication’.
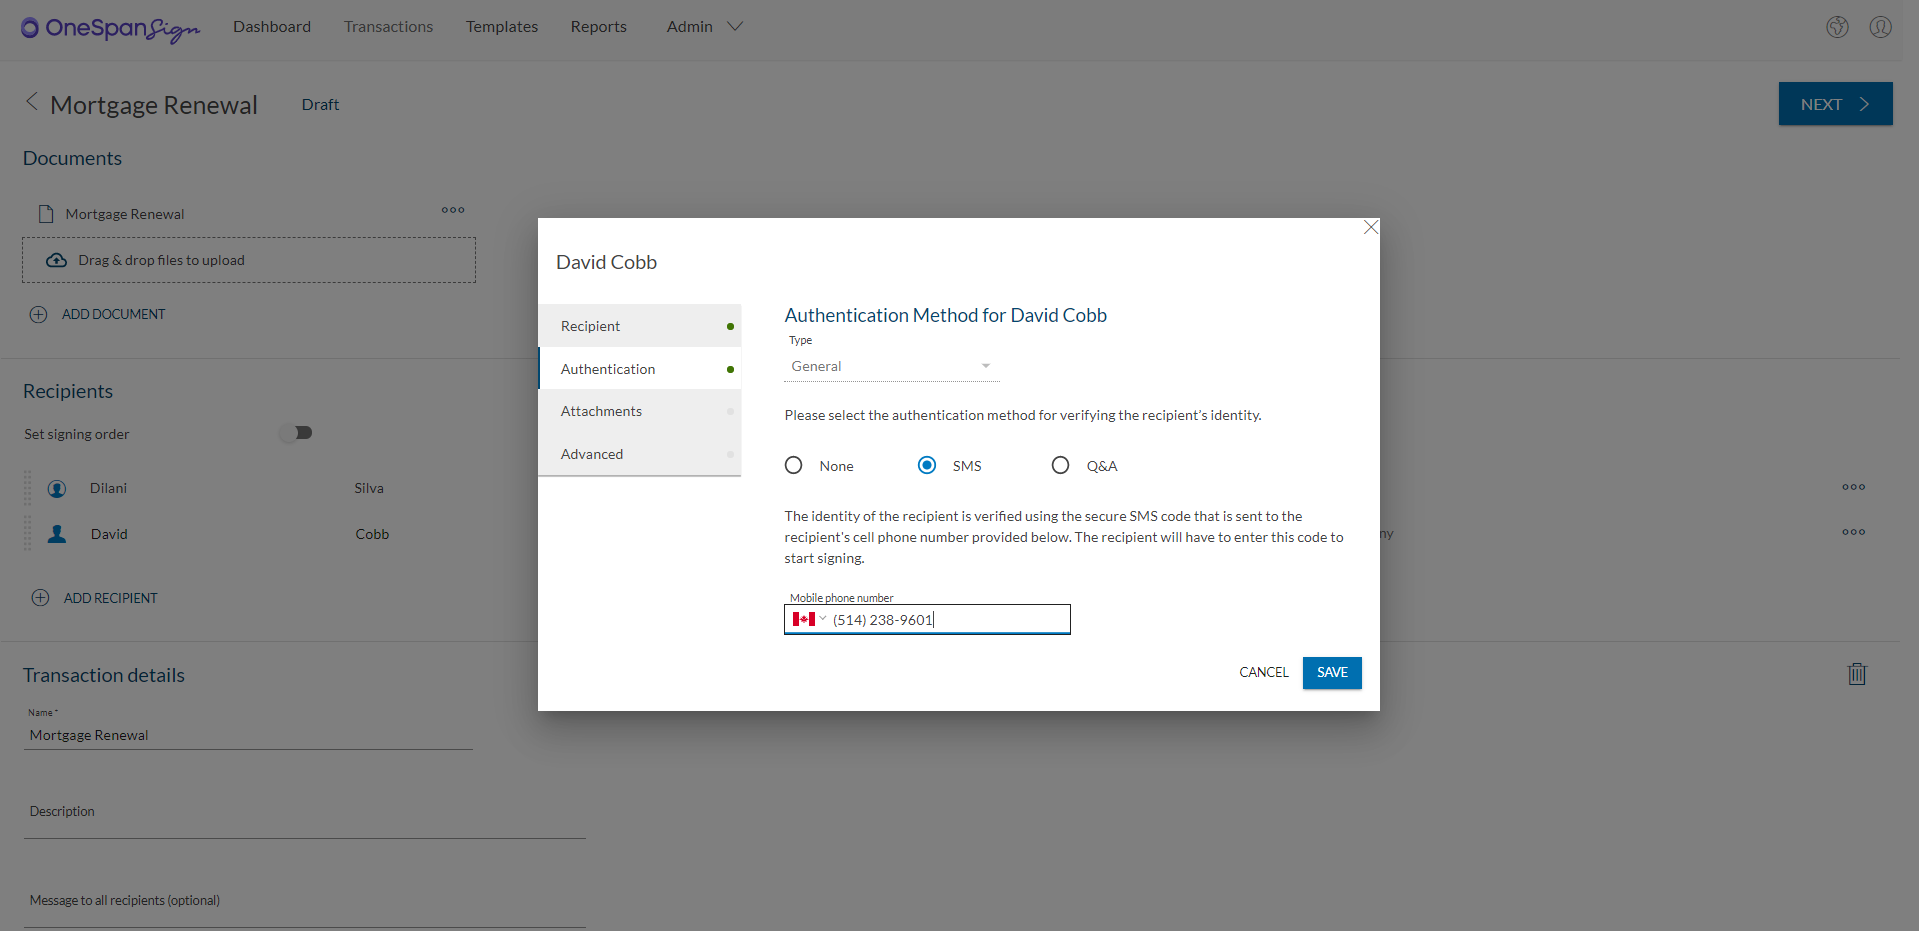
Select ‘SMS’ in the authentication methods section. Enter David Cobb’s mobile phone number.
Click ‘Save’.
Scroll down to the ‘Settings’ section and enable in-person signing.
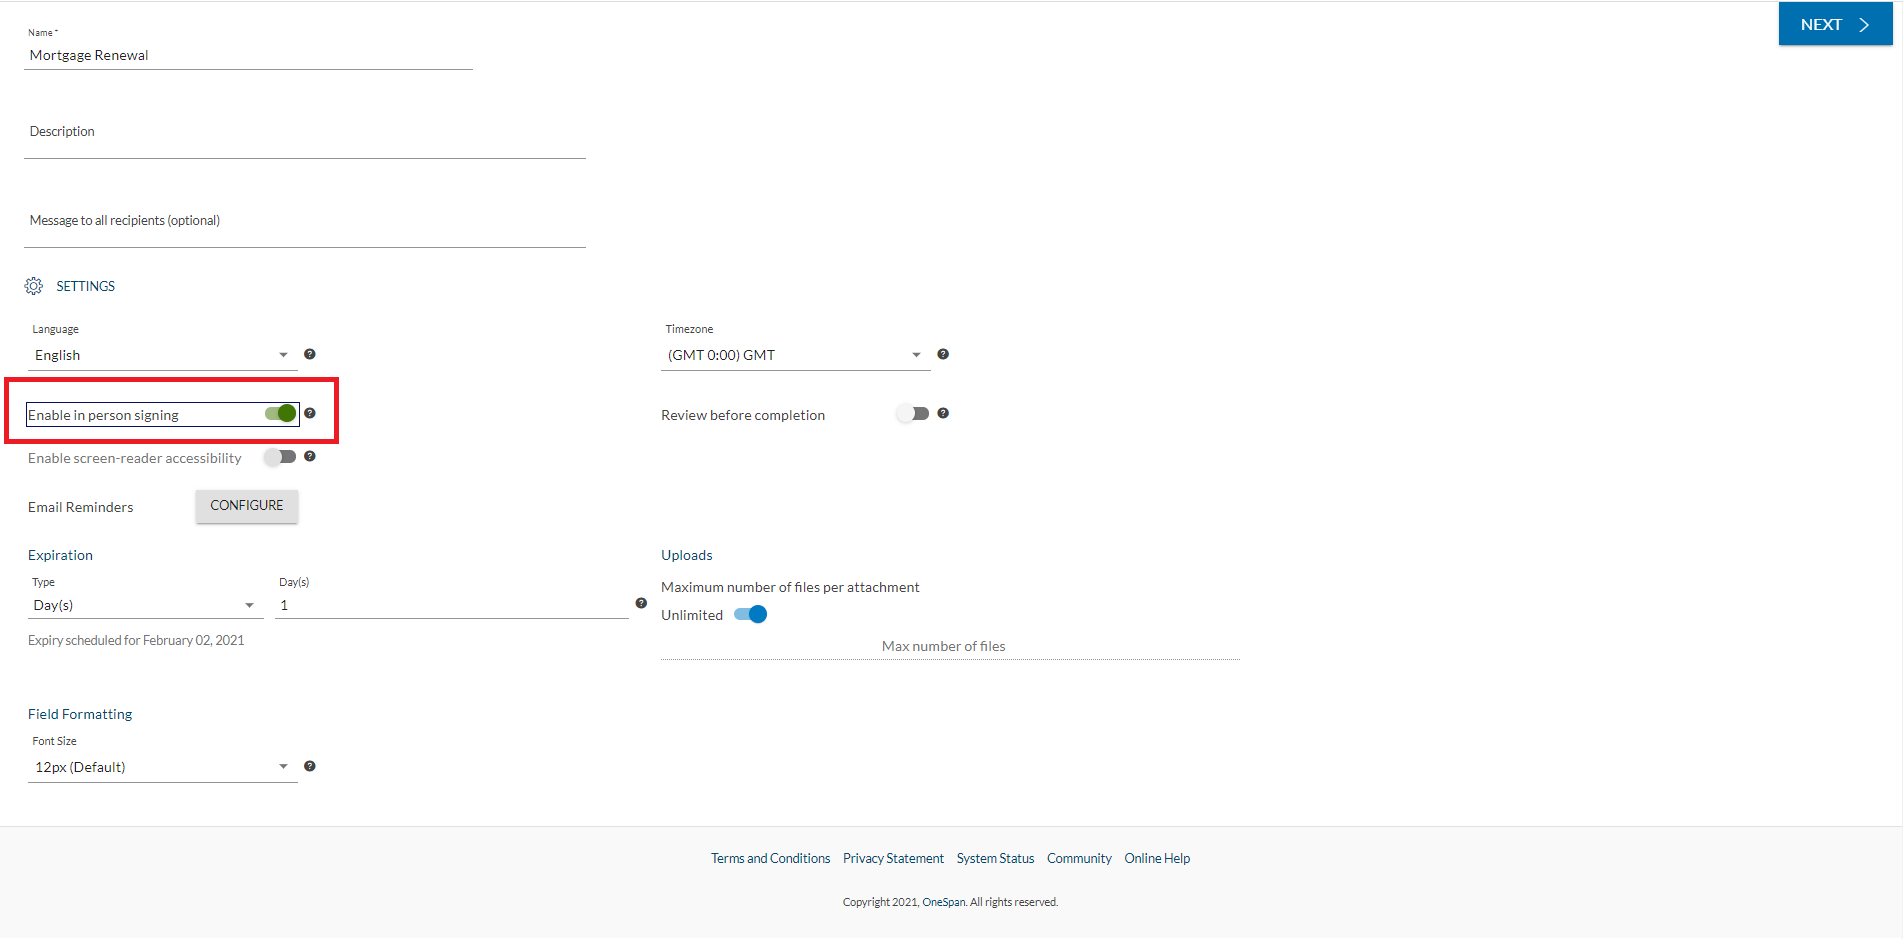
Click ‘Next’ to prepare the document for signature.
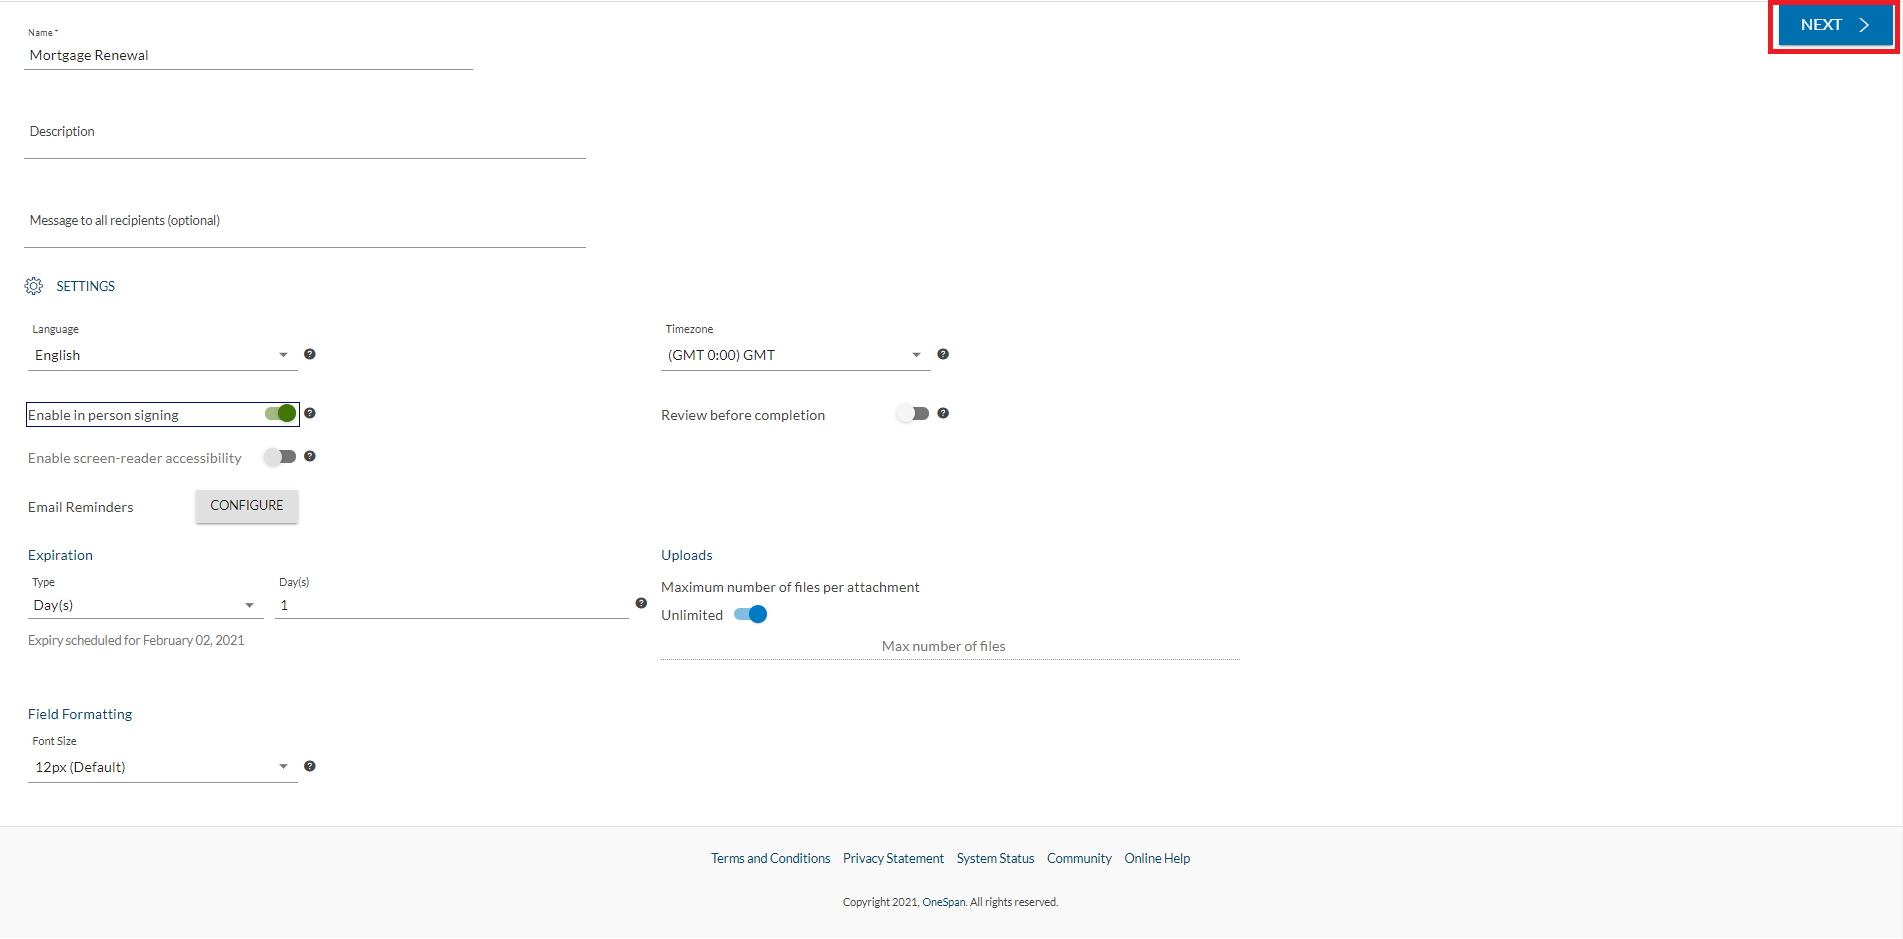
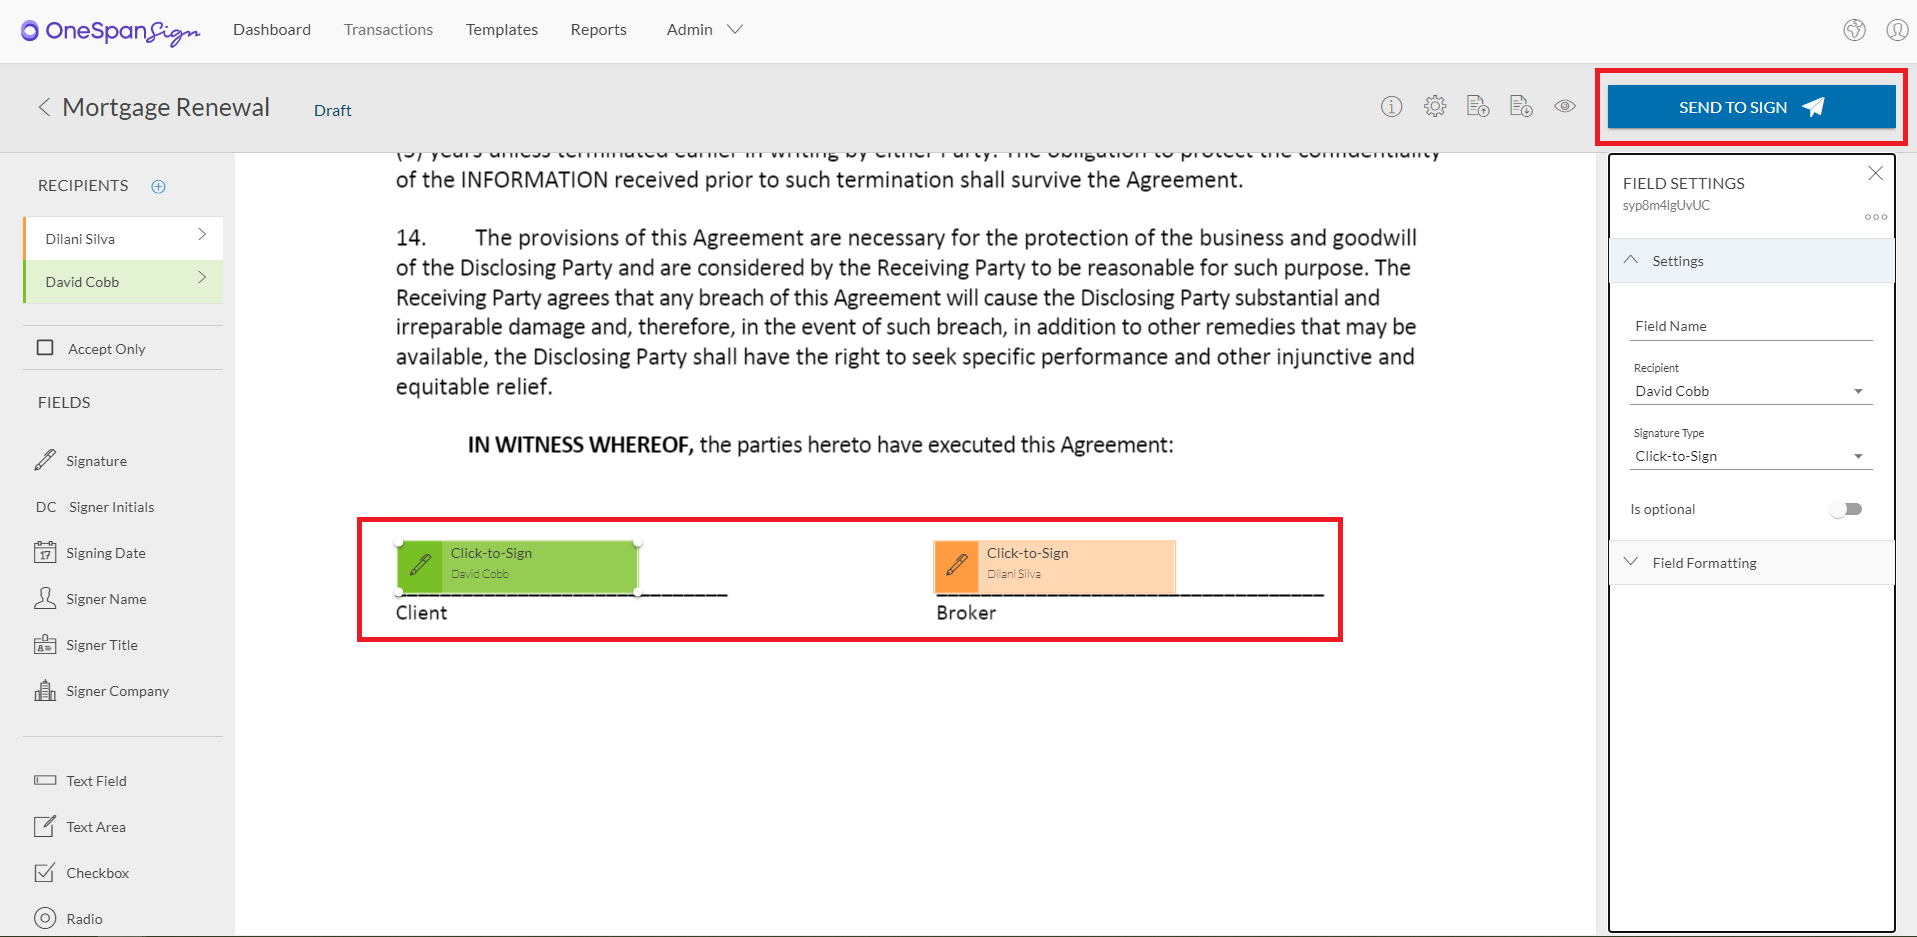
Add signature blocks to the desired locations on your document.
Now your transaction is ready to send. Click ‘Send to Sign’ to distribute your document for signing.
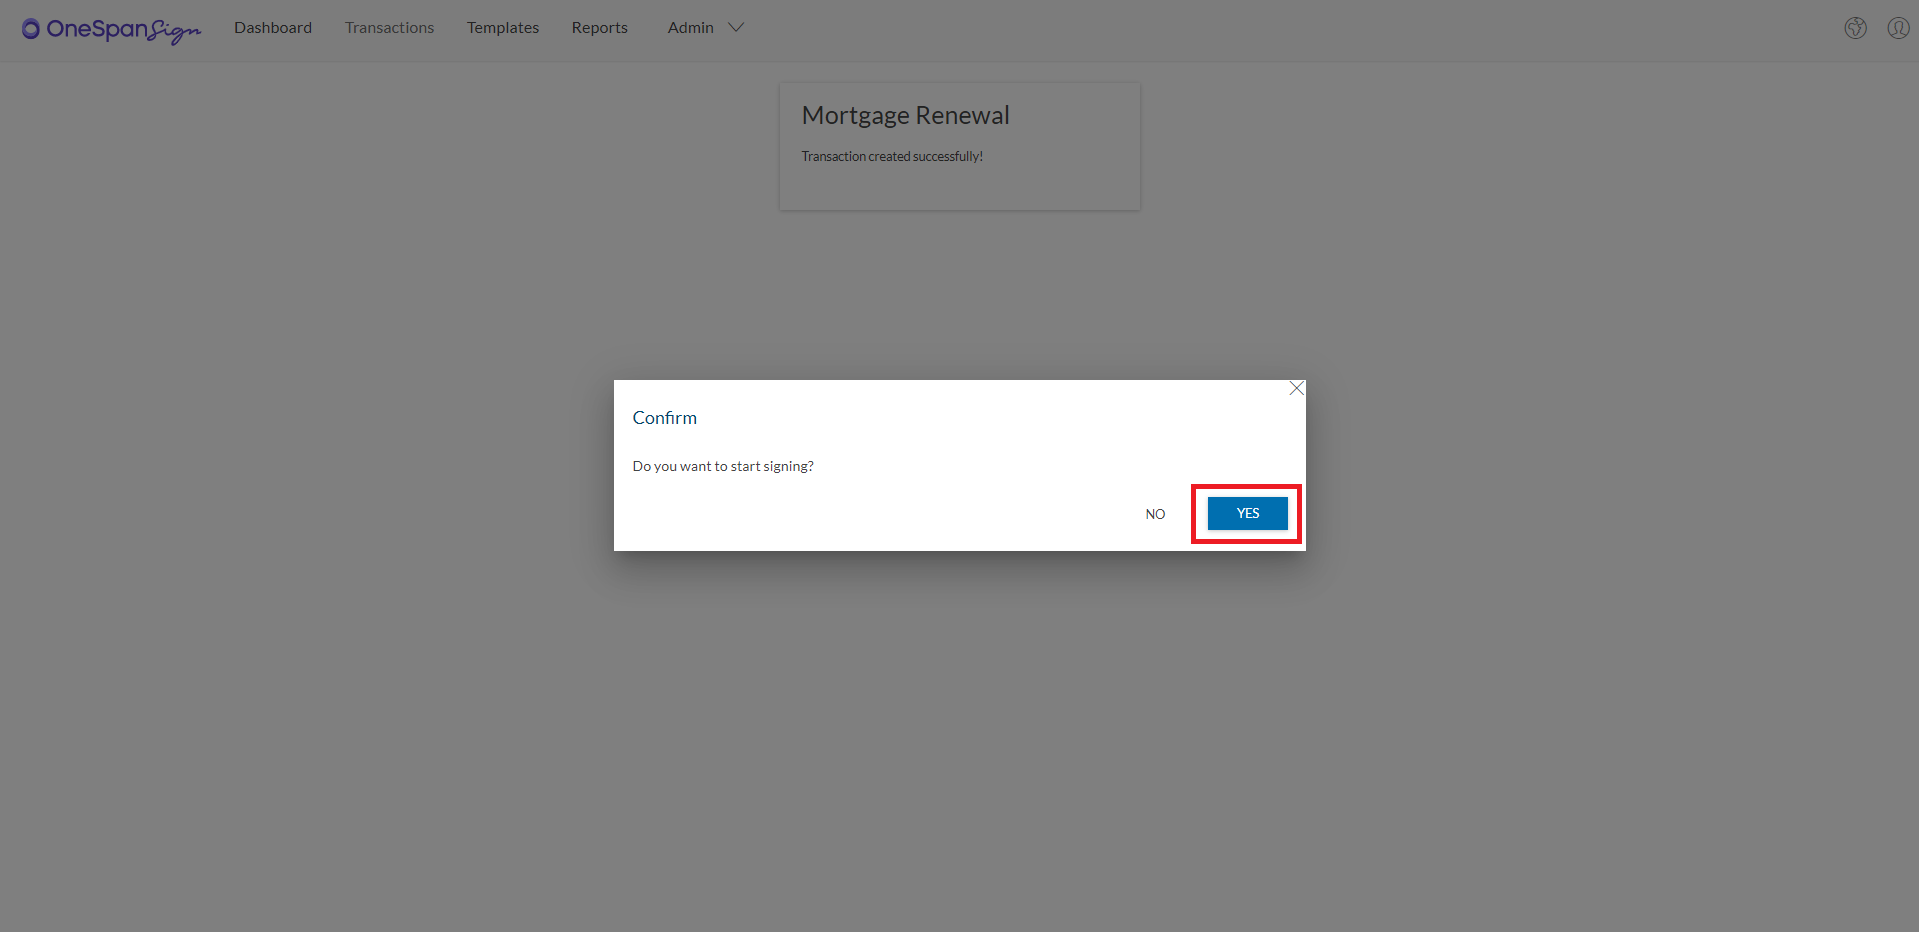
Since this is an in-person signing scenario, you can immediately start signing the document.
Click ‘Yes’ to start signing the document.
As the host of the transaction, you can decide which signer can sign the document first. We’ll have David Cobb sign first. Click David’s name and click ‘Start’

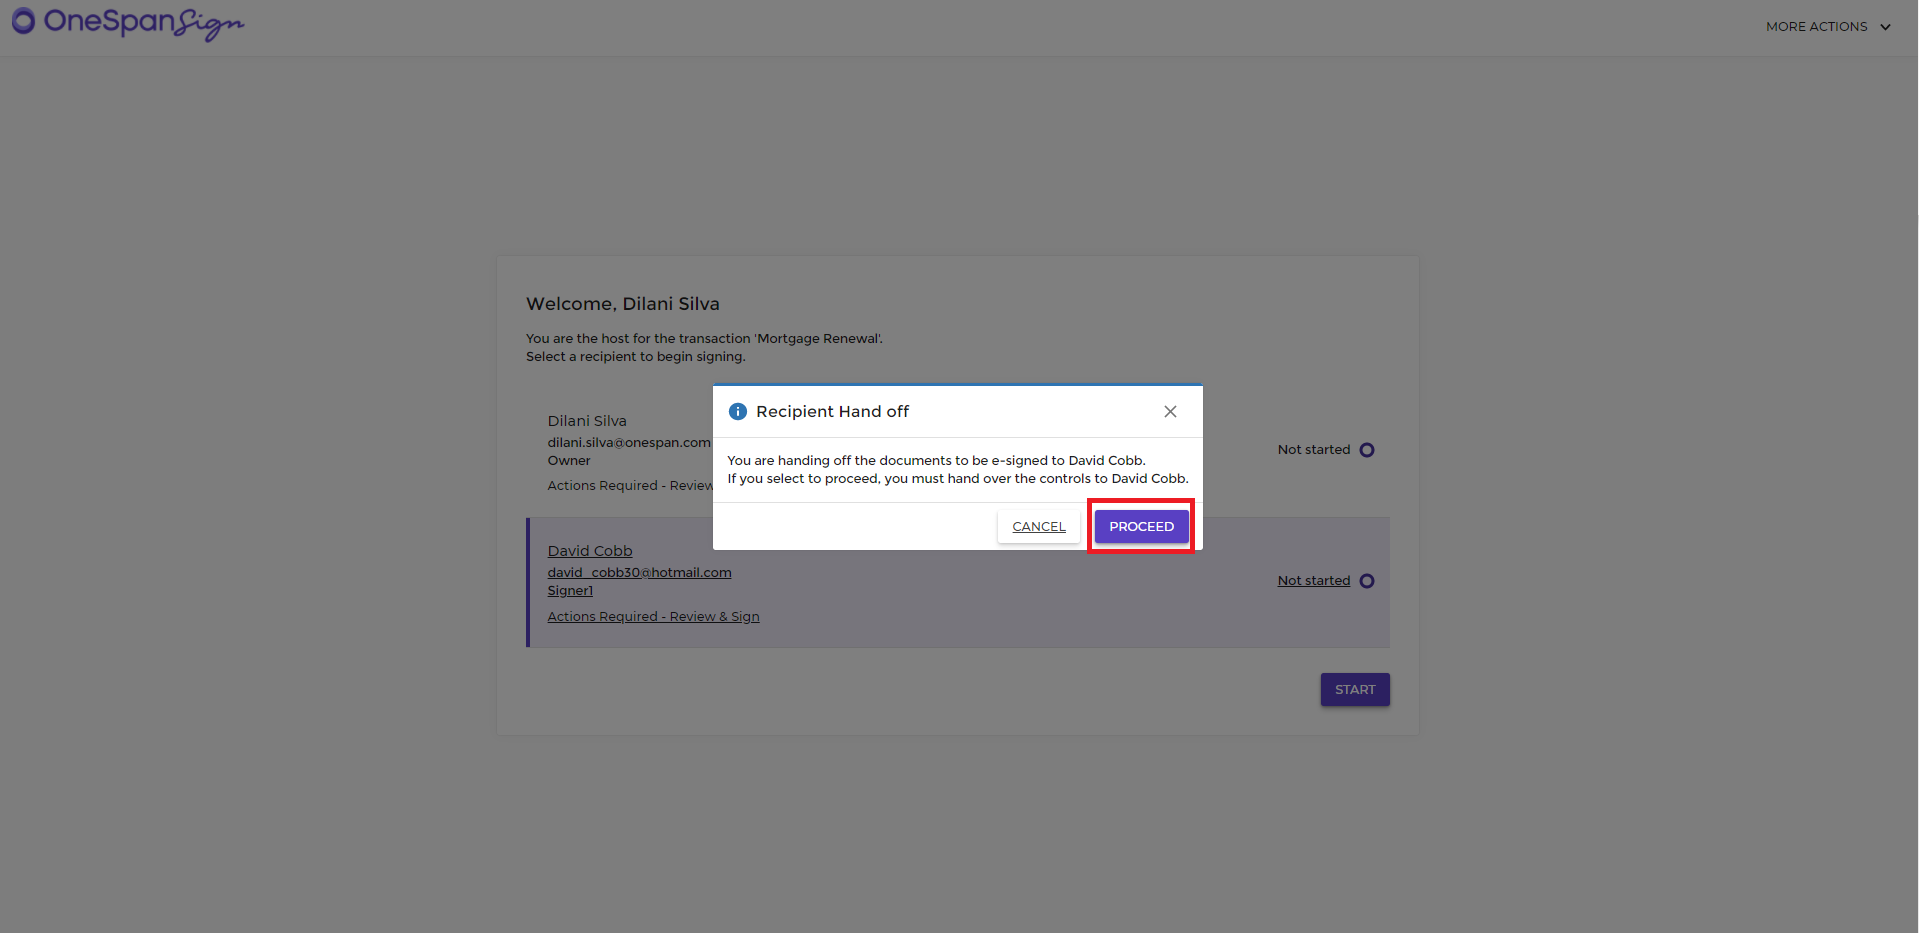
A dialog box will appear requesting to pass controls to David to sign the document. Click ‘Proceed’.
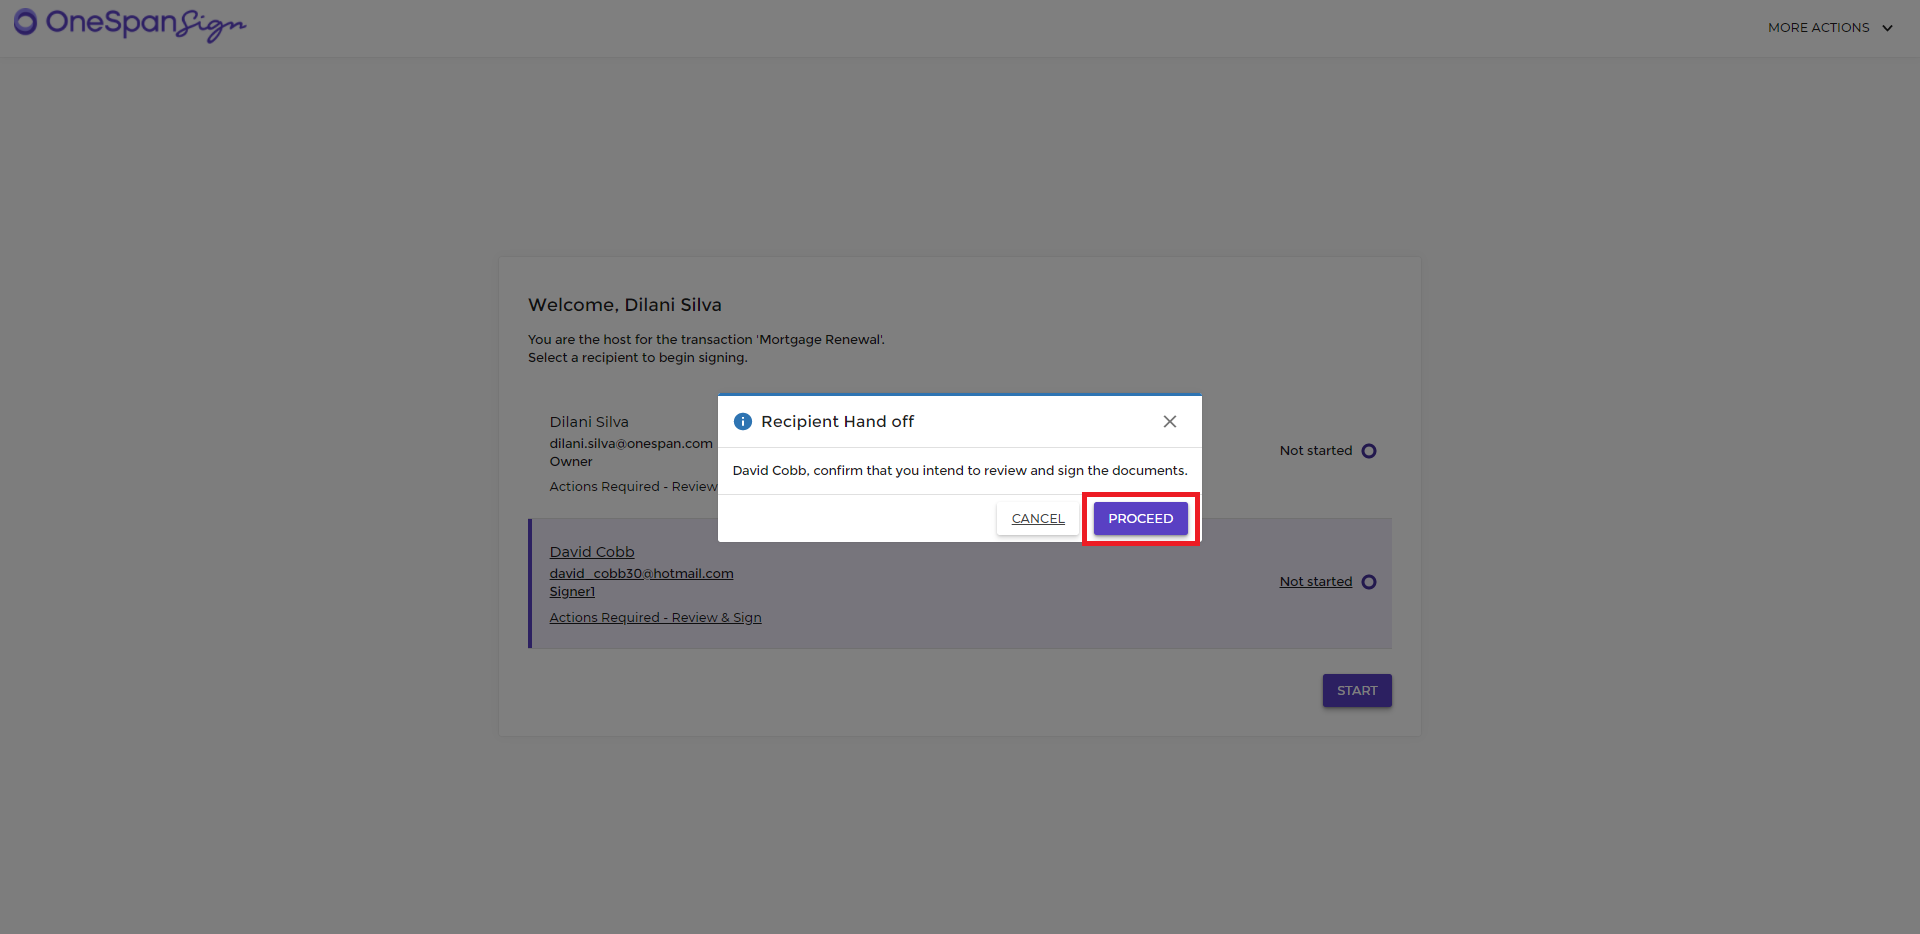
David will confirm that he will sign the document. He clicks ‘Proceed’.
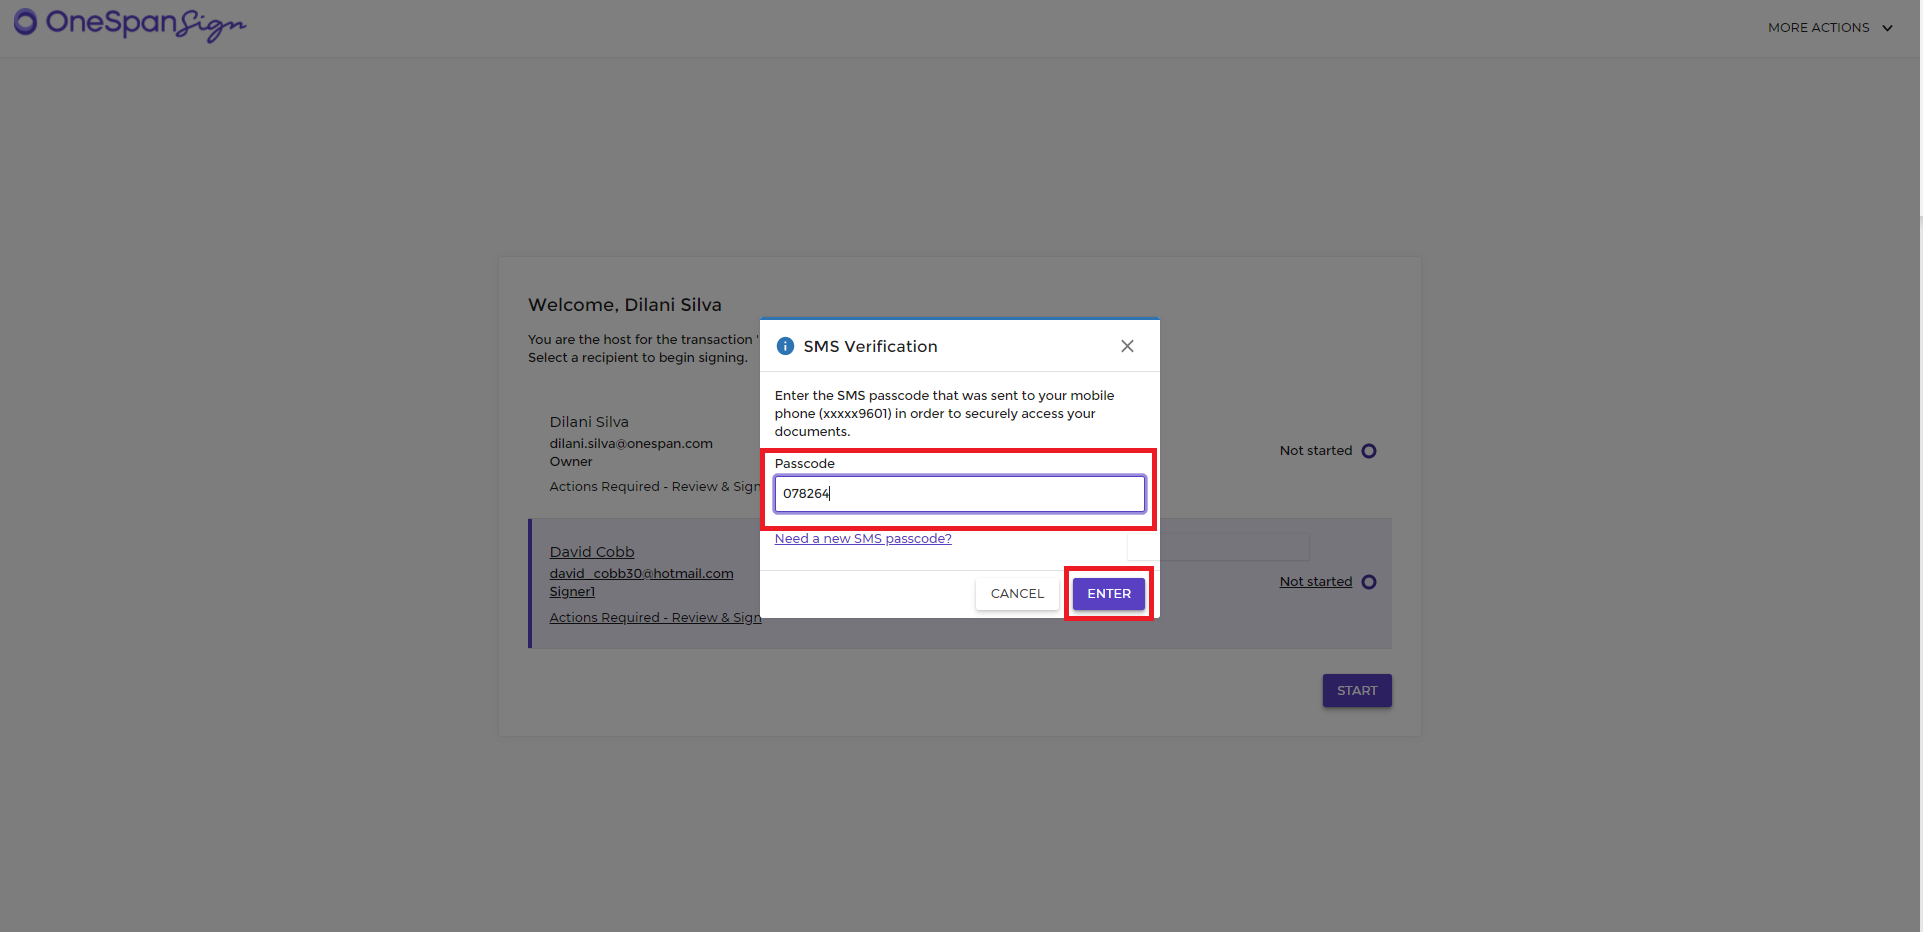
David is prompted to enter the SMS passcode before accessing the document to sign. He enters the SMS passcode he receives on his phone and clicks ‘Enter’.
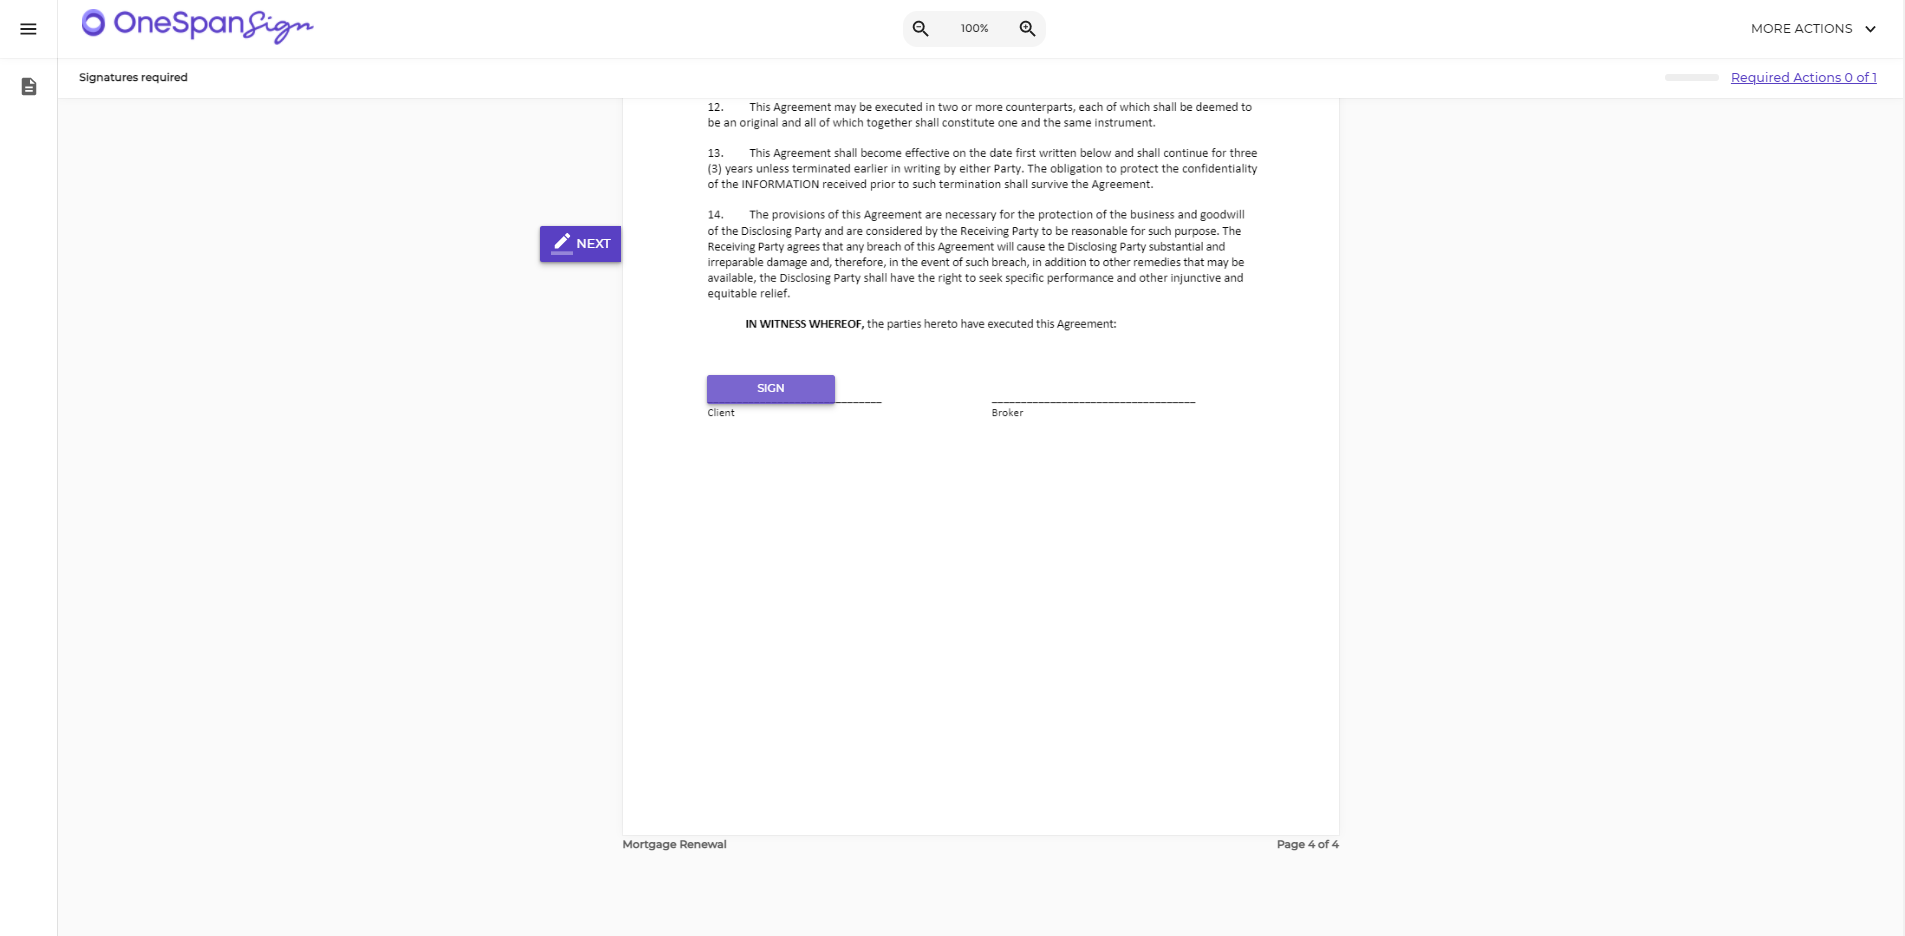
David receives access to the document and signs it.
After he clicks ‘Done’, he passes control back to the host and the host completes signing the document

FAQ Questions
Is SMS authentication included with my OneSpan Sign account?
SMS authentication is available at an additional cost. Please contact your customer success representative for more information.
What happens if my signers fail to authenticate themselves?
This could either mean that you sent the transaction to the incorrect signer or entered the incorrect mobile phone number. If the transaction was sent to the intended signer, simply resend your transaction and give your signer another chance to pass the validation step.
How to Use In-Person Electronic Notarization (IPEN)
Step-by-step instructions
Updating the Notary Commission Page for IPEN
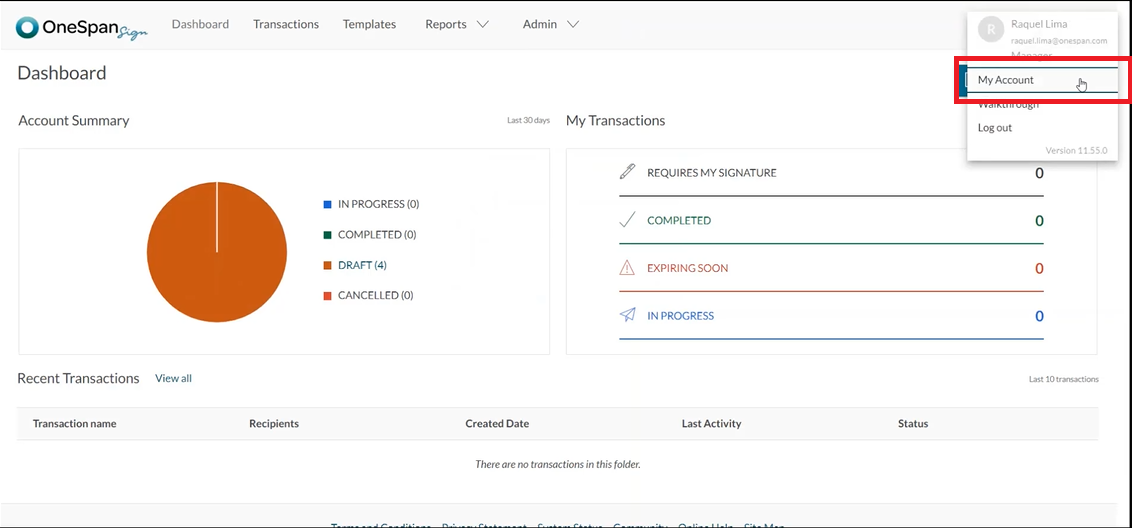
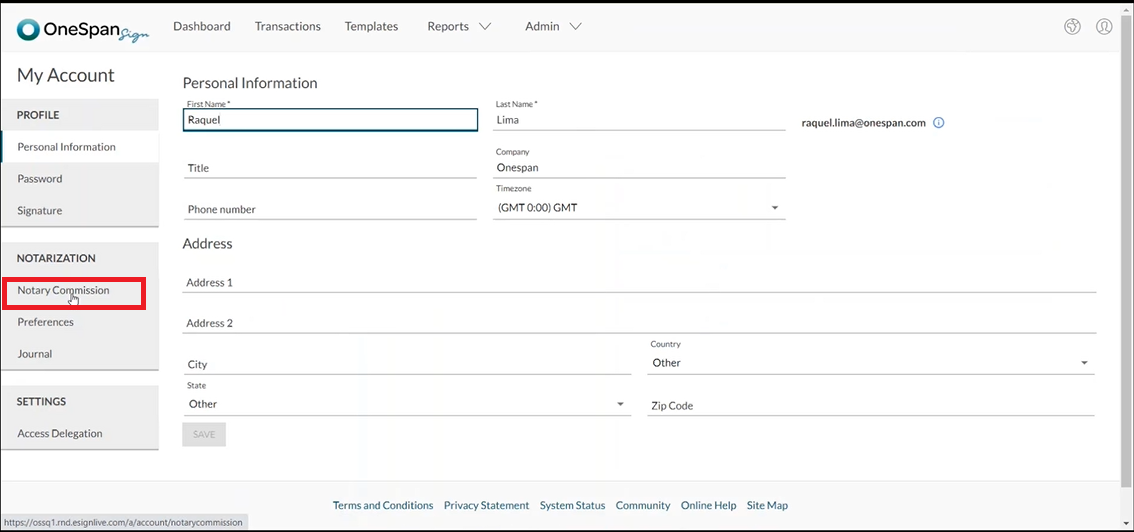
1. After logging in to OneSpan Sign, the Notary accesses their ‘My Account’ section and clicks ‘Notary Commission’.

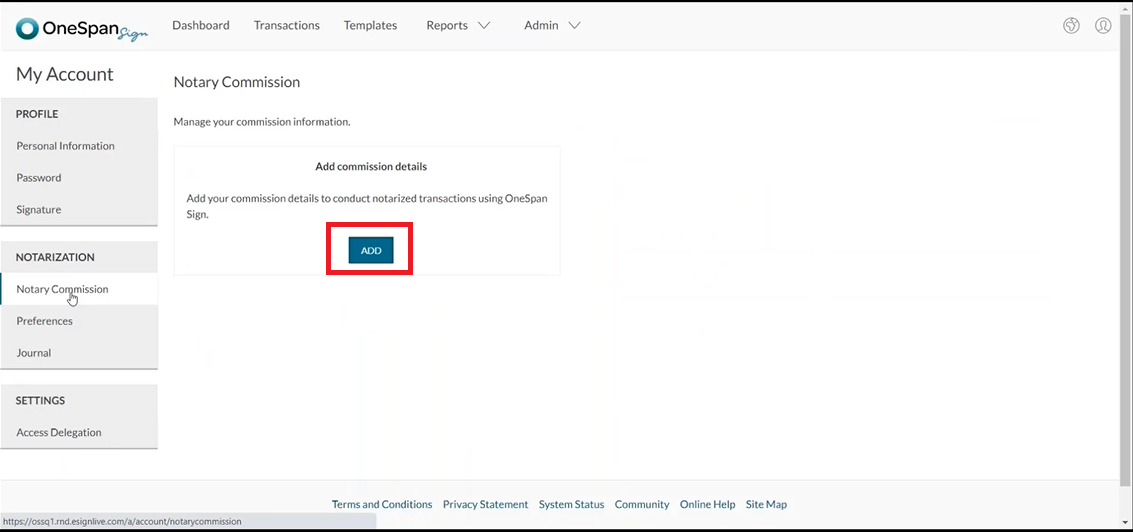
2. The Notary clicks ‘Add’ to include their commission detail.
3. The Notary can select different options in the ‘Authority’ section:
- If the Notary can only perform IPEN transactions, they can select ‘Electronic notary’
- If the Notary can perform both IPEN and RON transactions, they can select ‘Remote online notary’
- If their commission applies to both methods, they can add a checkbox to ‘My commission applies to both RON and IPEN transactions’
In this example, the Notary can only perform IPEN transactions, so they will select ‘Electronic notary’.
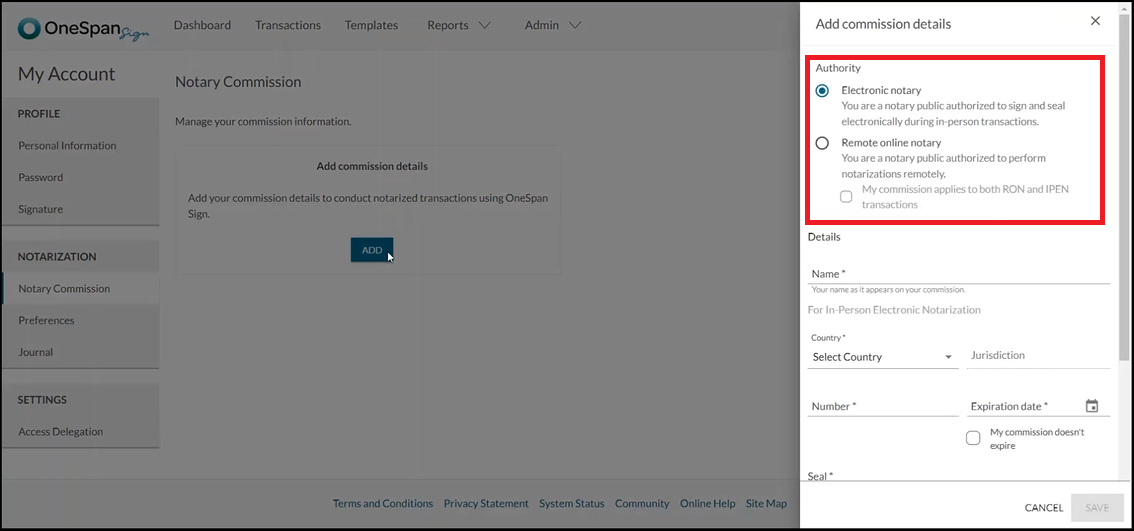
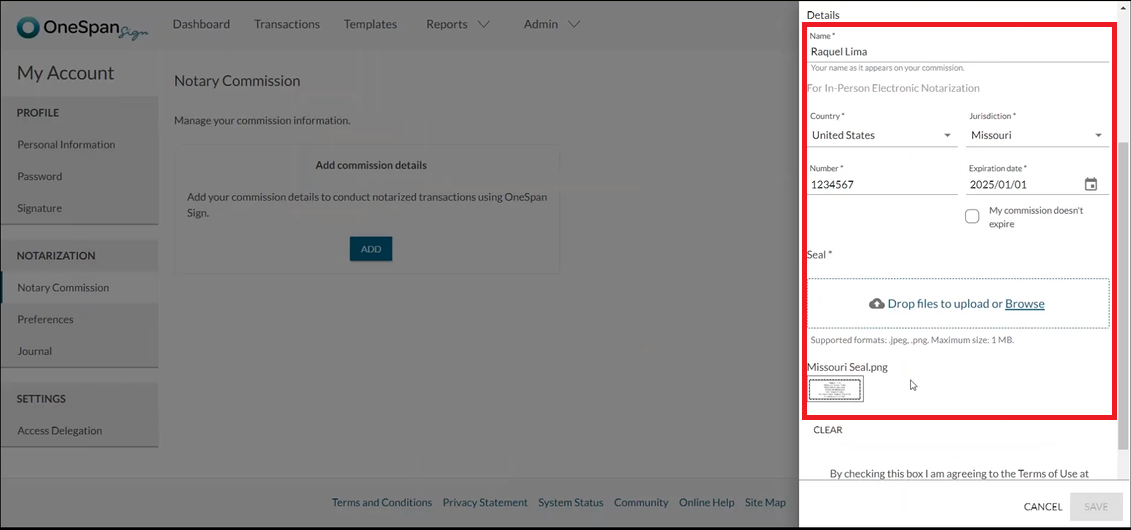
4. The Notary adds their name, country, jurisdiction, commission number, commission expiration date, and uploads their notary seal. The Notary agrees to the ‘Terms of Use’, confirms they are a commissioned notary, and clicks ‘Save’.

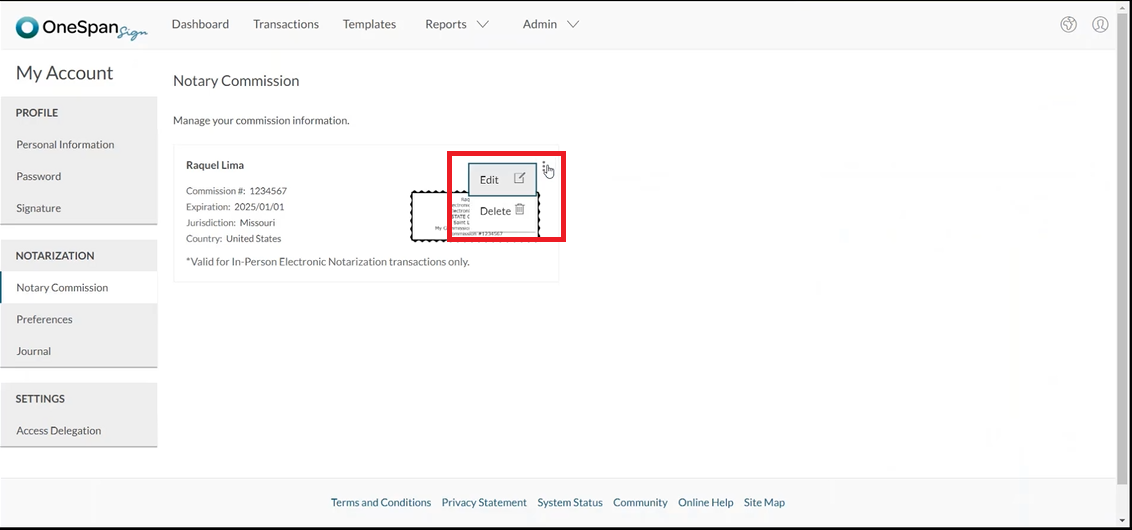
5. The Notary’s commission information is saved in OneSpan Sign and they can revisit this page at any time to edit or delete their commission details.
Configuring a Transaction for IPEN
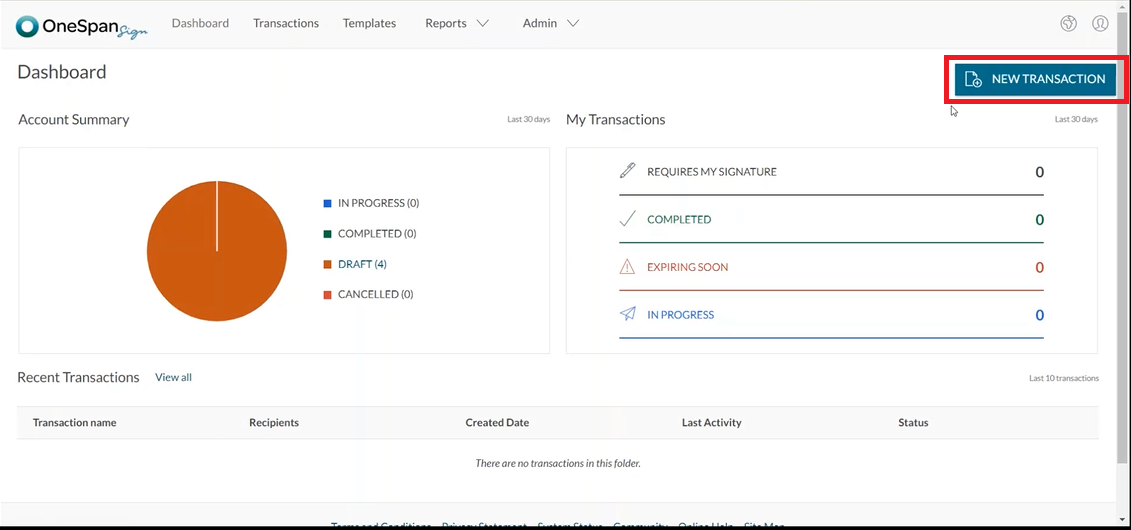
1. Now it’s time for the Notary to prepare the documents for In-person Electronic Notarization. The Notary selects ‘New Transaction’ and enters a name for the transaction.
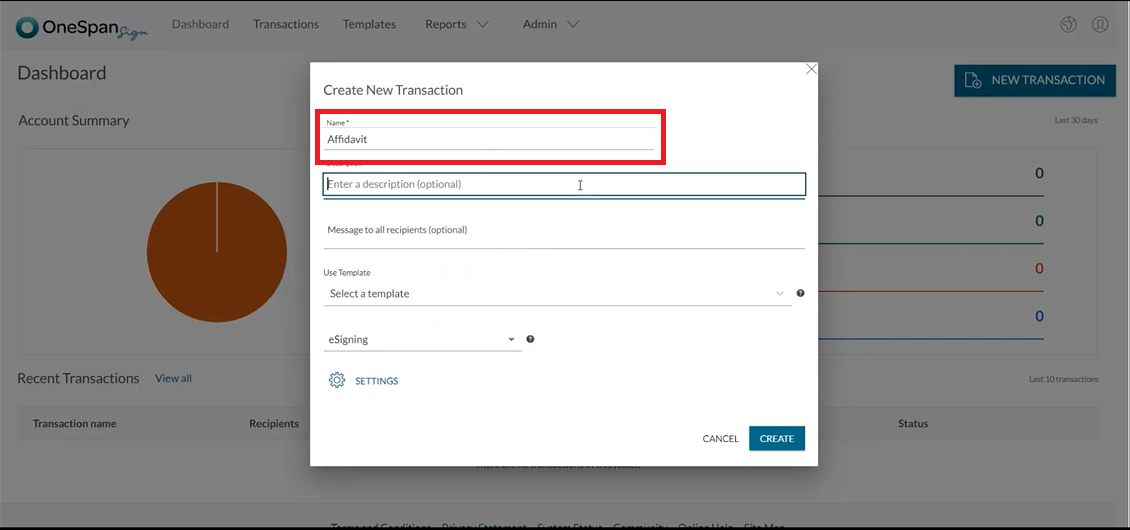
2. In the drop-down, the Notary selects ‘In-Person Electronic Notarization’ as a transaction type and then clicks ‘Create’ to proceed.

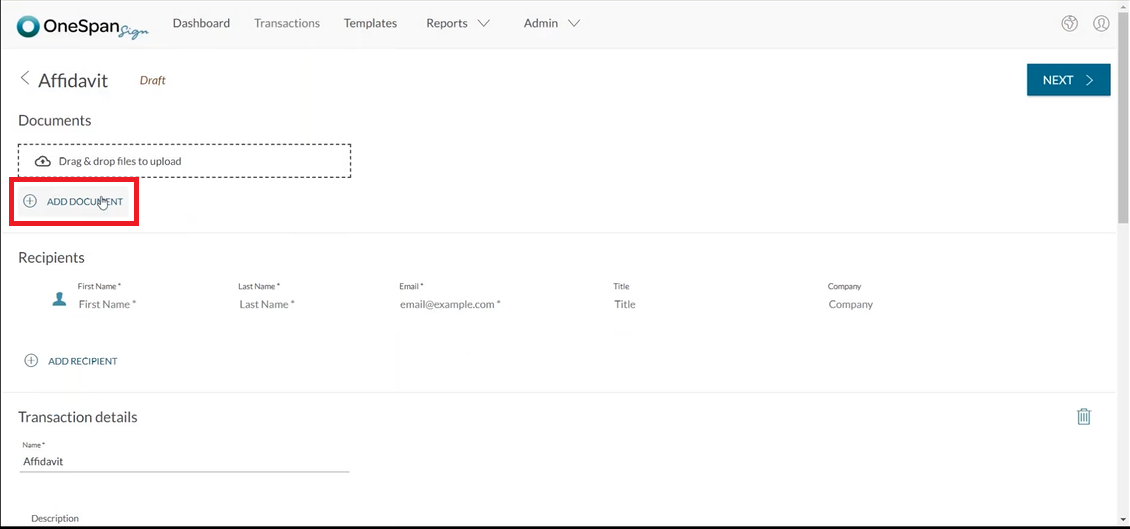
3. To add a document to the transaction, the Notary clicks ‘Add Document’ and uploads a document from their files.
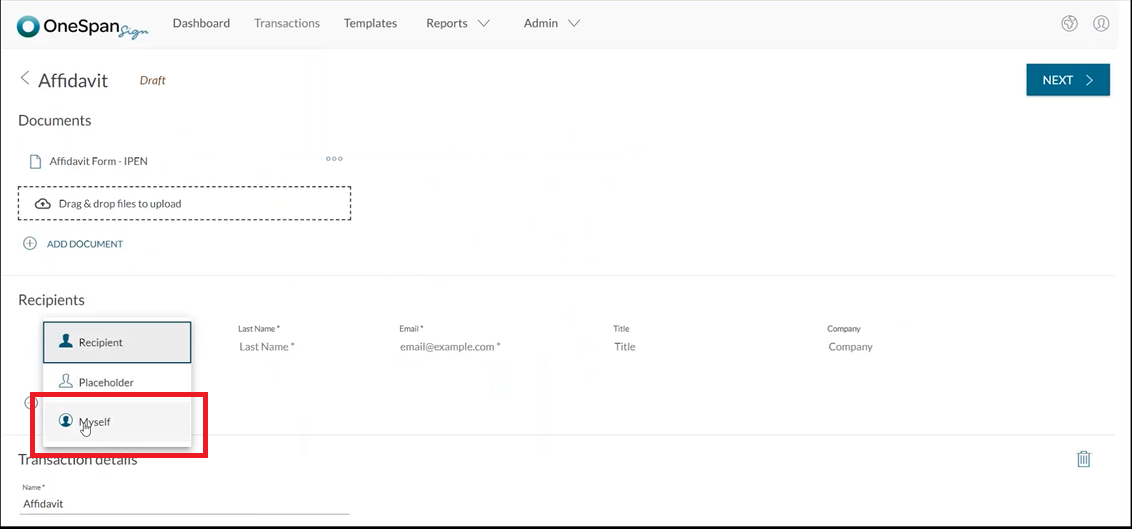
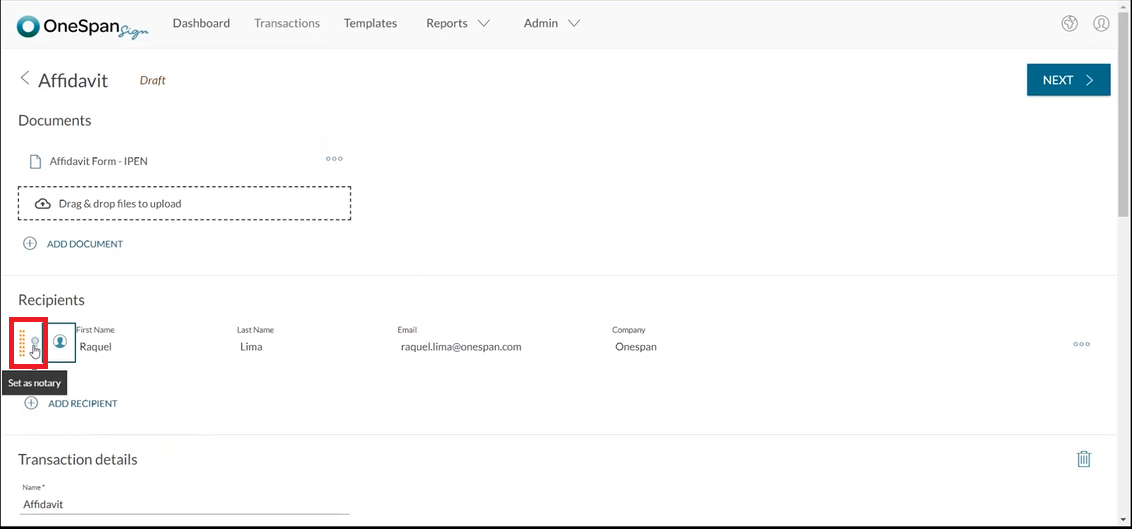
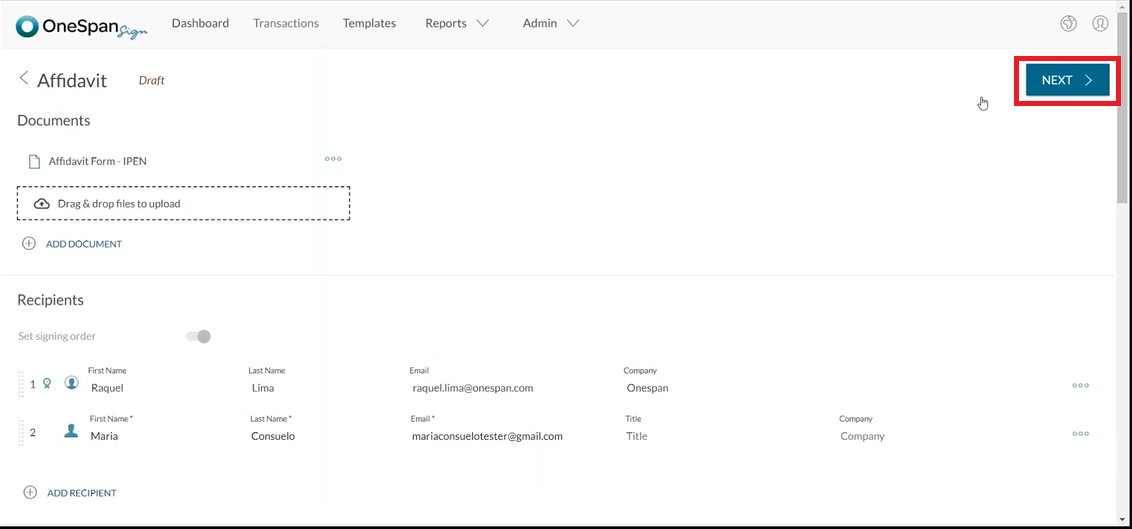
4. The Notary now adds themselves to the transaction and clicks the notary badge next to their name.
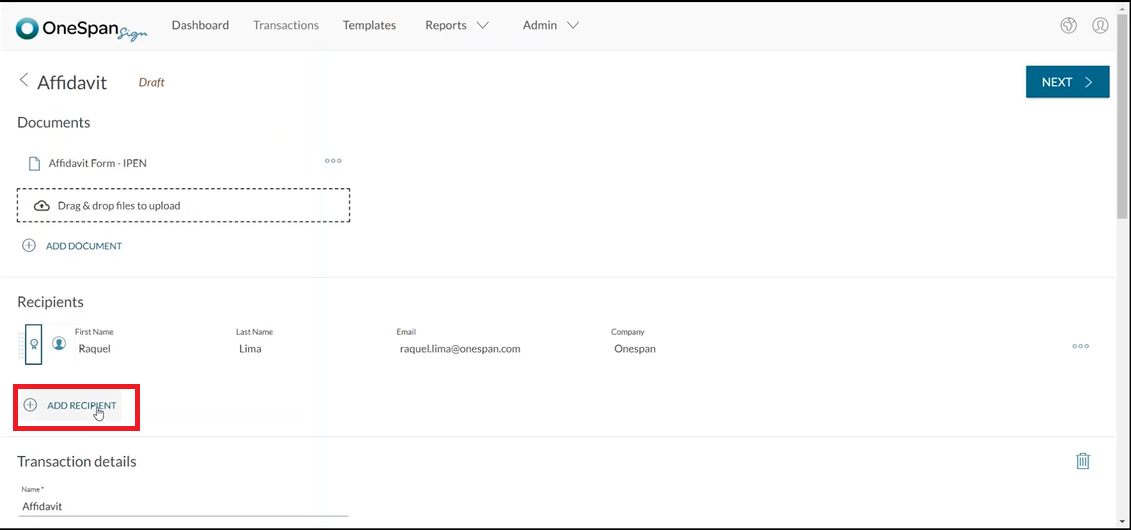
5. The Notary adds a signer to the transaction by adding the signer’s first name, last name and email address.
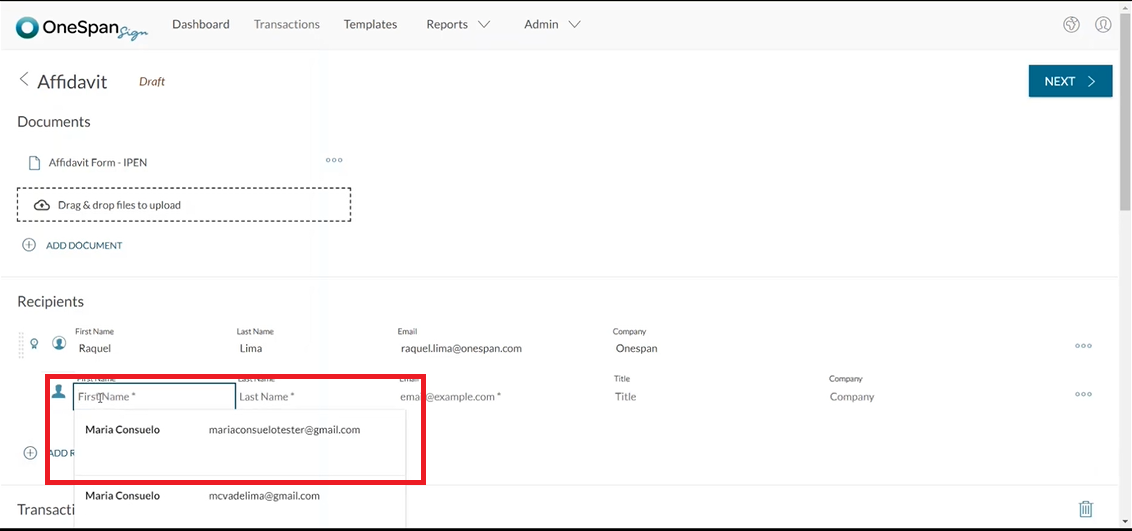
6. They then click ‘Next’ to prepare the document for signing and electronic notarization.
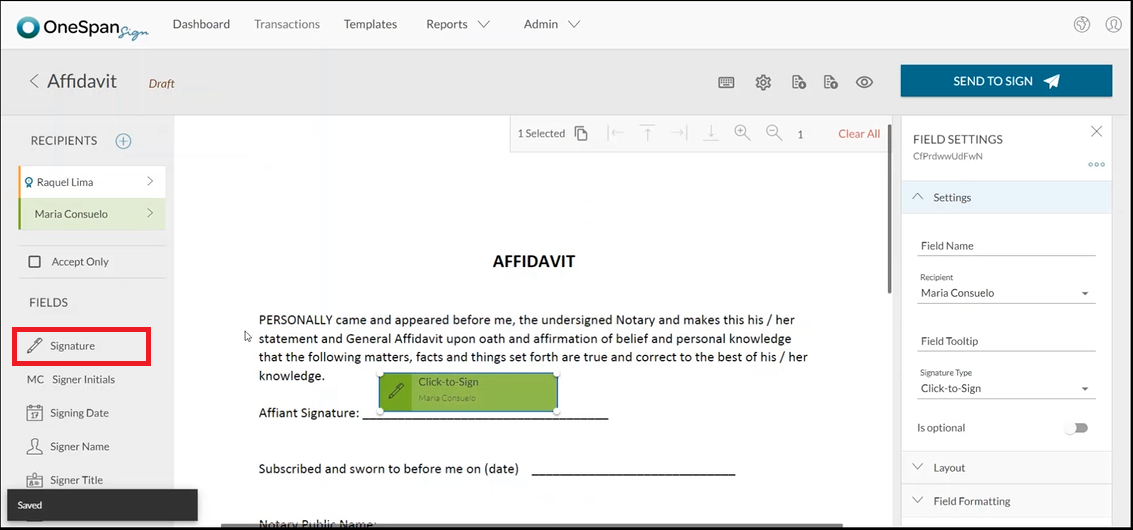
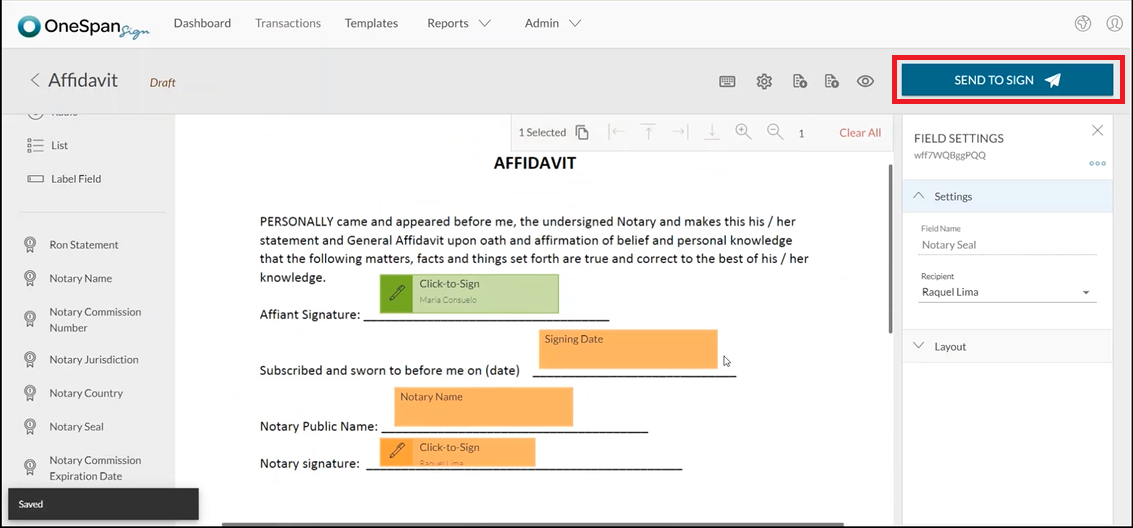
7. To prepare the affidavit, the Notary can drag and drop the signature blocks into the desired areas of the document.
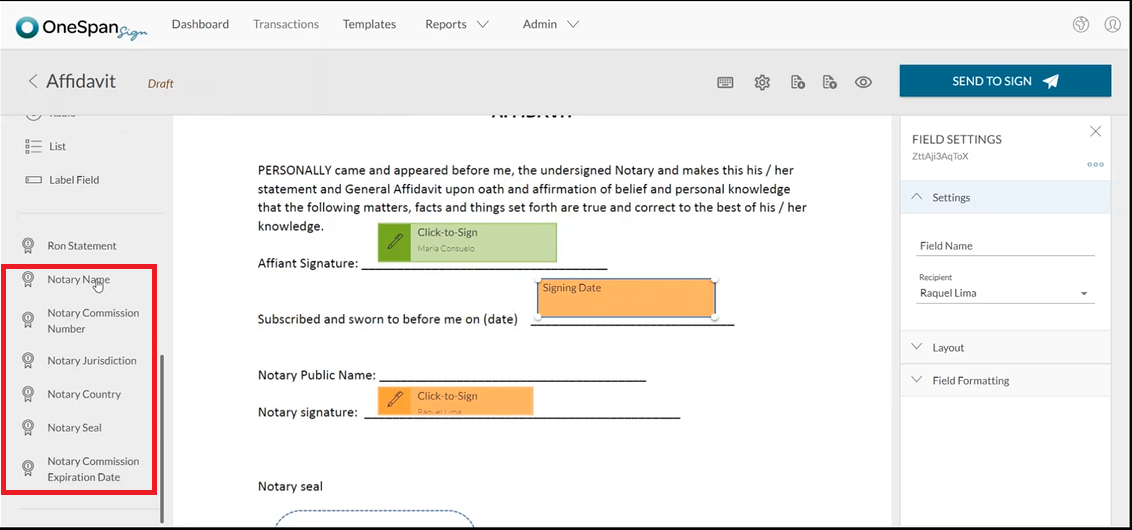
8. The Notary can also scroll down to access additional fields specifically configured for IPEN such as:
- Notary Name
- Notary Commission Number
- Notary Jurisdiction
- Notary Country
- Notary Seal
- Notary Commission Expiration Date
9. Once all the necessary fields have been added, the affidavit is ready to send. The Notary clicks ‘Send to Sign’.
Signing in an IPEN Session
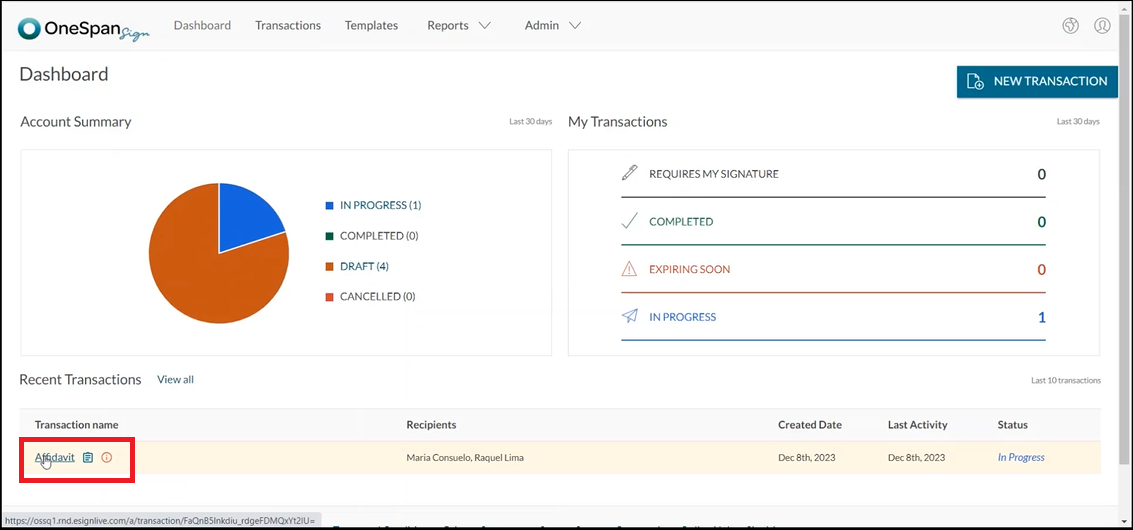
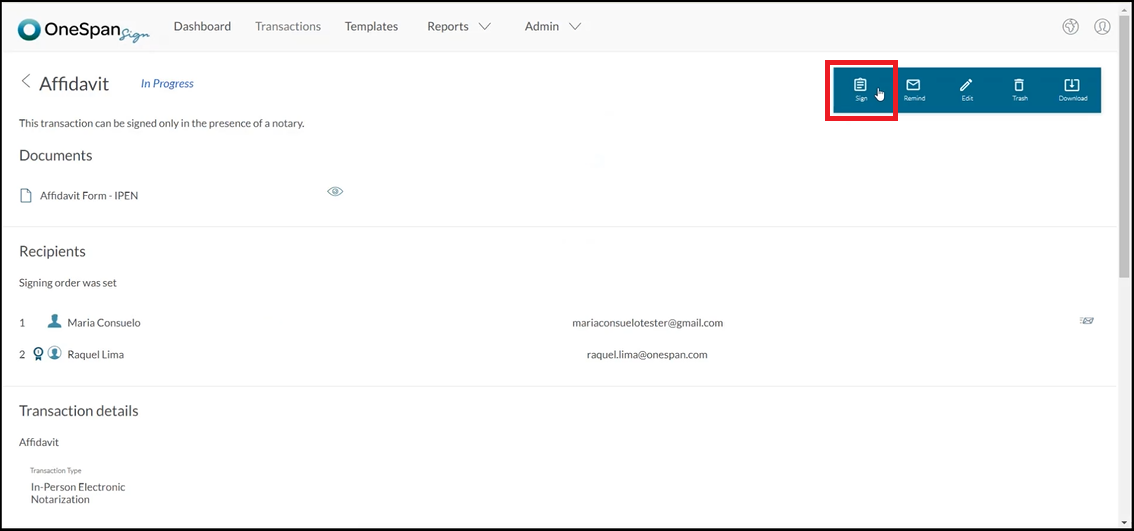
1. When the Notary meets the signer in-person to notarize the affidavit, they access the transaction on their tablet or laptop and then click ‘Sign’.
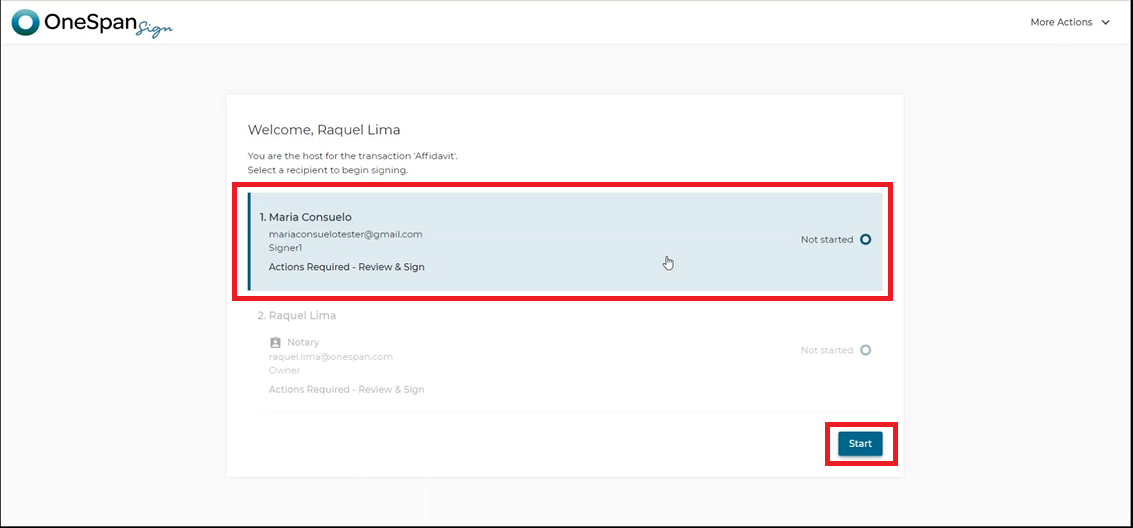
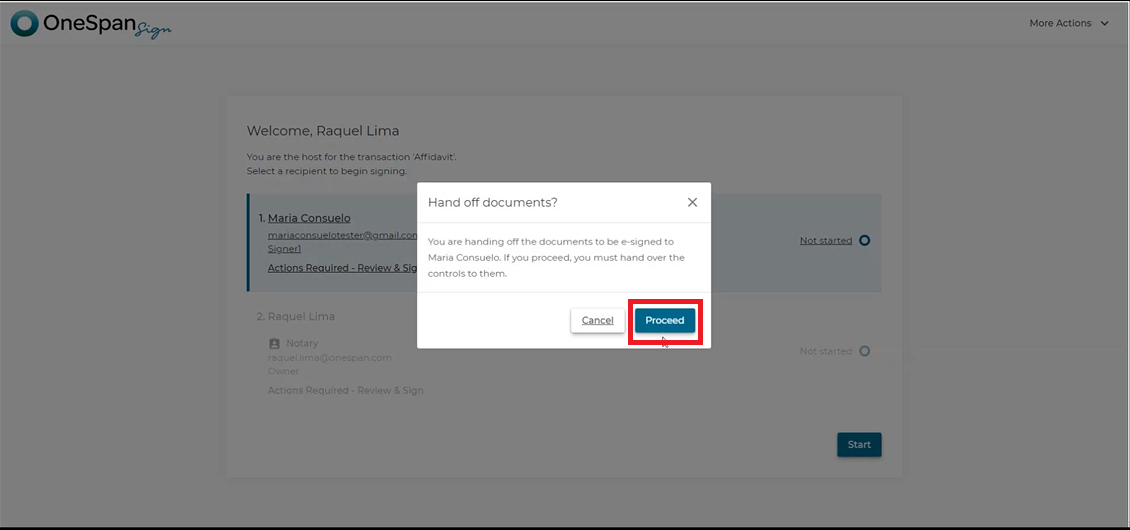
2. The Welcome screen appears showing the actions required for both the signer and Notary in the IPEN session.
To start the electronic notarization, the Notary selects the signer’s name and clicks ‘Start’.
3. The Notary clicks ‘Proceed’ to confirm they are handing off the documents to be e-signed by the signer.
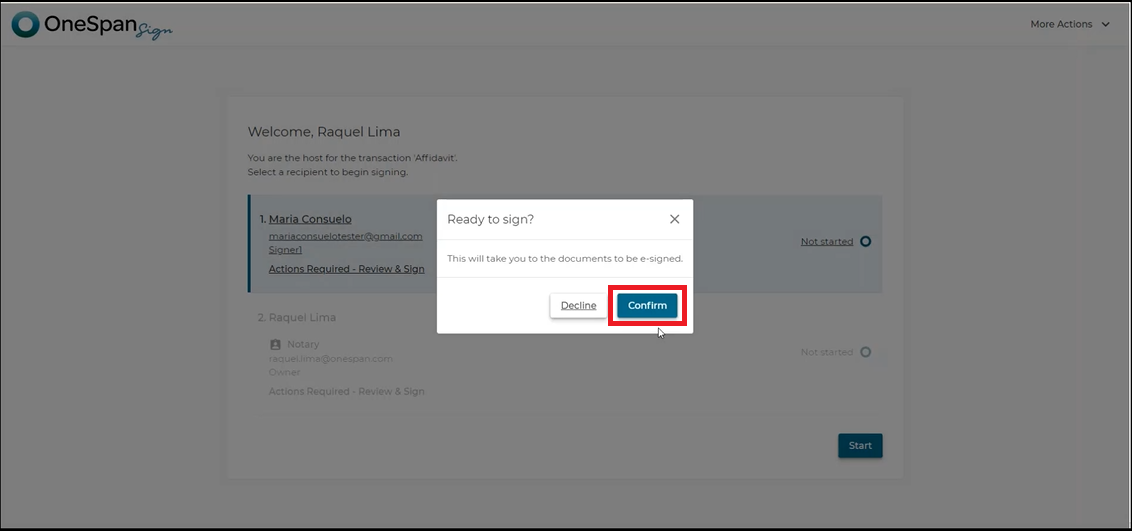
4. The Notary hands the tablet or laptop to the signer. The signer confirms that they are ready to e-sign the documents.
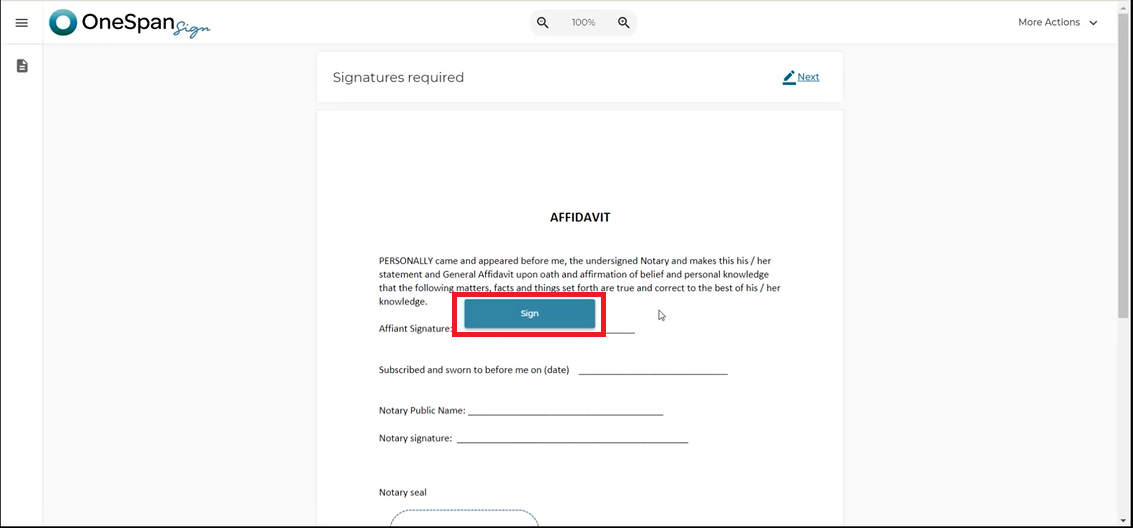
5. The signer reviews the document that needs to be e-signed and clicks sign.
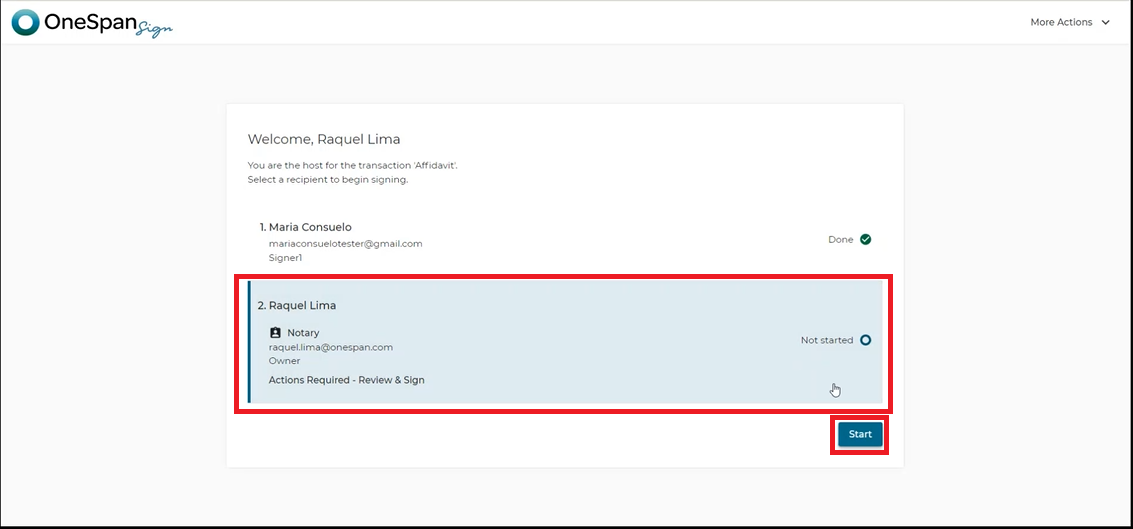
6. Once the signer has completed the signing process, they click ‘Confirm’ and then ‘Done’ to pass control back to the Notary to apply their signature and notary seal.

7. The Notary selects themselves and clicks ‘Start’ to proceed with signing and notarizing the document by applying their seal.
8. The Notary can then fill in additional information about the In-person Electronic Notarization session in the eJournal. This includes information such as:
- Signer street address, city, country, zip code and state
- Identification method
- Notary’s relationship to the signer
- Document type
- Notarial act
- Date of notarization
- And comments
The Notary clicks ‘Save’.
9. And that’s it! The In-person Electronic Notarization session has been successfully completed with OneSpan Notary!
Accessing Electronic Evidence
1. At the end of the session, the notarized affidavit, comprehensive audit trail, and eJournal are available to review and download. The Notary exits signing mode and clicks ‘Download’ to access these assets. The notarized document and audit trail will be contained in a zip file.
2. The notarized document shows the signer’s e-signature, the date the document was notarized, the notary’s name, signature, and the eNotary electronic seal.
3. The evidence summary contains the audit trail. This captures detailed actions taken throughout the e-signing and notarization process, including:
- Signing privileges passed between notary and signer
- IP address and geolocation details of participants
- E-Signing events and timestamps
- Notaries applying their eNotary electronic seal
- And other actions
4. The eJournal can only be accessed by the notary. At the end of each In-person Electronic Notarization session the eJournal will be available to the notary in the ‘Account Settings’ section. To access the eJournal the notary clicks ‘My Account’, then selects ‘Journal’ in the left-hand column. They can then download the eJournal for their selected IPEN session.
5. All the required information captured during the IPEN session is included in the eJournal. This includes transaction name, notarial act, document type, signer information, identification type, and the notary’s comments.
6. The notary can download and save the electronic evidence to their records at any time.